Viewing computer images
A. Connecting the projector to a computer
Preparation:
•Make sure that the power of the projector and that of the computer are turned off.
•When connecting the projector to a desktop computer, disconnect the RGB cables that are connected to the
monitor.
|
|
|
|
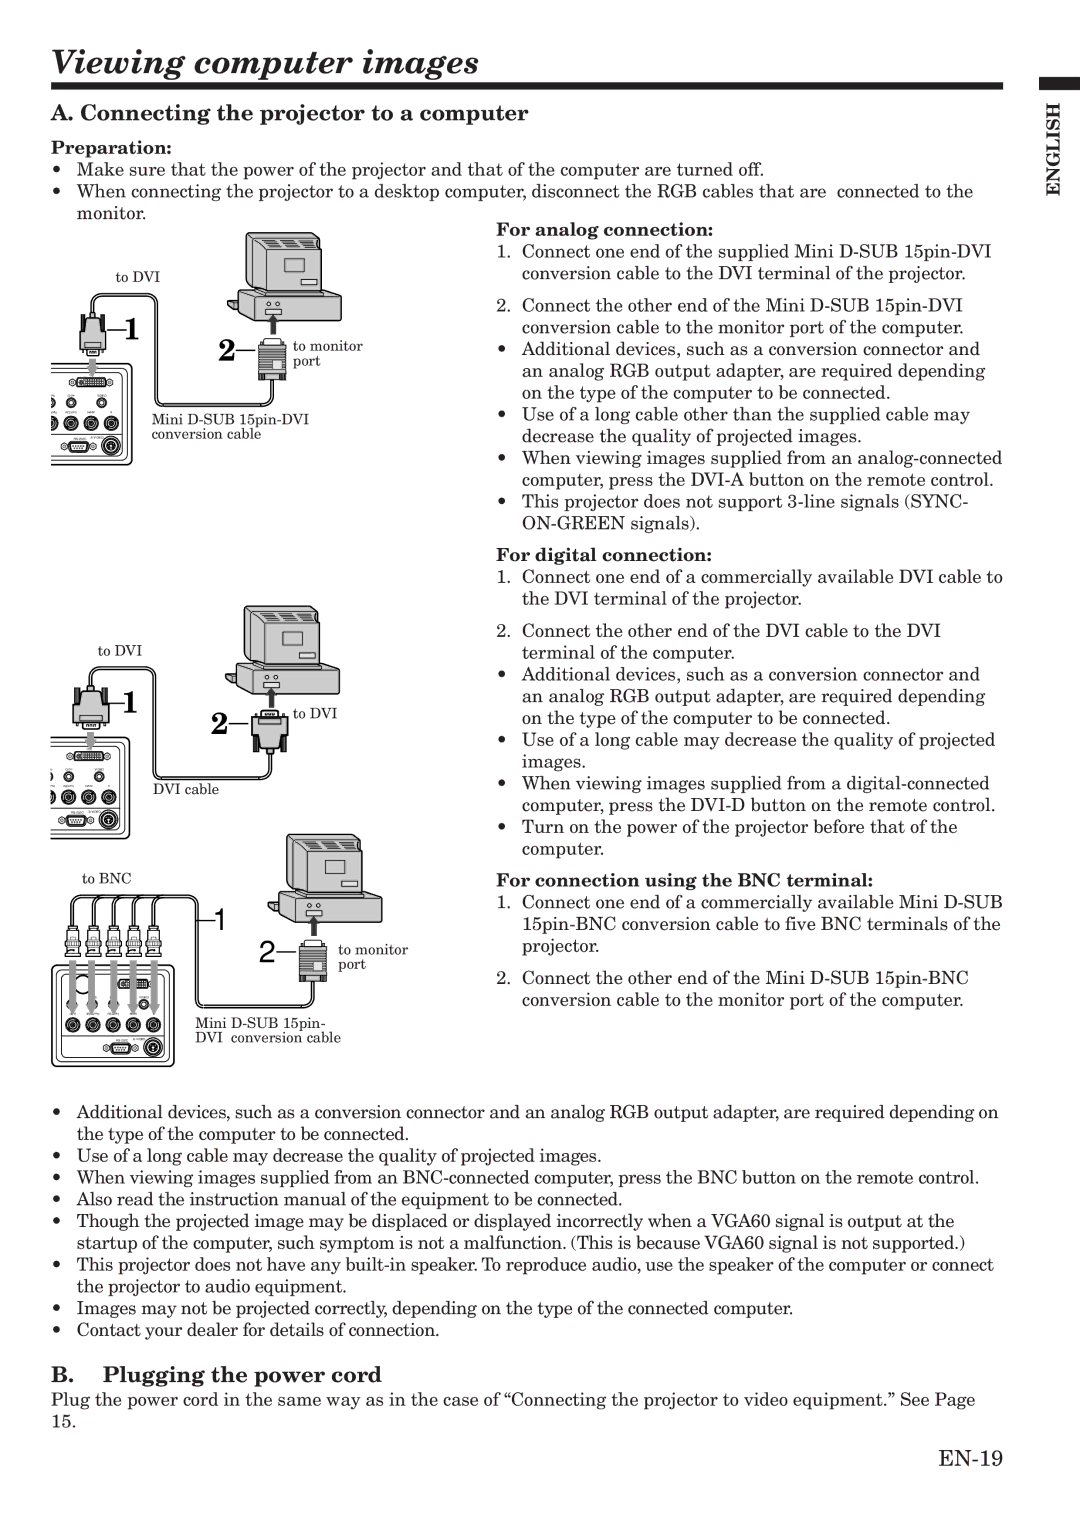
| For analog connection: | |
|
|
|
|
| 1. | Connect one end of the supplied Mini |
|
|
| to DVI |
|
| conversion cable to the DVI terminal of the projector. |
|
|
| 1 |
| 2. | Connect the other end of the Mini |
|
|
| to monitor |
| conversion cable to the monitor port of the computer. | |
|
|
| 2 | • | Additional devices, such as a conversion connector and | |
|
|
| port | |||
|
| DVI |
|
|
| an analog RGB output adapter, are required depending |
Pb | Cr/Pr | VIDEO |
|
|
| on the type of the computer to be connected. |
b/Pb) | R(Cr/Pr) | H/HV | Mini | • | Use of a long cable other than the supplied cable may | |
V |
|
|
| |||
| conversion cable |
|
| decrease the quality of projected images. | ||
•When viewing images supplied from an
•This projector does not support
For digital connection:
1.Connect one end of a commercially available DVI cable to the DVI terminal of the projector.
2.Connect the other end of the DVI cable to the DVI
|
| to DVI |
|
| terminal of the computer. | ||
|
|
| 1 |
| • | Additional devices, such as a conversion connector and | |
|
|
| 2 | to DVI | an analog RGB output adapter, are required depending | ||
|
|
| on the type of the computer to be connected. | ||||
|
|
|
|
|
| ||
|
|
|
|
| • | Use of a long cable may decrease the quality of projected | |
|
| DVI |
|
|
| ||
b | Cr/Pr | VIDEO |
|
|
| • | images. |
Pb) | R(Cr/Pr) | H/HV | V |
| DVI cable | When viewing images supplied from a | |
|
|
|
|
| computer, press the | ||
|
|
|
|
|
| • | Turn on the power of the projector before that of the |
|
|
|
|
|
|
| computer. |
| to BNC |
| For connection using the BNC terminal: | ||||
|
|
|
|
| 1 | 1. | Connect one end of a commercially available Mini |
|
|
|
|
|
| ||
|
|
|
|
| 2 | to monitor | projector. |
|
|
|
|
| port | Connect the other end of the Mini | |
|
|
|
|
|
| 2. | |
|
|
|
| VIDEO |
|
| conversion cable to the monitor port of the computer. |
| G(Y) | B(Cb/Pb) | R(Cr/Pr) | H/HVV |
|
| |
|
|
|
|
| Mini |
| |
|
|
| DVI conversion cable |
| |||
•Additional devices, such as a conversion connector and an analog RGB output adapter, are required depending on the type of the computer to be connected.
•Use of a long cable may decrease the quality of projected images.
•When viewing images supplied from an
•Also read the instruction manual of the equipment to be connected.
•Though the projected image may be displaced or displayed incorrectly when a VGA60 signal is output at the startup of the computer, such symptom is not a malfunction. (This is because VGA60 signal is not supported.)
•This projector does not have any
•Images may not be projected correctly, depending on the type of the connected computer.
•Contact your dealer for details of connection.
B.Plugging the power cord
Plug the power cord in the same way as in the case of “Connecting the projector to video equipment.” See Page 15.
ENGLISH