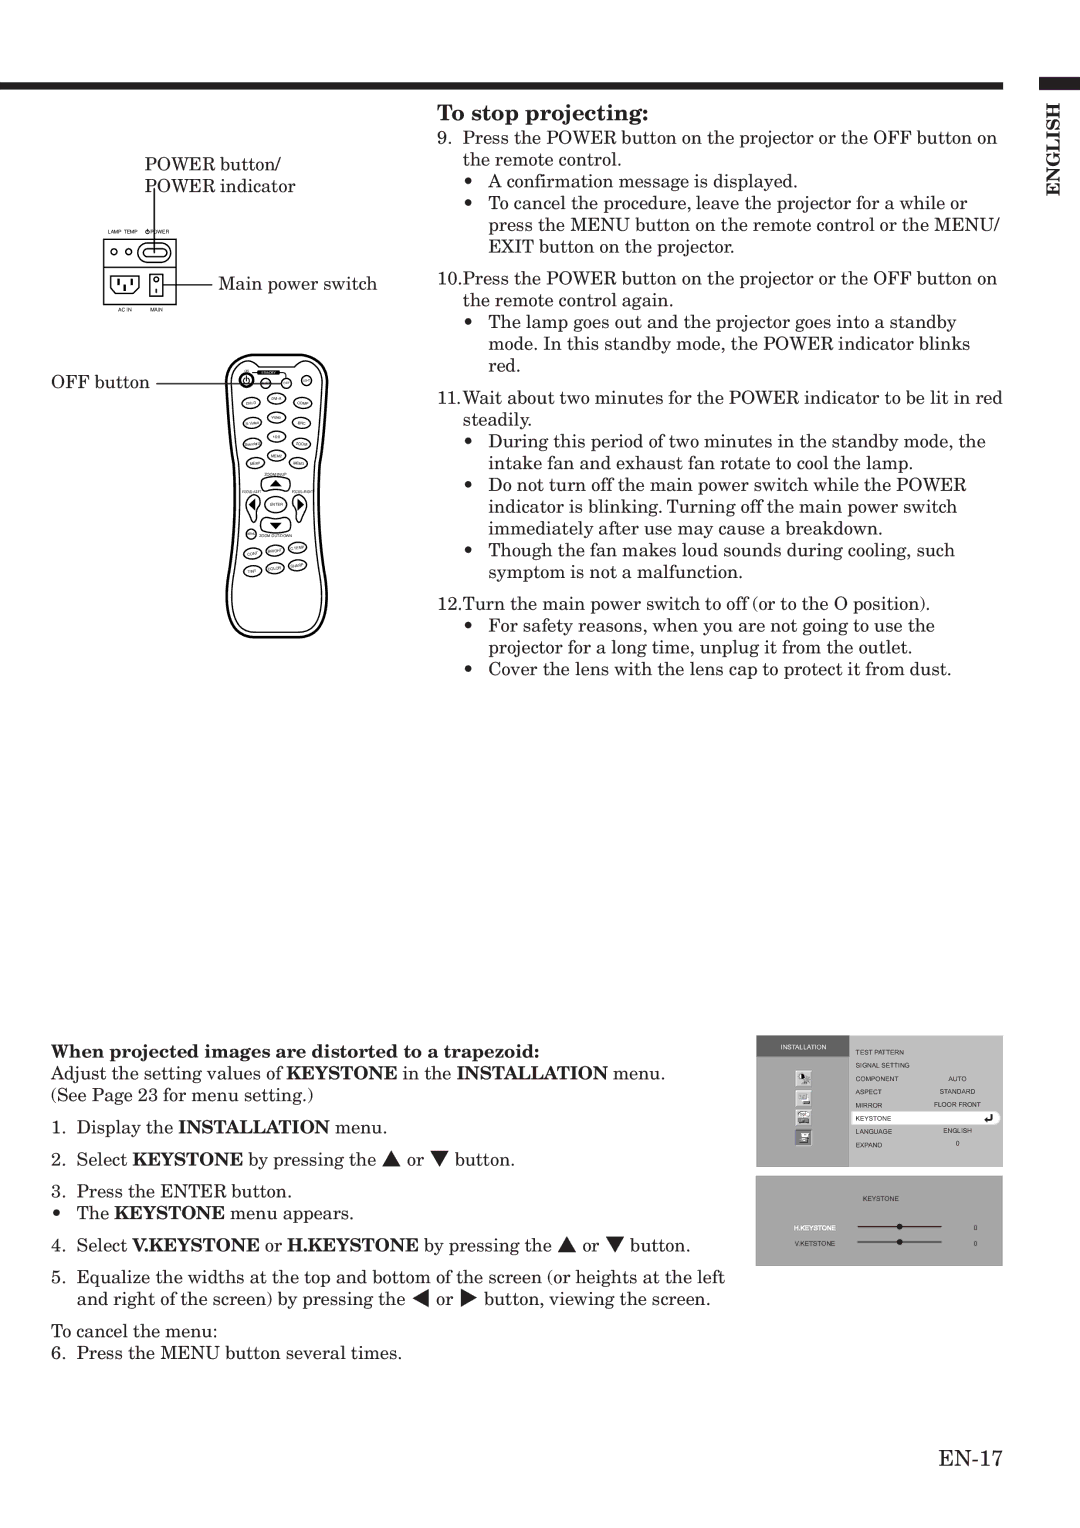
POWER button/
POWER indicator
LAMP TEMP ![]() POWER
POWER
Main power switch
AC IN | MAIN |
|
|
OFF button | ON | STANDBY |
|
|
| LIGHT | |
|
| AUTO | OFF |
|
|
| |
|
| COMP | |
|
| Video |
|
|
| BNC | |
|
| 16:9 |
|
| Standard |
| ZOOM |
|
| MEM2 |
|
| MEM1 |
| MEM3 |
|
| ZOOM IN/UP | |
|
| FOCUS+/RIGHT | |
|
| ENTER |
|
| MENU ZOOM OUT/DOWN | ||
|
| BRIGHT | C.TEMP |
| CONT |
| |
|
|
| |
|
| COLOR | SHARP |
| TINT |
| |
|
|
| |
To stop projecting:
9.Press the POWER button on the projector or the OFF button on the remote control.
•A confirmation message is displayed.
•To cancel the procedure, leave the projector for a while or press the MENU button on the remote control or the MENU/ EXIT button on the projector.
10.Press the POWER button on the projector or the OFF button on the remote control again.
•The lamp goes out and the projector goes into a standby mode. In this standby mode, the POWER indicator blinks red.
11.Wait about two minutes for the POWER indicator to be lit in red steadily.
•During this period of two minutes in the standby mode, the intake fan and exhaust fan rotate to cool the lamp.
•Do not turn off the main power switch while the POWER indicator is blinking. Turning off the main power switch immediately after use may cause a breakdown.
•Though the fan makes loud sounds during cooling, such symptom is not a malfunction.
12.Turn the main power switch to off (or to the O position).
•For safety reasons, when you are not going to use the projector for a long time, unplug it from the outlet.
•Cover the lens with the lens cap to protect it from dust.
ENGLISH
When projected images are distorted to a trapezoid:
Adjust the setting values of KEYSTONE in the INSTALLATION menu. (See Page 23 for menu setting.)
1.Display the INSTALLATION menu.
2.Select KEYSTONE by pressing the { or } button.
3.Press the ENTER button.
• The KEYSTONE menu appears.
4.Select V.KEYSTONE or H.KEYSTONE by pressing the { or } button.
5.Equalize the widths at the top and bottom of the screen (or heights at the left and right of the screen) by pressing the $ or % button, viewing the screen.
To cancel the menu:
6. Press the MENU button several times.
INSTALLATION
|
|
| TEST PATTERN |
|
| |
|
|
| SIGNAL SETTING |
|
| |
|
|
| COMPONENT |
| AUTO | |
|
|
| ASPECT | STANDARD | ||
|
|
| MIRROR | FLOOR FRONT | ||
|
|
| ||||
| opt. |
| KEYSTONE |
|
| |
|
|
| LANGUAGE |
| ENGLISH | |
|
|
|
| |||
|
|
| EXPAND | 0 | ||
|
|
|
|
|
|
|
|
|
|
|
|
|
|
|
|
|
| KEYSTONE |
|
|
H.KEYSTONE |
|
| 0 | |||
|
| |||||
V.KETSTONE |
|
| 0 | |||
|
| |||||
|
|
|
|
|
|
|