Asking for installation
To view images projected by the ceiling- mounted projector from the front:
When the projector is installed on the ceiling, the special ceiling mount bracket, which is separately sold, is required. Be sure to ask a certified installation specialist for installation of the projector. Contact your dealer for details.
•Mitsubishi assumes no responsibilities for any damage caused by use of other manufacturer’s ceiling bracket and by inadequate installation conditions even within the warranty period.
•When installing the projector on the ceiling, set MIRROR in the INSTALLATION menu to CEILING FRONT. See Page 25 for details.
•Ask your installation specialist to provide a breaker. When you do not use the projector, be sure to shut down the main power by the breaker.
•When the projector is installed on the ceiling, projected images may appear darker than those projected when the projector is installed on the floor. This symptom is not a malfunction.
•Do not install the projector where the exhaust vents are exposed to air emitted by an air conditioning. Such installation may cause a breakdown.
•Do not install the projector near a fire alarm because it emits hot air from its exhaust vents.
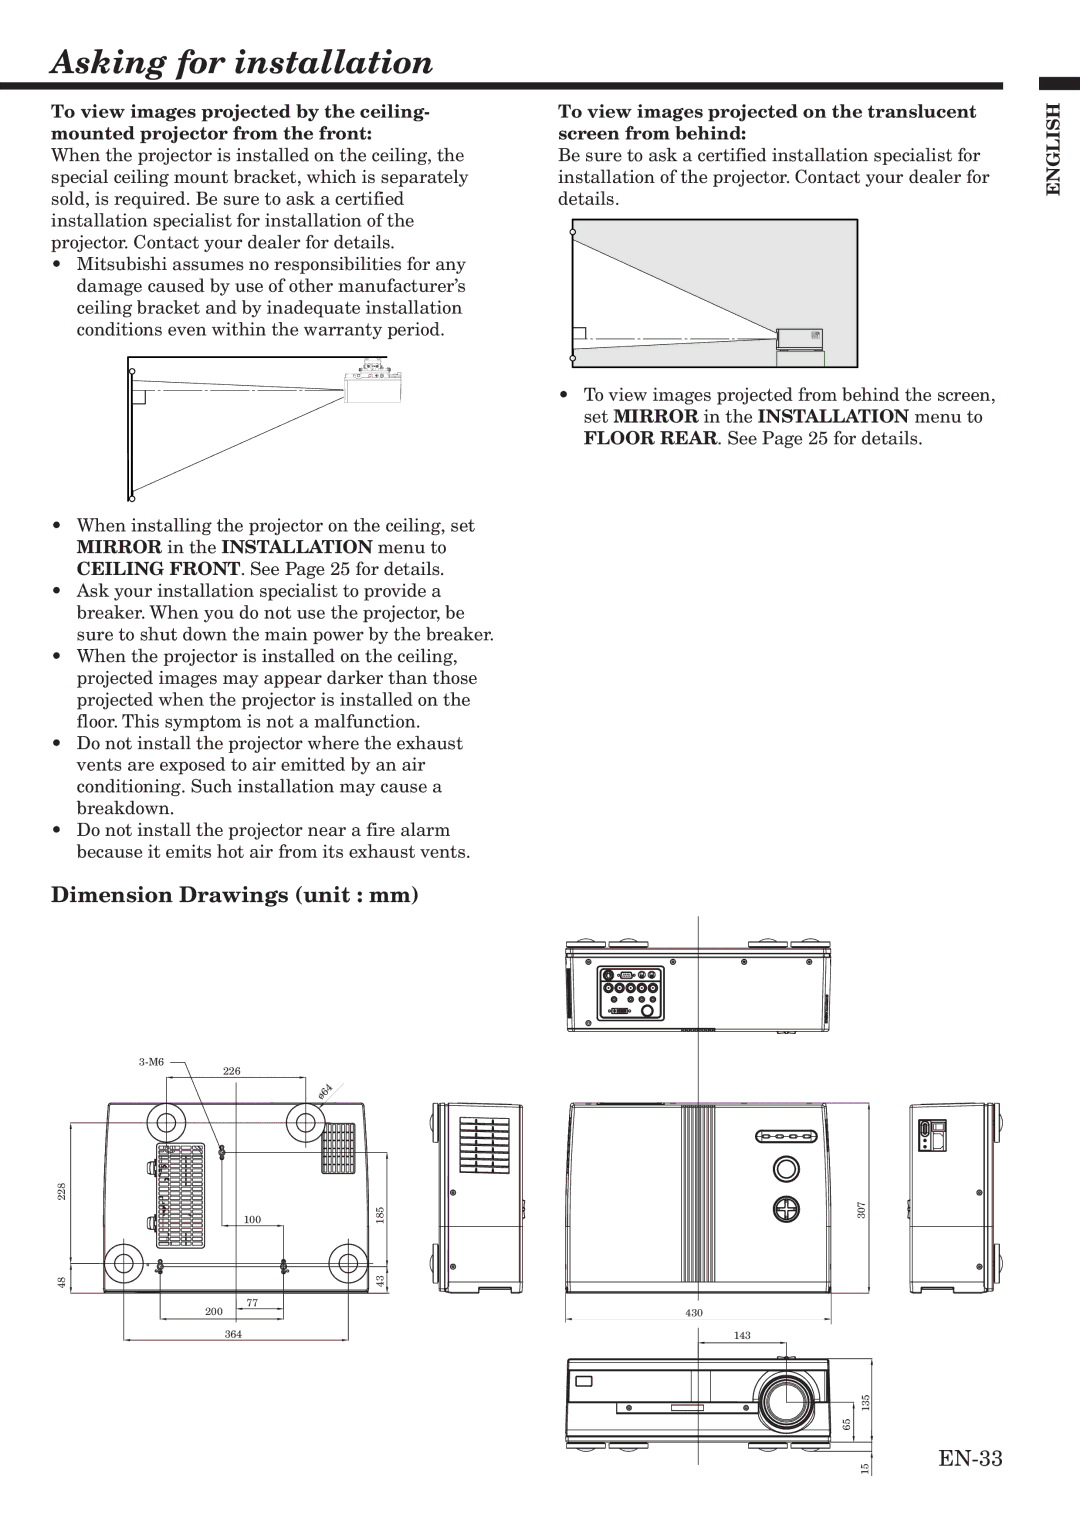
Dimension Drawings (unit : mm)
| |
226 |
|
228 |
|
100 | 185 |
48 | 43 |
77 |
|
200 |
|
364 |
|
To view images projected on the translucent | ENGLISH |
| |
screen from behind: |
|
Be sure to ask a certified installation specialist for |
|
installation of the projector. Contact your dealer for |
|
details. |
|
•To view images projected from behind the screen, set MIRROR in the INSTALLATION menu to FLOOR REAR. See Page 25 for details.
307
430
143
65 135
15