Replacing the lamp
Spare lamp for XD95U: VLT-XD95LP
•To reduce the risk of electrical shock, always turn the projector off and disconnect the power cord before changing the lamp.
•To reduce the risk of severe burns, allow the projector to cool for at least 45 minutes before replacing the lamp.
•To reduce the risk of injuries to fingers and damage to internal components, use caution when removing lamp glass that has shattered into sharp pieces.
•To reduce the risk of injuries to fingers and/or compromising image quality by touching the lens, do not touch the empty lamp compartment when the lamp is removed.
•This lamp contains mercury. Consult your local hazardous waste regulations to dispose of this lamp in a proper manner.
•To assure optimal performance from the projector, it is recommended that you purchase a Mitsubishi projector lamp for lamp replacement.
1.Turn the power off and disconnect the projector from the wall
socket. If the lamp is hot, avoid burns by waiting for approximately 45 minutes until the lamp has cooled.
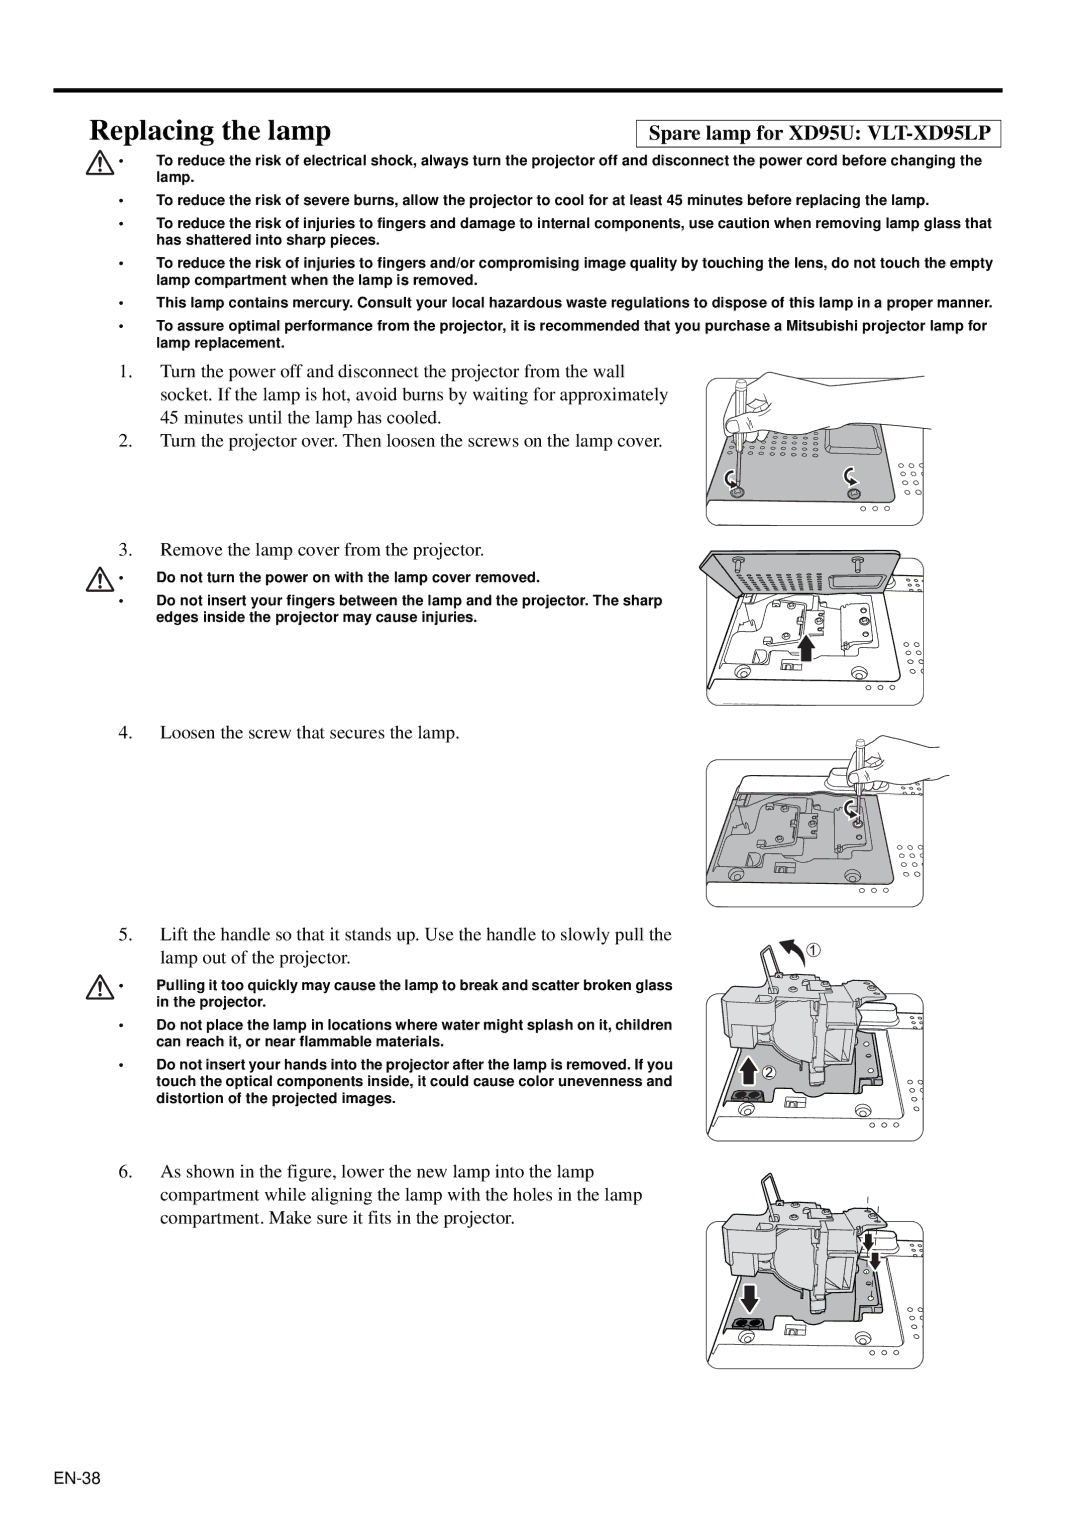
2. Turn the projector over. Then loosen the screws on the lamp cover.
3.Remove the lamp cover from the projector.
• Do not turn the power on with the lamp cover removed.
• Do not insert your fingers between the lamp and the projector. The sharp edges inside the projector may cause injuries.
4.Loosen the screw that secures the lamp.
5.Lift the handle so that it stands up. Use the handle to slowly pull the
lamp out of the projector.
• Pulling it too quickly may cause the lamp to break and scatter broken glass in the projector.
• Do not place the lamp in locations where water might splash on it, children can reach it, or near flammable materials.
• Do not insert your hands into the projector after the lamp is removed. If you touch the optical components inside, it could cause color unevenness and distortion of the projected images.
6.As shown in the figure, lower the new lamp into the lamp
compartment while aligning the lamp with the holes in the lamp compartment. Make sure it fits in the projector.