DESKTOP CHARGER
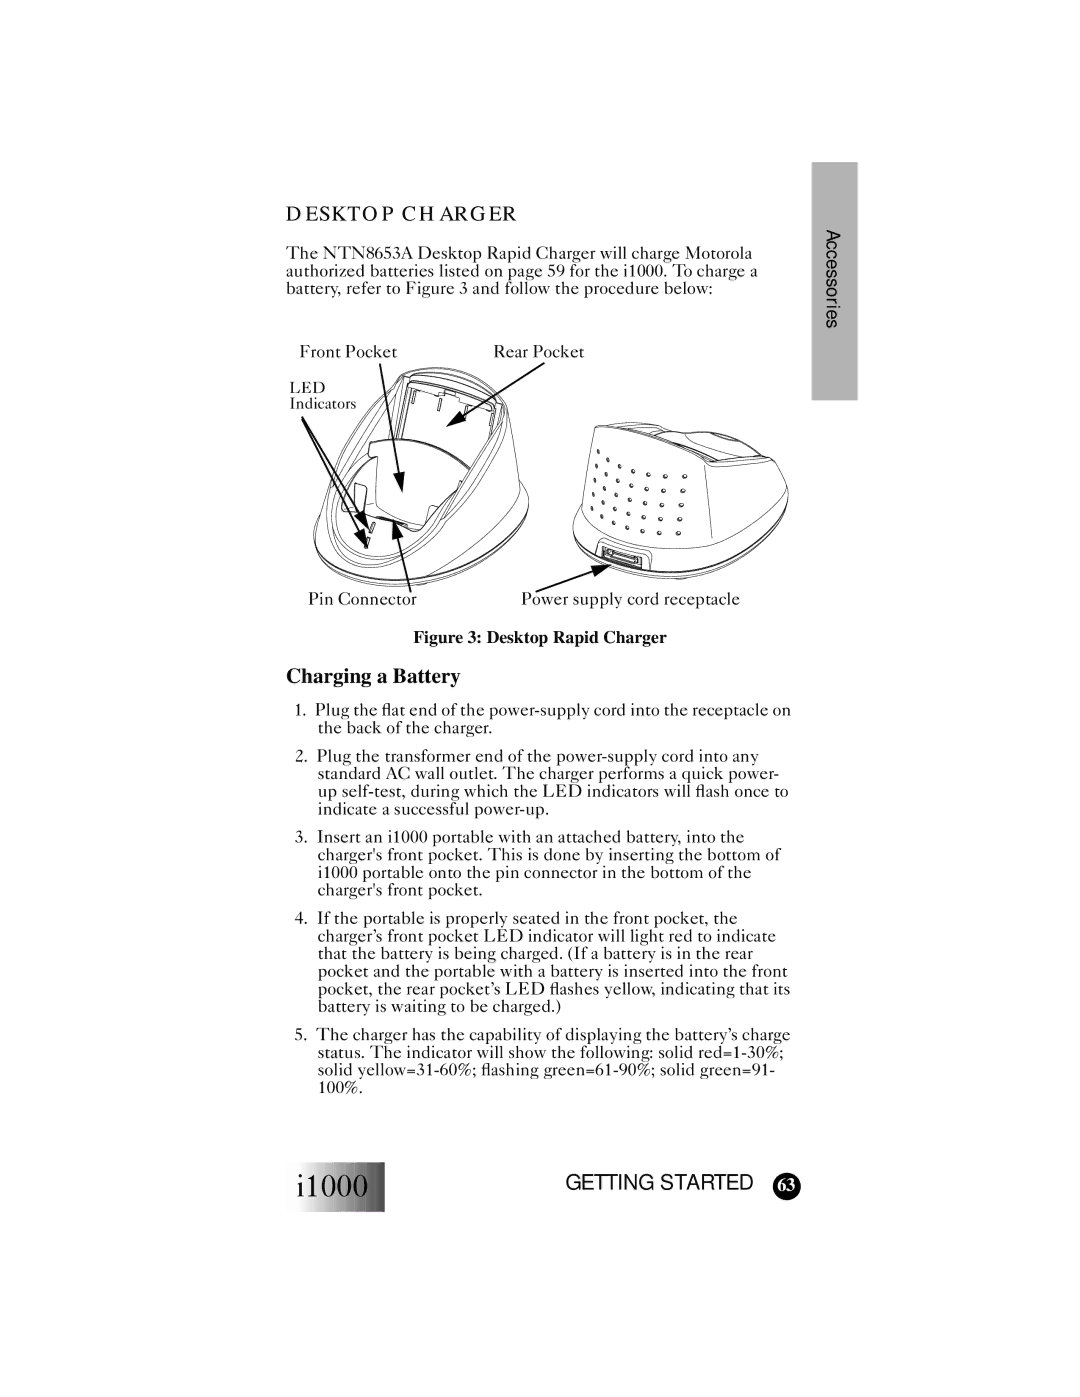
The NTN8653A Desktop Rapid Charger will charge Motorola authorized batteries listed on page 59 for the i1000. To charge a battery, refer to Figure 3 and follow the procedure below:
Front Pocket | Rear Pocket |
LED
Indicators
Accessories
Pin Connector | Power supply cord receptacle |
Figure 3: Desktop Rapid Charger
Charging a Battery
1.Plug the flat end of the
2.Plug the transformer end of the
3.Insert an i1000 portable with an attached battery, into the charger's front pocket. This is done by inserting the bottom of i1000 portable onto the pin connector in the bottom of the charger's front pocket.
4.If the portable is properly seated in the front pocket, the charger’s front pocket LED indicator will light red to indicate that the battery is being charged. (If a battery is in the rear pocket and the portable with a battery is inserted into the front pocket, the rear pocket’s LED flashes yellow, indicating that its battery is waiting to be charged.)
5.The charger has the capability of displaying the battery’s charge status. The indicator will show the following: solid
 i1000
i1000


GETTING STARTED 63