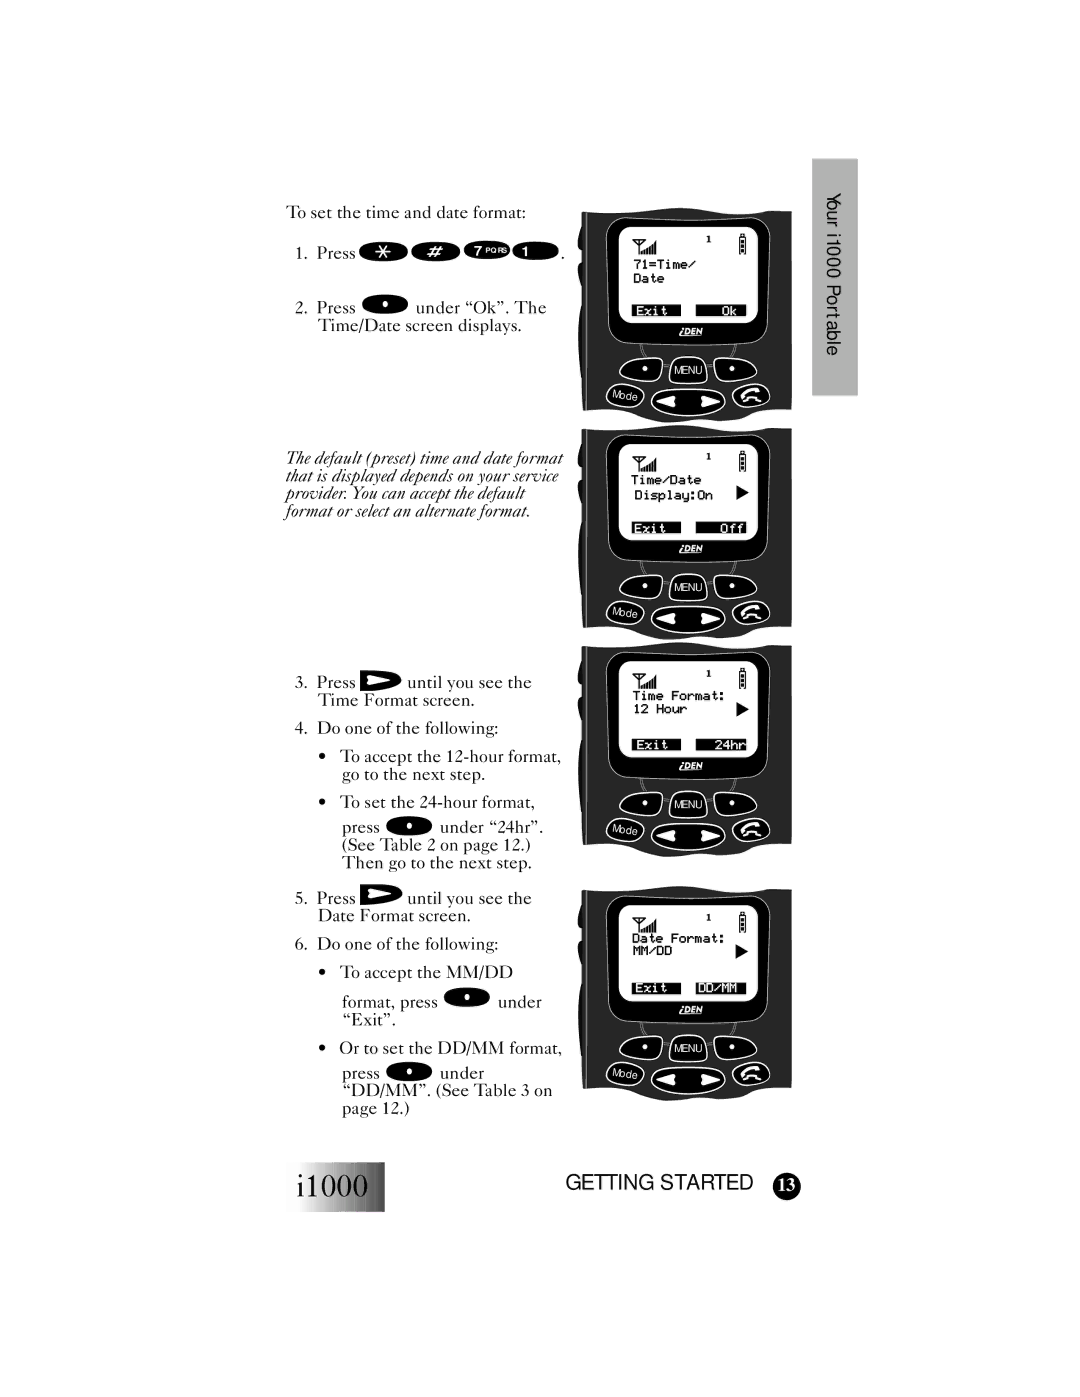
To set the time and date format:
1. Press | 7 PQRS 1 | . |
2.Press  under “Ok”. The Time/Date screen displays.
The default (preset) time and date format that is displayed depends on your service provider. You can accept the default format or select an alternate format.
3.Press ![]() until you see the Time Format screen.
until you see the Time Format screen.
4.Do one of the following:
•To accept the
•To set the
press ![]() under “24hr”. (See Table 2 on page 12.) Then go to the next step.
under “24hr”. (See Table 2 on page 12.) Then go to the next step.
5.Press ![]() until you see the Date Format screen.
until you see the Date Format screen.
6.Do one of the following:
•To accept the MM/DD
format, press ![]() under “Exit”.
under “Exit”.
• Or to set the DD/MM format,
press ![]() under “DD/MM”. (See Table 3 on page 12.)
under “DD/MM”. (See Table 3 on page 12.)
71=Time/ Date
Exit | Ok |
![]()
![]()
![]() MENU
MENU ![]()
![]()
![]()
![]()
Mode ![]()
![]()
![]()
![]()
![]()
Time/Date | ▲ |
Display:On |
Exit | Off |
![]()
![]()
![]() MENU
MENU ![]()
![]()
![]()
![]()
Mode ![]()
![]()
![]()
![]()
![]()
Time Format: | ▲ | |
12 Hour | ||
|
Exit | 24hr |
![]()
![]()
![]()
![]() MENU
MENU ![]()
![]()
![]()
![]()
Mode ![]()
![]()
![]()
![]()
![]()
Date Format: | ▲ | |
MM/DD | ||
|
Exit | DD/MM |
![]()
![]()
![]()
![]() MENU
MENU ![]()
![]()
![]()
![]()
Mode ![]()
![]()
![]()
![]()
![]()
Your i1000 Portable
i1000 | GETTING STARTED 13 |