5.0Hardware Installation and Wiring
5.1Mounting the Centurion Controller
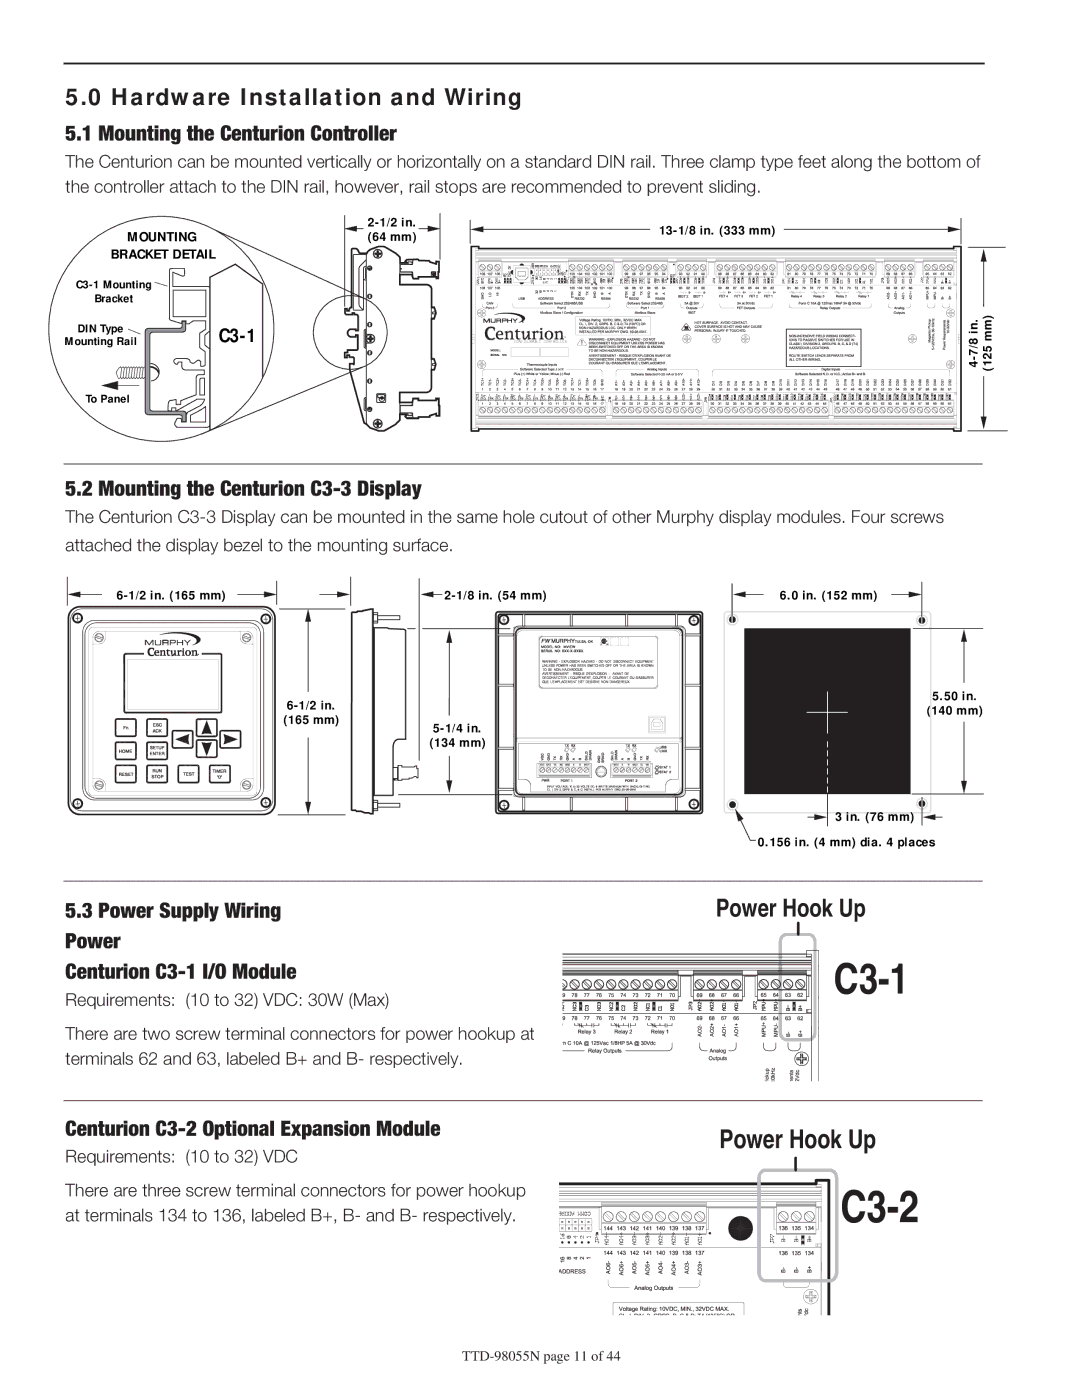
The Centurion can be mounted vertically or horizontally on a standard DIN rail. Three clamp type feet along the bottom of the controller attach to the DIN rail, however, rail stops are recommended to prevent sliding.
MOUNTING
BRACKET DETAIL
Bracket
DIN Type | |
Mounting Rail |
To Panel
(64 mm)
(125 mm) |
5.2 Mounting the Centurion C3-3 Display
The Centurion
(165 mm)
![]()
(134 mm)
6.0 in. (152 mm)
5.50 in.
(140 mm)
![]()
![]() 3 in. (76 mm)
3 in. (76 mm) ![]()
![]() 0.156 in. (4 mm) dia. 4 places
0.156 in. (4 mm) dia. 4 places
5.3Power Supply Wiring Power
Centurion C3-1 I/O Module
Requirements: (10 to 32) VDC: 30W (Max)
Power Hook Up
C3-1
There are two screw terminal connectors for power hookup at terminals 62 and 63, labeled B+ and B- respectively.
Centurion C3-2 Optional Expansion Module
Requirements: (10 to 32) VDC
There are three screw terminal connectors for power hookup at terminals 134 to 136, labeled B+, B- and B- respectively.
Power Hook Up

