75 75QD
Introduction
Supplied accessories
Using your camera correctly
Take trial shots
Have Nikon spot-check your camera regularly
Contents
63-70
77-88
~.~ 89-101
Nomenclature
N75QD only Data imprint LCD/buttons
FilIDlj Select Adjust
LCD PanelNiewfinder Display
IeS
LCD illuminator button
12mm-dia. reference circle z
Vari-Brite focus area and warning indications
Available Exposure Modes
User-controlled exposure mode
Use this mode to freeze the motion of fast- moving subjects
Point-and -shoot exposure mode
Start Shooting Immediately
~fl
Page
Lightly press the shutter release button
About Shutter Release Button
Preparation
Check points
Install Batteries and Check Battery Power
~~ON. . I IB , -- ---F===u~~~u
Check the lens type
Mount Lens
Type Nikkor lens
Type Nikkor lens CPU Nikkor lens other
Detach the lens
Pull film leader across to red index mark
Load Film
OX-coded film
~E3 n3@ @
Set the time in Day/ Hour/ Minute display
Quartz Date power source
Is sec Ion are as f 0 IIows
ThO
Set the AF Area mode selector to
Set Focus Mode and AF Area Mode
For example, building windows
Situations where autofocus may not work as expected
Segment sensor to achieve superior metering
Set Exposure Mode to A8
You use a G- or D-type Nikkor lens 3D Matrix
Metering is performed-and makes the calculations
Symbol Exposure mode
About exposure mode
Hold the camera properly
Hold Camera and EOcus------I
Built-in Speedlight
Release Shutter
Is displayed during film rewind
FS.6
Metering Systems
Basic Operation
Shooting with Vari-Program
1iIiI Landscape mode
~x.. Portrait mode
~ Sports mode
~ Close- Up mode
~ Night Portrait mode
Built-in Speedlight and Multi-Sensor Balanced Fill-Flash
Using Built-In Speedlight
90 FS.b
Camera.....shake
Page
Imprinting Date/Time N7SQD only
~Y~=oo, »~,~~l
Focus Operation
Focus Mode
Auto-Servo AF
About Lock-OnTM
Manual focus
Manual focus using Electronic Rangefinder
Rotate AF Area mode selector to select AF Area mode
Focus Area Mode
When focus mode is set to Manual
When focus mode is set to Autofocus
Focus Area Selection
Focus Area selector is locked and focus area
Than Ec3 is selected
Check points
AF-Assist Illuminator
~ e AF-Assist Illuminator can be canceled
AF VR BO- 400mm f/4.5-5.6 ED
Focus Lock
Exposure Mode
Auto-Multi Program
Set the exposure mode dial to P
Auto-Multi Program
Auto-Multi Program is best suited. for snapshots
Difference between 8AUTO mode and P Auto-Multi Program
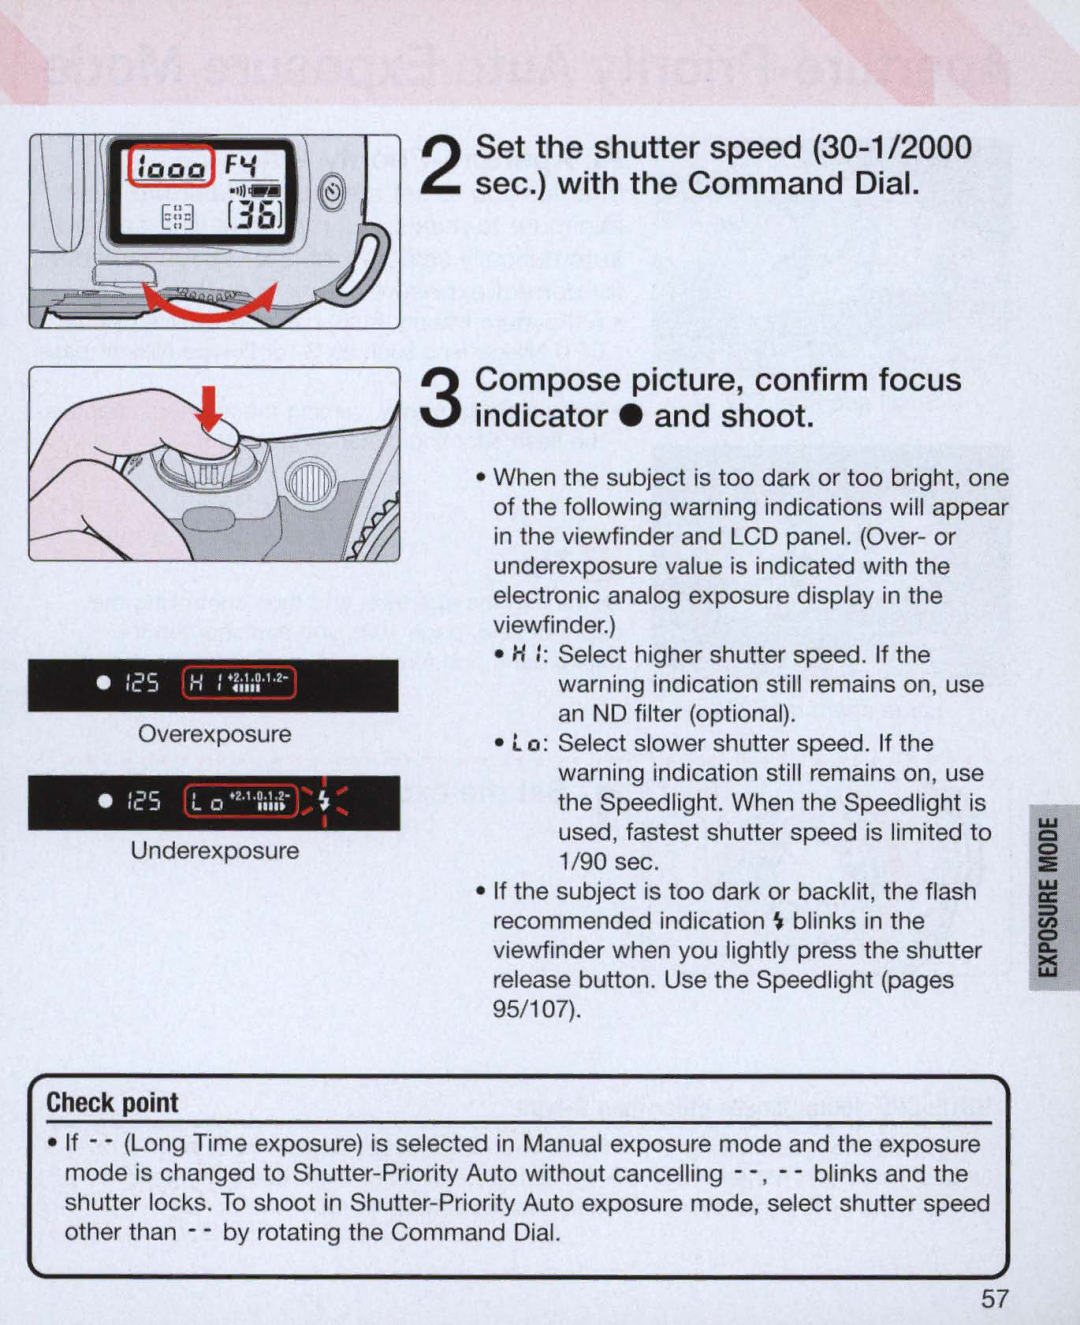
Compose picture, confirm focus indicator. and shoot
By rotating Command Dial in Auto-Multi
Flexible Program
Shutter-Priority Auto
Set the exposure mode dial to S
Check point
Overexposure
Underexposure
Set the exposure mode dial to a
Aperture-Priority Auto
Flash shooting distance
95/107
Set the exposure mode dial to M
Manual Exposure Mode
Center-Weighted Metering
Time can be set in Manual exposure mode
Compose picture, focus and shoot
Long Time Time exposure of more than 30 sec
Long Time Exposure
Advanced Operation
Electronic analog exposure Display
Exposure Compensation
No compensation
+0.5 EV compensation
Compose picture, confirm focus indicator. and shoot
Auto Exposure Bracketing
Cancel
Display changes as follows
No display
IlIE
Bracketing order
Auto Exposure Bracketing
Ll5
Multiple Exposure
Number of exposures Compensation value
Standard compensation value in multiple exposure
Custom
Menus 1to 12 are available
Menu/Features of Custom Setting
Cancelling Custom Setting
Beep sound pages 28, 41
Menu number and Custom Setting options
Bracketing order
Focus area illumination
Options 3 3 sec Sec. initial setting ID 10 sec CD 20 sec
Time delay for auto meter-switch-oft
AE-L button pages 52/80
Metering system in the Auto Exposure lock
Standby duration for the remote control operation
Self-timer duration
LCDilluminates by pressing any function button
AF-Assist Illuminator activation
Other Functions
Film Rewind
Rewind
Mid- roll rewind
Set the film advance mode selector to
Film Advance Mode
Single-frame shooting
~ Continuous shooting
Auto Exposure Lock
Page
Diopter AdjustmentNiewfinder Accessories
Depth-of-Field Preview
Press the @ remote control button a
Remote Control Operation optional
Focusing in remote control operation
Long Time Time exposure with remote control
Remote Control Operation optional
~s ~s
Or..D.-type....lens...is.attached
Available Mode Combinations
Flash
Multi-Sensor Balanced Fill-Flash
Built-In SpeedlightlReady-Light
With Monitor Pre-Flash2
Non-CPU Nikkor lens Standard TIL
Brightness and contrast. Furthermore, it integrates
Ready-light
§j/1 Slow Sync
Flash Sync Mode Features
BJ Rear-Curtain Sync
~ Flash Cancel
Red- Eye Reduction
Red- Eye Reduction with Slow Sync
Flash Sync Mode FeatureS
Except ~ or ~
P, S, a or M exposure mode
8 or Vari-Program except 1iiiiiI. ~ or ~
P or a exposure mode
~ FS.6
Available shutter speed and aperture in each exposure mode
24/79 34
100
Available flash sync mode combinations
Usable lenses with built-in Speedlight
101
Depth of field
Miscellaneous
104
Lens Compatibility
Type Nikkor and other CPU Nikkor lens
IeS
When a non-CPU lens is attached
Manual
Usable Optional Speedlights
Withm
Speedlight
Usable Optional Speedlights
109
100 200 400 800 Maximum
111
Battery Pack MB
Optional Accessories
Remote Control Unit ML- L3
Eyepiece correction lenses
Speedlight S8-80DXlS8-50DXlS8-30
Filters
Soft case CF-63
Neckstraps/Handstrap AH-4
Camera Care
Remove the batteries and store the camera with a desiccant
Do not leave
Call a doctor immediately
Troubleshooting
Blinks
Installed
Advanced
Autofocus is not
Or M mode
Mode in flash
Cancel the - by selecting 57, 62 30 sec. or faster shutter
Beyond cameras
Output
Have occu rred
Shoot again after
Glossary
Flash-to-subject distance
Guide number
Guide number Flash-to-subject distance =-= Flstop
122
123
With limitations see chart on
Specifications
125
126
127
Exposures
128
Dynamic AF Mode with Closest-Subject
Dynamic AF Mode with Center-Subject
Index
Automatic Balanced Fill -Flash with TIL
38 -91
69-70
84-87
40-41
Custom Setting Menu
Function
Options
Nikon

