A-8 / ENGLISH
DETERGENT (AXP/EDS) SYSTEM PREPARATION AND USE
COMMON INSTRUCTIONS:
The system should be purged of previous detergent when switching to a different detergent. SERVICE NOTE: Move machine over floor drain before purging because a small amount of detergent will be dispensed in the process.
To Purge When Changing Chemicals:
1Disconnect and remove the detergent cartridge.
2Turn the Key Switch (J) ON. Press and hold the Purge Switch (T) down for at least 3 seconds, then press and hold the Solution Switch (R) (on the main machine’s control panel) for the duration of the purge cycle. Holding the solution switch is necessary to open the solution valve and prevent the purged detergent from flowing back into the solution tank. NOTE: Once activated the Purge Indicator (U) will begin to scroll a flashing light from left to right and will automatically shut off after 10 seconds. Normally one purge cycle is adequate to purge the system.
To Purge Weekly:
1Disconnect and remove the detergent cartridge. Install and connect a Cartridge filled with clean water.
2Turn the Key Switch (J) ON. Press and hold the Purge Switch (T) down for at least 3 seconds, then press and hold the Solution Switch (R) (on the main machine’s control panel) for the duration of the purge cycle. Holding the solution switch is necessary to open the solution valve and prevent the purged detergent from flowing back into the solution tank. NOTE: Once activated the Purge Indicator (U) will begin to scroll a flashing light from left to right and will automatically shut off after 10 seconds. Normally one purge cycle is adequate to purge the system.
The Detergent Box (AA) has a Detergent Level Viewing Slot (BB) for keeping track of how much detergent is remaining in the cartridge. When the detergent level is nearing the bottom of this slot it is time to refill or replace the cartridge.
General Use:
The detergent injection system is activated when the Key Switch (J) is turned on but no detergent is dispensed until the scrub system is activated and the Drive Pedal (8) pushed forward. The solution flow rate is determined by the use of “Maintenance” or “Restoration” mode. The solution flow rate can be changed by pressing the Maintenance Extract Mode Switch (D) for reduced flow or the Restoration Extract Mode Switch (F) for increased flow. The detergent flow rate increases or decreases with the solution flow rate but the detergent ratio remains the same. During scrubbing, the detergent system can be turned off at any time by pressing the Detergent ON/OFF Switch (S) to allow scrubbing with water only. SERVICE NOTE: Follow the “To Purge Weekly” instructions above if the machine is going to be stored for an extended period of time or if you plan to discontinue use of the detergent injection system.
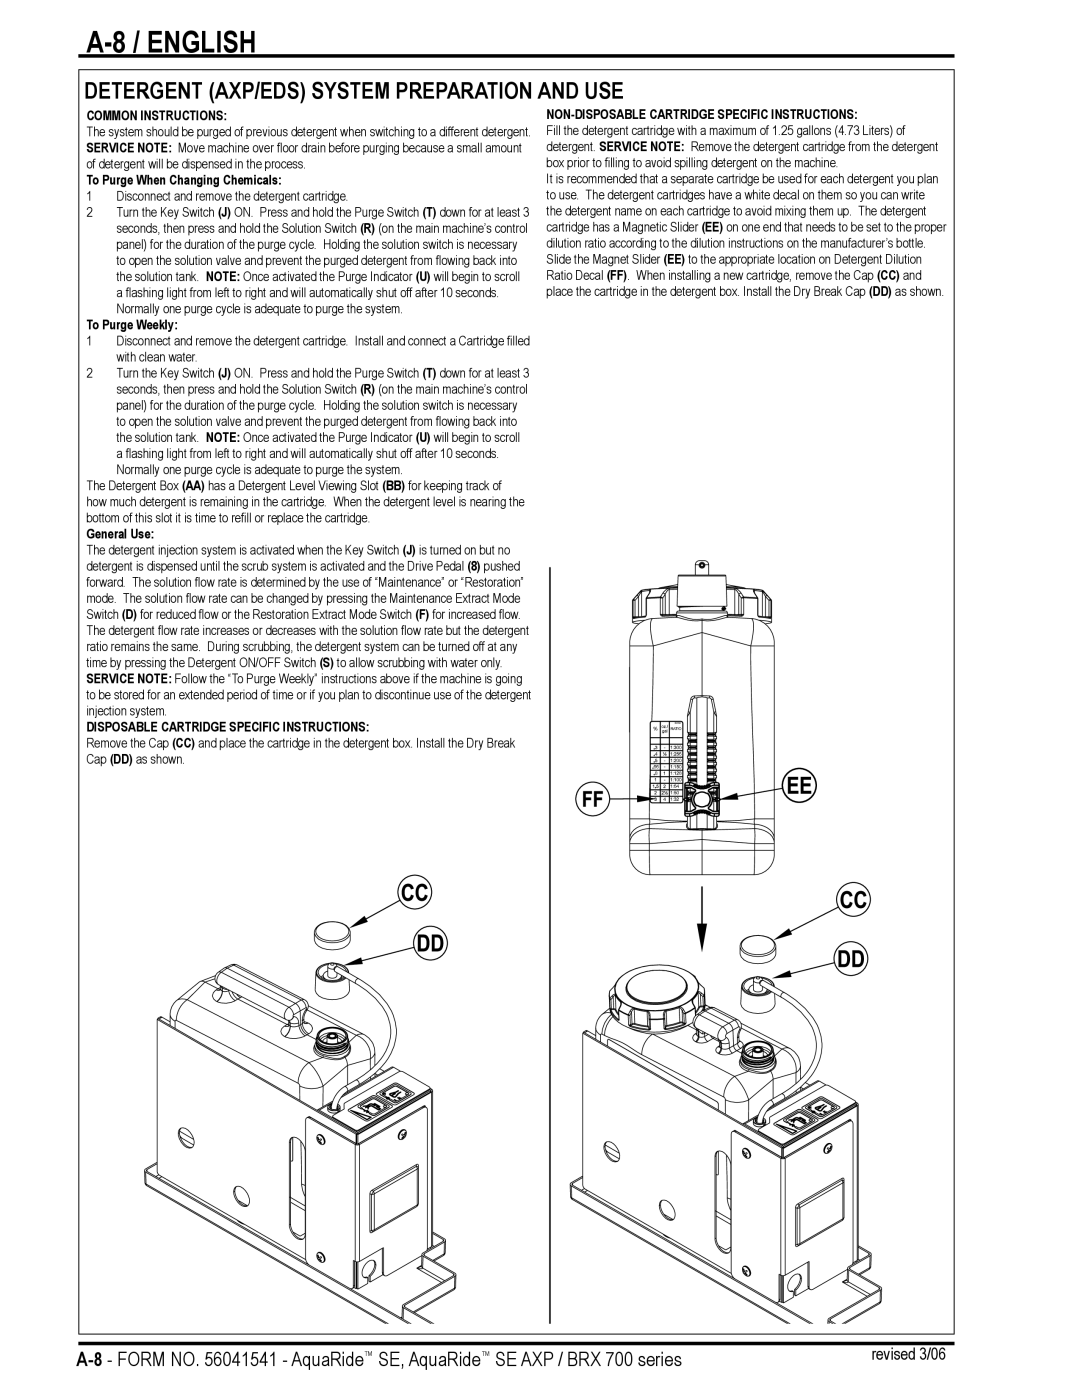
DISPOSABLE CARTRIDGE SPECIFIC INSTRUCTIONS:
Remove the Cap (CC) and place the cartridge in the detergent box. Install the Dry Break Cap (DD) as shown.
NON-DISPOSABLE CARTRIDGE SPECIFIC INSTRUCTIONS:
Fill the detergent cartridge with a maximum of 1.25 gallons (4.73 Liters) of detergent. SERVICE NOTE: Remove the detergent cartridge from the detergent box prior to filling to avoid spilling detergent on the machine.
It is recommended that a separate cartridge be used for each detergent you plan to use. The detergent cartridges have a white decal on them so you can write the detergent name on each cartridge to avoid mixing them up. The detergent cartridge has a Magnetic Slider (EE) on one end that needs to be set to the proper dilution ratio according to the dilution instructions on the manufacturer’s bottle. Slide the Magnet Slider (EE) to the appropriate location on Detergent Dilution Ratio Decal (FF). When installing a new cartridge, remove the Cap (CC) and place the cartridge in the detergent box. Install the Dry Break Cap (DD) as shown.
revised 3/06 |