INSTALLATION (Continued)
CONNECTING OPTIONAL ACCESSORIES
1.Refer to Figure 22. To connect an external audio source (NuTone Model
2.Connect an RCA™ phono type plug to the shielded audio cable coming from the external audio source. Follow the phono plug manufacturer’s instructions when connecting to the cable.
3.Insert the phono plug into the appropriate input jack
(TAPE or AUX) on the master station’s main circuit board. NOTE: The TAPE and AUX inputs have input audio level controls to allow matching of the external audio source with the radio and CD audio of the master.
4.To use the selected source audio for recording onto a cassette recorder, insert the recorder’s plug into the master station’s LINE OUT jack.
5.Optional connection to provide program audio only:
•The CD, radio or optional audio sources can be channeled through an auxiliary amplifier (purchase a NuTone Model
•NOTE: If an auxiliary amplifier is used, connect the master station’s LINE OUT jacks to the auxiliary amplifier’s
•NOTE: When using the LINE OUT for recording program audio or distributing program audio only through an external amplifier, the automatic CD PAUSE should be disabled or the audio present on the LINE OUT jack will stop when the intercom or chime is used. To disable the CD PAUSE, refer to the homeowner’s manual.
CONNECTING POWER TO THE OPTIONAL CP-95 CASSETTE PLAYER
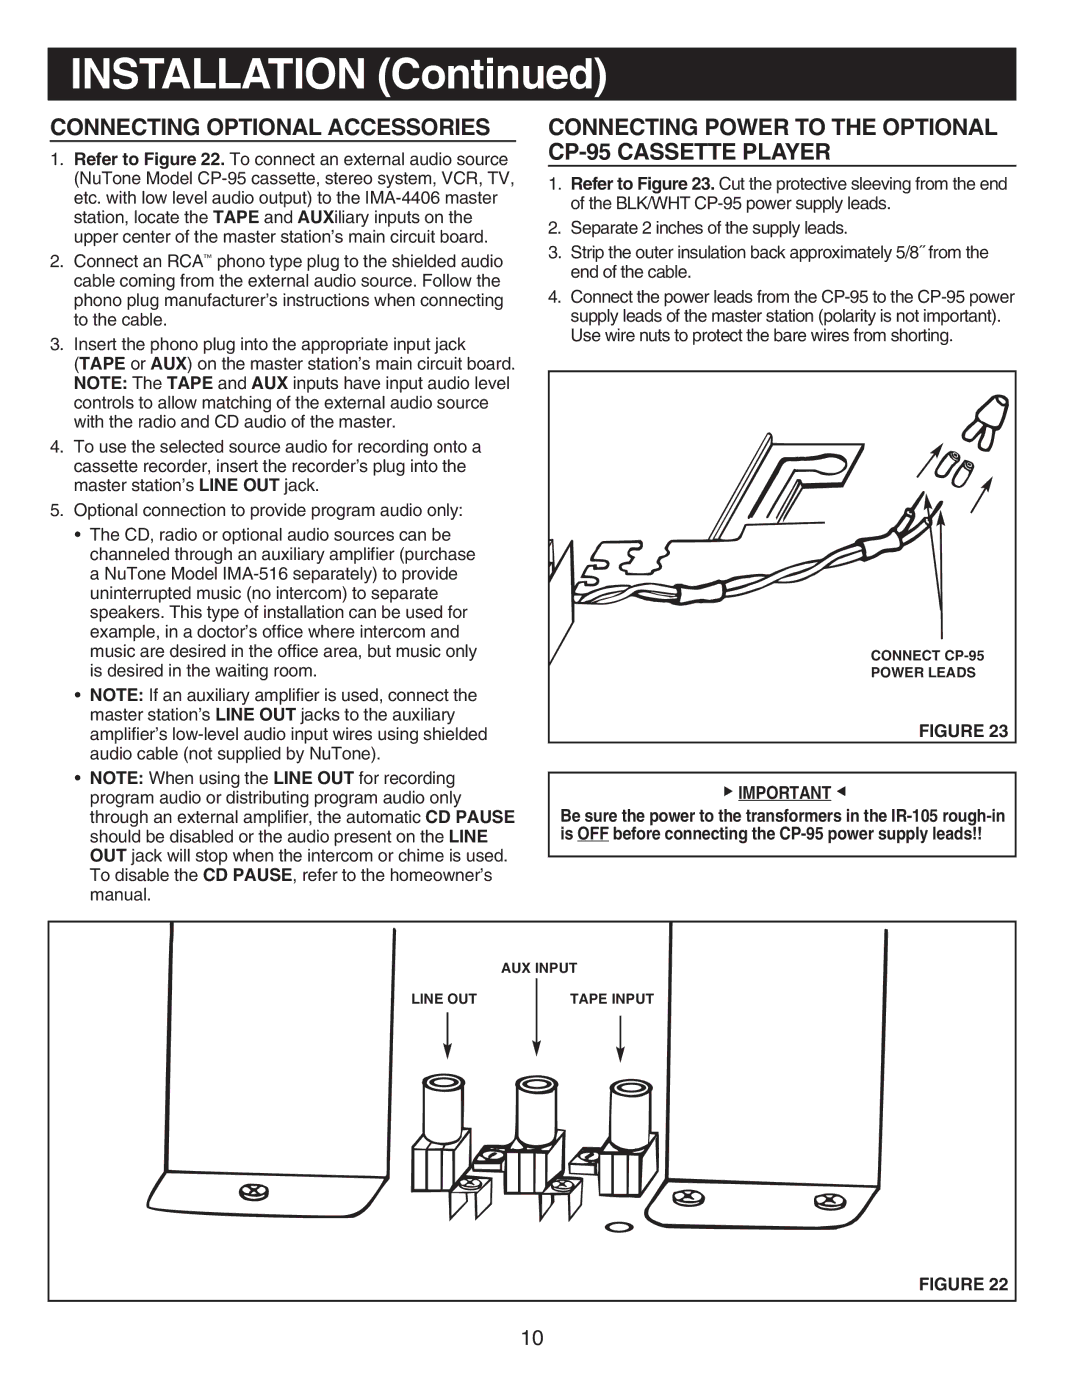
1.Refer to Figure 23. Cut the protective sleeving from the end of the BLK/WHT
2.Separate 2 inches of the supply leads.
3.Strip the outer insulation back approximately 5/8˝ from the end of the cable.
4.Connect the power leads from the
CONNECT
POWER LEADS
FIGURE 23
IMPORTANT | |
▲ | ▲ |
Be sure the power to the transformers in the
AUX INPUT
LINE OUT
TAPE INPUT
FIGURE 22
10