Formatting the Recorder (FORMAT)
If you format the recorder, all function settings will return to their defaults*. All files stored in the recorder will be deleted.
If you have important files that you want to save, connect the recorder to a computer and transfer those files from the recorder to the computer before formatting the device.
* Date and time settings will not be cleared, so you won’t need to set them again.
Formatting the
Recorder (FORMA
T)
![]()
![]() 3,5
3,5
![]()
![]()
![]() 2,4
2,4 ![]()
![]()
![]()
![]()
![]()
![]()
![]()
![]() 1
1
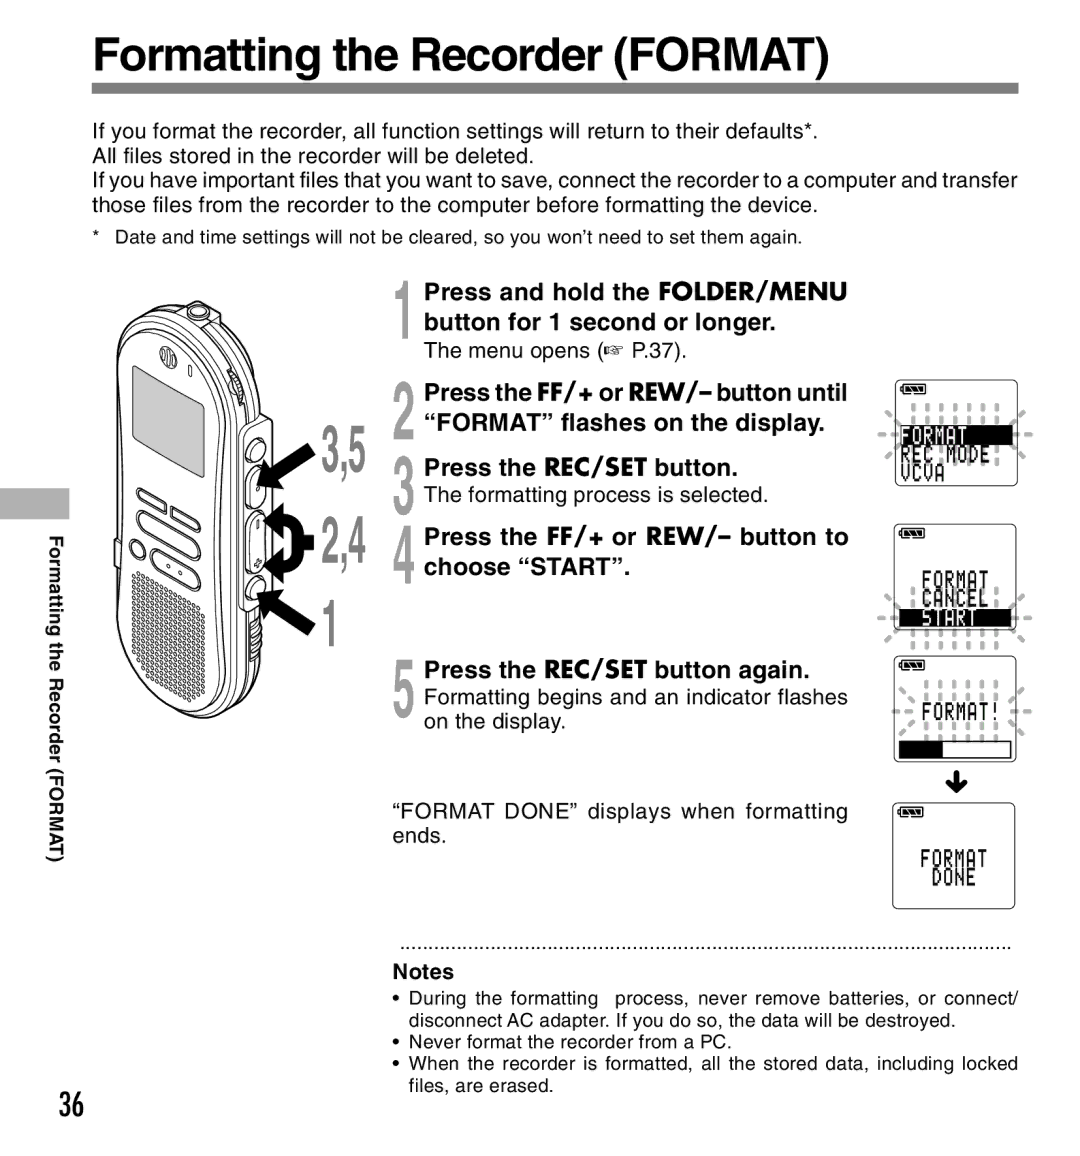
1 Press and hold the FOLDER/MENU button for 1 second or longer.
The menu opens (☞ P.37).
2 Press the FF/+ or REW/– button until “FORMAT” flashes on the display.
3 Press the REC/SET button. The formatting process is selected.
4 Press the FF/+ or REW/– button to choose “START”.
5 Press the REC/SET button again. Formatting begins and an indicator flashes on the display.
“FORMAT DONE” displays when formatting ends.
![]()
![]() F O R M A T
F O R M A T
 R
R E C
E C  M
M O
O D E
D E 
V C V A
F O R M A T
![]() C A
C A![]() N
N![]() C
C![]() E L
E L ![]()
S T A R T
![]() F O R M A T !
F O R M A T !![]()
{
F O R M A T
D O N E
36
............................................................................................................
Notes
•During the formatting process, never remove batteries, or connect/ disconnect AC adapter. If you do so, the data will be destroyed.
•Never format the recorder from a PC.
•When the recorder is formatted, all the stored data, including locked files, are erased.