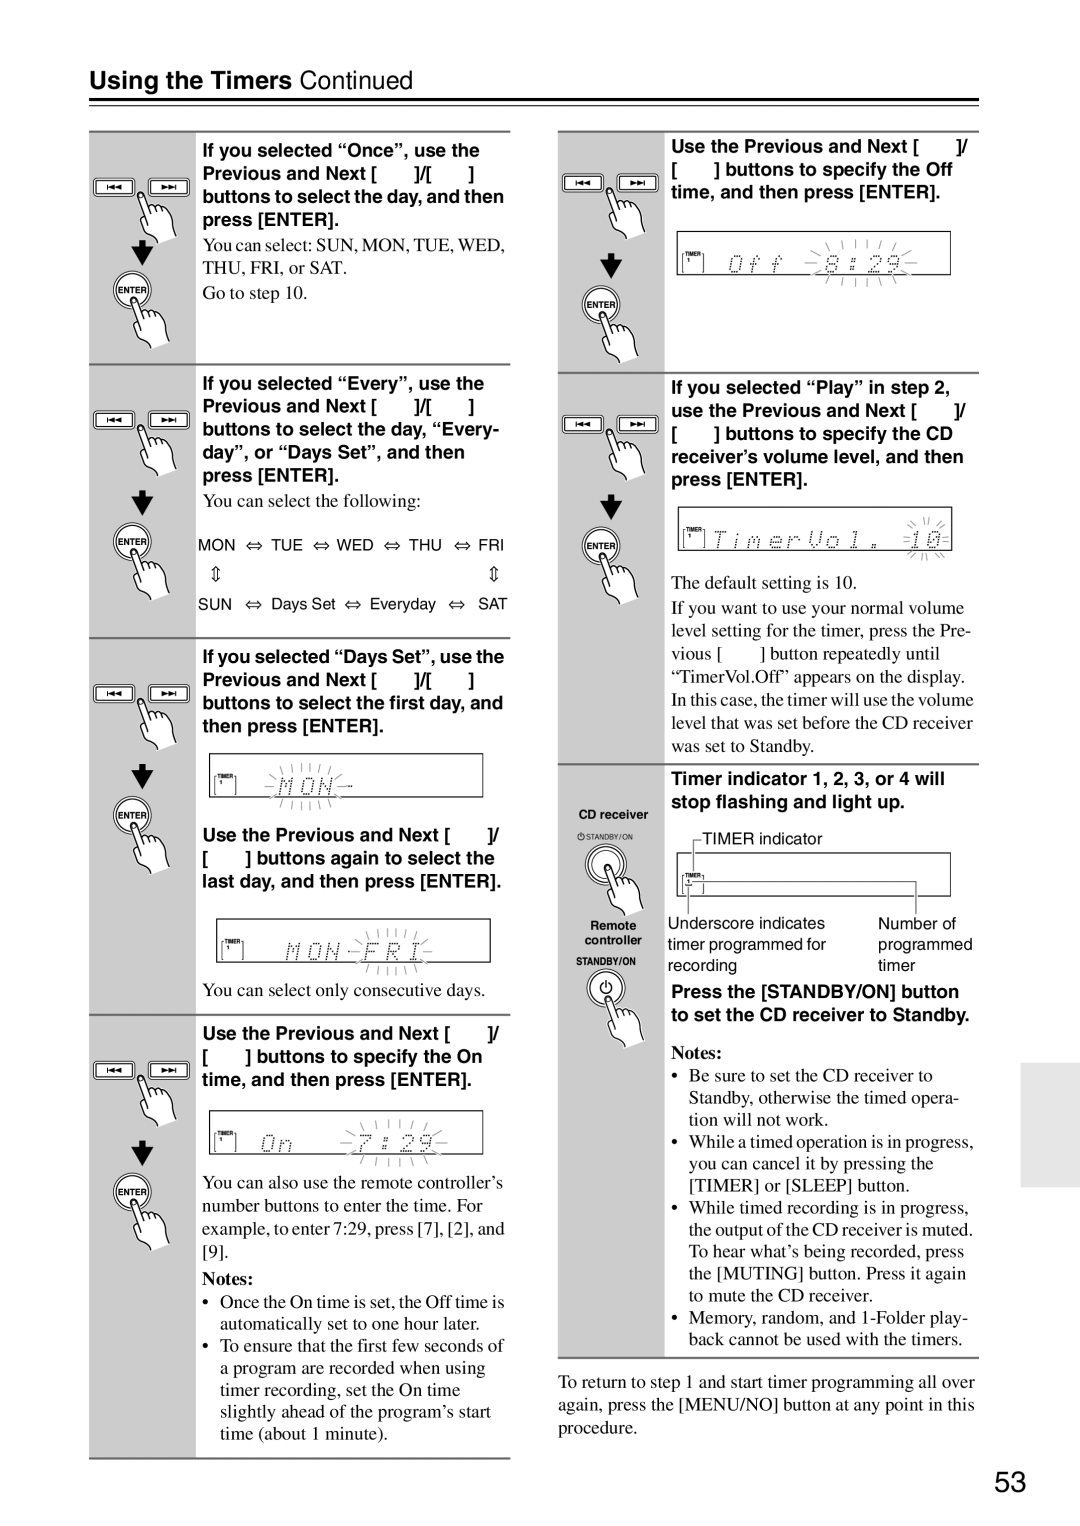
7 | If you selected “Once”, use the | ||||
| |||||
| Previous and Next [7]/[6] |
| |||
| buttons to select the day, and then | ||||
| press [ENTER]. |
|
| ||
| You can select: SUN, MON, TUE, WED, | ||||
| THU, FRI, or SAT. |
|
| ||
| Go to step 10. |
|
|
| |
8 | If you selected “Every”, use the | ||||
| |||||
| Previous and Next [7]/[6] |
| |||
| buttons to select the day, “Every- | ||||
| day”, or “Days Set”, and then |
| |||
| press [ENTER]. |
|
| ||
| You can select the following: |
| |||
| MON | TUE | WED | THU | FRI |
| SUN | Days Set | Everyday | SAT | |
9 | If you selected “Days Set”, use the | ||||
| |||||
Previous and Next [7]/[6] buttons to select the first day, and then press [ENTER].
Use the Previous and Next [7]/ [6] buttons again to select the last day, and then press [ENTER].
| You can select only consecutive days. |
|
|
10 | Use the Previous and Next [7]/ |
| [6] buttons to specify the On |
time, and then press [ENTER].
You can also use the remote controller’s number buttons to enter the time. For example, to enter 7:29, press [7], [2], and [9].
Notes:
•Once the On time is set, the Off time is automatically set to one hour later.
•To ensure that the first few seconds of a program are recorded when using timer recording, set the On time slightly ahead of the program’s start time (about 1 minute).
11 | Use the Previous and Next [7]/ |
| [6] buttons to specify the Off |
time, and then press [ENTER].
12 | If you selected “Play” in step 2, |
| |
| use the Previous and Next [7]/ |
| [6] buttons to specify the CD |
| receiver’s volume level, and then |
| press [ENTER]. |
The default setting is 10.
If you want to use your normal volume level setting for the timer, press the Pre- vious [7] button repeatedly until “TimerVol.Off” appears on the display. In this case, the timer will use the volume level that was set before the CD receiver was set to Standby.
13 | Timer indicator 1, 2, 3, or 4 will | |
| ||
CD receiver | stop flashing and light up. | |
|
| |
| TIMER indicator |
|
Remote | Underscore indicates | Number of |
controller | timer programmed for | programmed |
| recording | timer |
Press the [STANDBY/ON] button to set the CD receiver to Standby.
Notes:
•Be sure to set the CD receiver to Standby, otherwise the timed opera- tion will not work.
•While a timed operation is in progress, you can cancel it by pressing the [TIMER] or [SLEEP] button.
•While timed recording is in progress, the output of the CD receiver is muted. To hear what’s being recorded, press the [MUTING] button. Press it again to mute the CD receiver.
•Memory, random, and
To return to step 1 and start timer programming all over again, press the [MENU/NO] button at any point in this procedure.
53
