Connecting Antenna—Continued
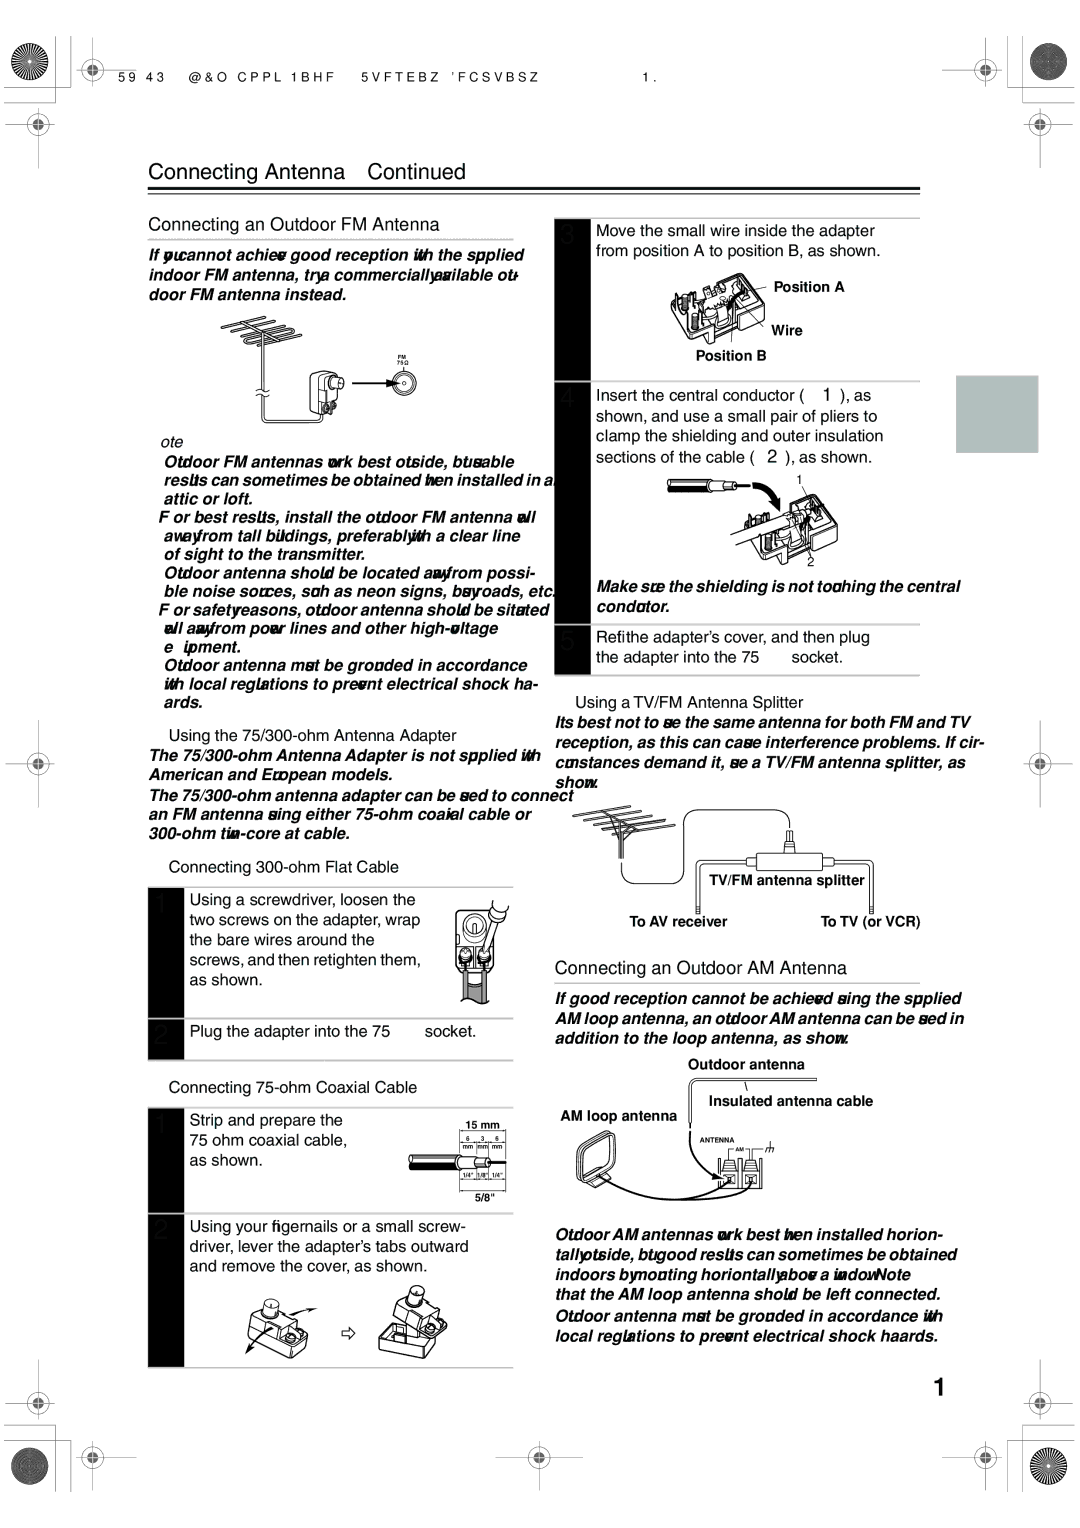
Connecting an Outdoor FM Antenna
If you cannot achieve good reception with the supplied indoor FM antenna, try a commercially available out- door FM antenna instead.
FM 75![]()
Notes:
•Outdoor FM antennas work best outside, but usable results can sometimes be obtained when installed in an attic or loft.
•For best results, install the outdoor FM antenna well away from tall buildings, preferably with a clear line of sight to the transmitter.
•Outdoor antenna should be located away from possi- ble noise sources, such as neon signs, busy roads, etc.
•For safety reasons, outdoor antenna should be situated well away from power lines and other
•Outdoor antenna must be grounded in accordance with local regulations to prevent electrical shock haz- ards.
■Using the 75/300-ohm Antenna Adapter
The
The
■Connecting
3 | Move the small wire inside the adapter |
| from position A to position B, as shown. |
| Position A |
| Wire |
| Position B |
4 | Insert the central conductor (1), as |
| shown, and use a small pair of pliers to |
clamp the shielding and outer insulation sections of the cable (2), as shown.
1
2
Make sure the shielding is not touching the central conductor.
5 Refit the adapter’s cover, and then plug the adapter into the 75 Ω socket.
■Using a TV/FM Antenna Splitter
It’s best not to use the same antenna for both FM and TV reception, as this can cause interference problems. If cir- cumstances demand it, use a TV/FM antenna splitter, as shown.
TV/FM antenna splitter
1 | Using a screwdriver, loosen the |
| two screws on the adapter, wrap |
| the bare wires around the |
| screws, and then retighten them, |
| as shown. |
2 | Plug the adapter into the 75 Ω socket. |
To AV receiver | To TV (or VCR) |
Connecting an Outdoor AM Antenna
If good reception cannot be achieved using the supplied AM loop antenna, an outdoor AM antenna can be used in addition to the loop antenna, as shown.
Outdoor antenna
■Connecting
1 | Strip and prepare the |
|
|
|
|
|
|
|
|
|
| |
|
|
| 15 mm |
|
|
| ||||||
75 ohm coaxial cable, |
|
|
| mm mm mm |
|
| ||||||
|
|
| 6 | 3 |
| 6 |
|
|
| |||
| as shown. |
|
|
|
|
|
|
|
|
|
|
|
|
|
|
|
|
|
|
|
|
|
|
| |
|
|
|
|
|
|
|
|
|
|
|
| |
|
|
| 1/4" |
| 1/8" | 1/4" |
|
|
| |||
|
|
|
|
|
|
|
|
|
|
|
|
|
|
|
|
|
|
| 5/8" |
|
|
| |||
|
|
|
|
|
|
|
|
|
|
|
|
|
2 | Using your fingernails or a small screw- | |||||||||||
| driver, lever the adapter’s tabs outward |
|
|
|
| |||||||
and remove the cover, as shown.
Insulated antenna cable
AM loop antenna
ANTENNA
AM
Outdoor AM antennas work best when installed horizon- tally outside, but good results can sometimes be obtained indoors by mounting horizontally above a window. Note that the AM loop antenna should be left connected.
Outdoor antenna must be grounded in accordance with local regulations to prevent electrical shock hazards.
19