Manuals
/
Optoma Technology
/
Computer Equipment
/
Projector
Optoma Technology
EH505
manual
Control Panel
Models:
EH505
1
11
101
101
Download
101 pages
36.62 Kb
8
9
10
11
12
13
14
15
Troubleshooting
Install
Lens Shift Range Diagram
Signal RGB
Password
Security Timer
Connecting the Projector
Intermission Problems
Reset
Setup
Page 11
Image 11
Introduction
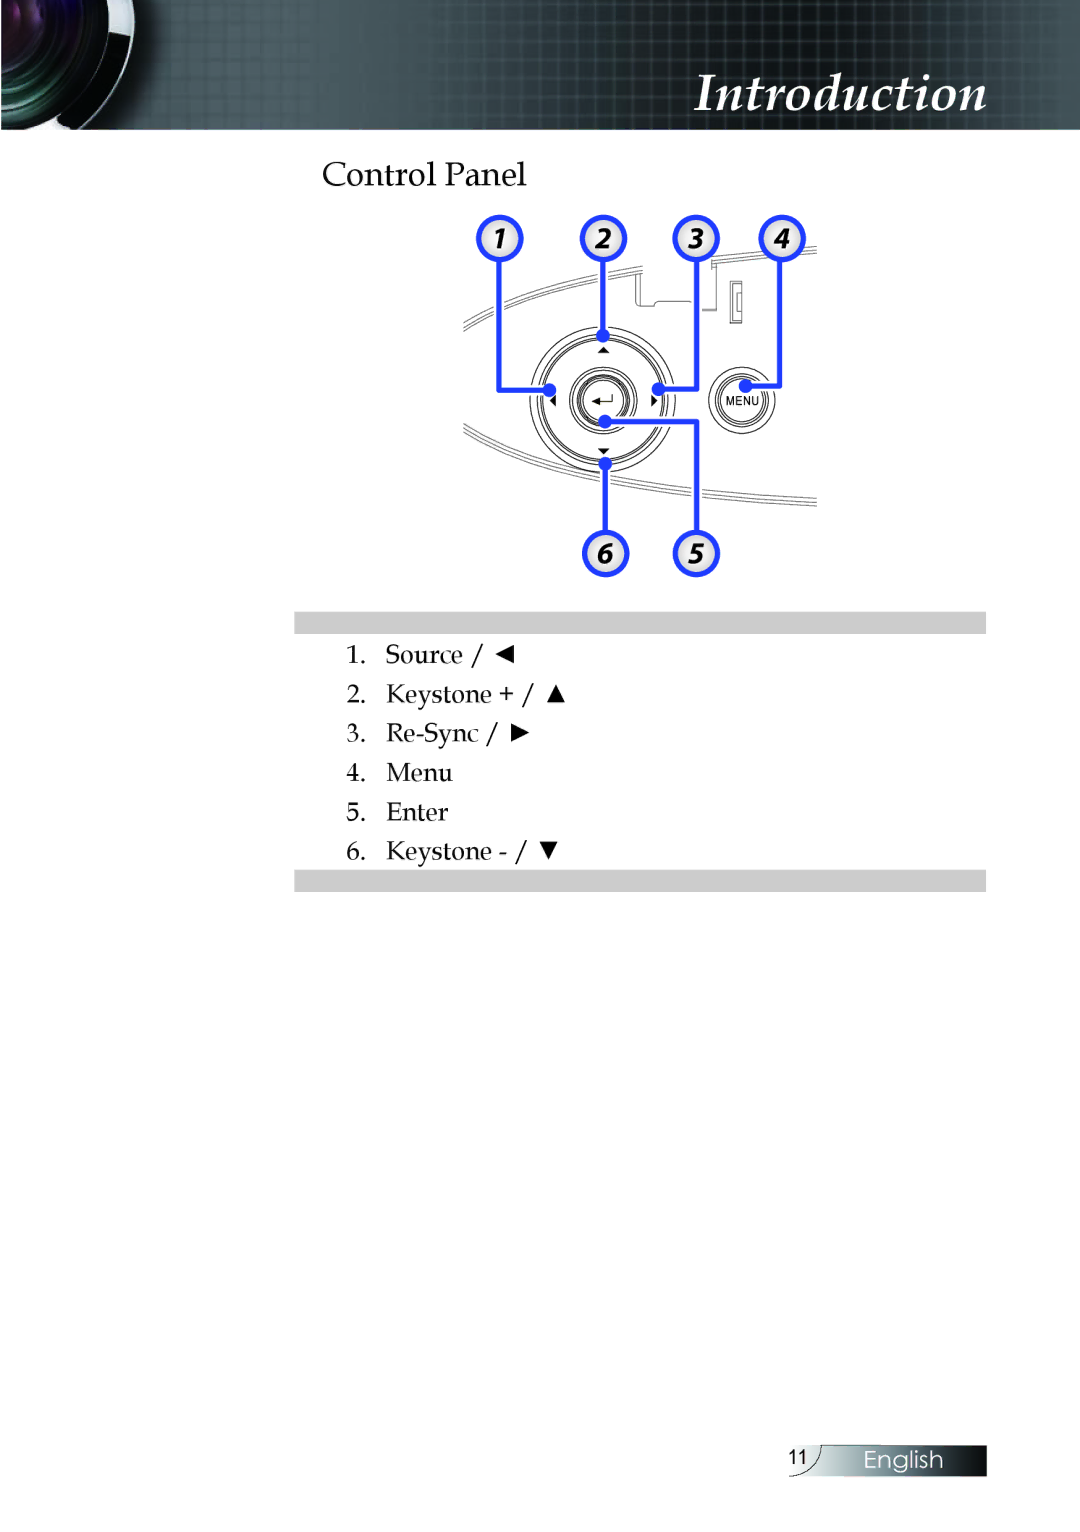
Control Panel
1
2
3
4
6 5
1.
Source / ◄
2.
Keystone + / ▲
3.
Re-Sync /
►
4.
Menu
5.
Enter
6.
Keystone
- /
▼
11
English
Page 10
Page 12
Page 11
Image 11
Page 10
Page 12
Contents
Table of Contents
Table of Contents
Important Safety Instruction
Safety Information
Usage Notice
Precautions
Do not
Eye Safety Warnings
Introduction
Product Features
Package Overview
Main Unit
Product Overview
Control Panel
Introduction
Remote Control
Connect to Computer / Notebook
Connecting the Projector
Connect to Video Sources
Removing the Existing Lens From the Projector
Installing or Removing the Optional Lens
Installing the New Lens
Powering On the Projector
Powering On/Off the Projector
Installation
Powering Off the Projector
Adjusting the Projector’s Height
Adjusting the Projected Image
Adjusting Projected Image Position Using Lens Shift
Adjusting the vertical image position
Lens Shift Range Diagram
Adjusting the horizontal image position
Adjusting the Zoom / Focus
Width Height
Adjusting Projection Image Size XGA
Height Width
Adjusting Projection Image Size Wxga
WxHl Min
Adjusting Projection Image Size Wuxga
Control Panel
User Controls
Using the Remote Control
Remote Control
DVI
On-screen Display Menus
How to operate
Image
Menu Tree
Options
Contrast
Display Mode
Image
Brightness
Advanced
Sharpness
Color
Tint
Image Advanced
Bias
Image Advanced RGB Gain/ Bias
Gain
Colors Except White
Image Advanced Color Matching
White
Reset
Format
Display
Keystone
Digital Zoom
Edge Mask
Image Shift
3D Format
3D Mode
Display 3D
3D2D
Screen Type WXGA/WUXGA only
Setup
Language
Projection
Security
Signal RGB
SignalVideo
Audio Settings
Setup Language
Security Setting
Setup Security
Security Timer
Change Password
Frequency
Setup Signal RGB
Phase
Automatic
Black Level
Setup Signal Video
White Level
Mute
Setup Audio Settings
Volume
Internal Speaker
Closed Captioning
Setup Advanced
Logo
Logo Capture
Control Settings
Setup Network
LAN Settings
Setup LAN Settings
Setup Control Settings
High Altitude
Options
Input Source
Source Lock
Test Pattern
Display Mode Lock
Remote Settings
Keypad Lock
Information
Lamp Setting
Options Input Source
Remote Code
Options Remote Settings
Function
IR Function
Options Advanced
Direct Power On
Signal Power On
Auto Power Off min
Power Mode Standby
Sleep Timer min
Lamp Reminder
Options Lamp Setting
Lamp Reset
Lamp Hour
Power
Brightness Mode
Supported External Devices
Wired LAN Terminal functionalites
LANRJ45
Click Properties
Enter / to confirm settings
IP ID
Preparing Email Alerts
RS232 by Telnet Function
Check and get the IP-Address on OSD of the projector
Quick Start-Guide for RS232 by Telnet
How to have Telnet enabled in Windows Vista
Specsheet for RS232 by Telnet
Partial, scrolling or incorrectly displayed image
Troubleshooting
Image Problems
Image is unstable or flickering
Image is stretched when displaying 169 DVD title
Intermission Problems
Hdmi Q & a
Message
Projector Status Indication
There is no sound
Remote Control Problems
Audio Problems
Message Reminders
Replacing the Lamp
Appendices
Cleaning the Lens
Cleaning the Projector
Video timing detail describe
Compatibility Modes
Video Compatibility
Computer Compatibility Vesa standards
Computer Signal Analog RGB Compatible
Input Signal for HDMI/DVI-D
True 3D Video Compatibility table
Appendices
RS232 Connector
RS232 Commands
RS232 Protocol Function List
RS232 Commands
YUV
WXGA/WUXGA Model
Send from projector automatically
AMX Device Discovery commands
Telnet Commands
Command Description Remark Parameter
PJLink supported commands
Version
INF0?
Trademarks
Ceiling Installation
Optoma Global Offices
Latin America
FCC notice
Regulation & Safety notices
Declaration of Conformity for EU countries
Operation conditions
Top
Page
Image
Contents