COOKINGWlTHYOURFOODSTEAMER
•Place the appliance on a stable, level surface away from walls and overhanging cupboards .
•Pour cold tap water into Water Reservoir to MAX level for foods requiring 13 to 60 minutes steaming time, or MIN level for food requiring less than
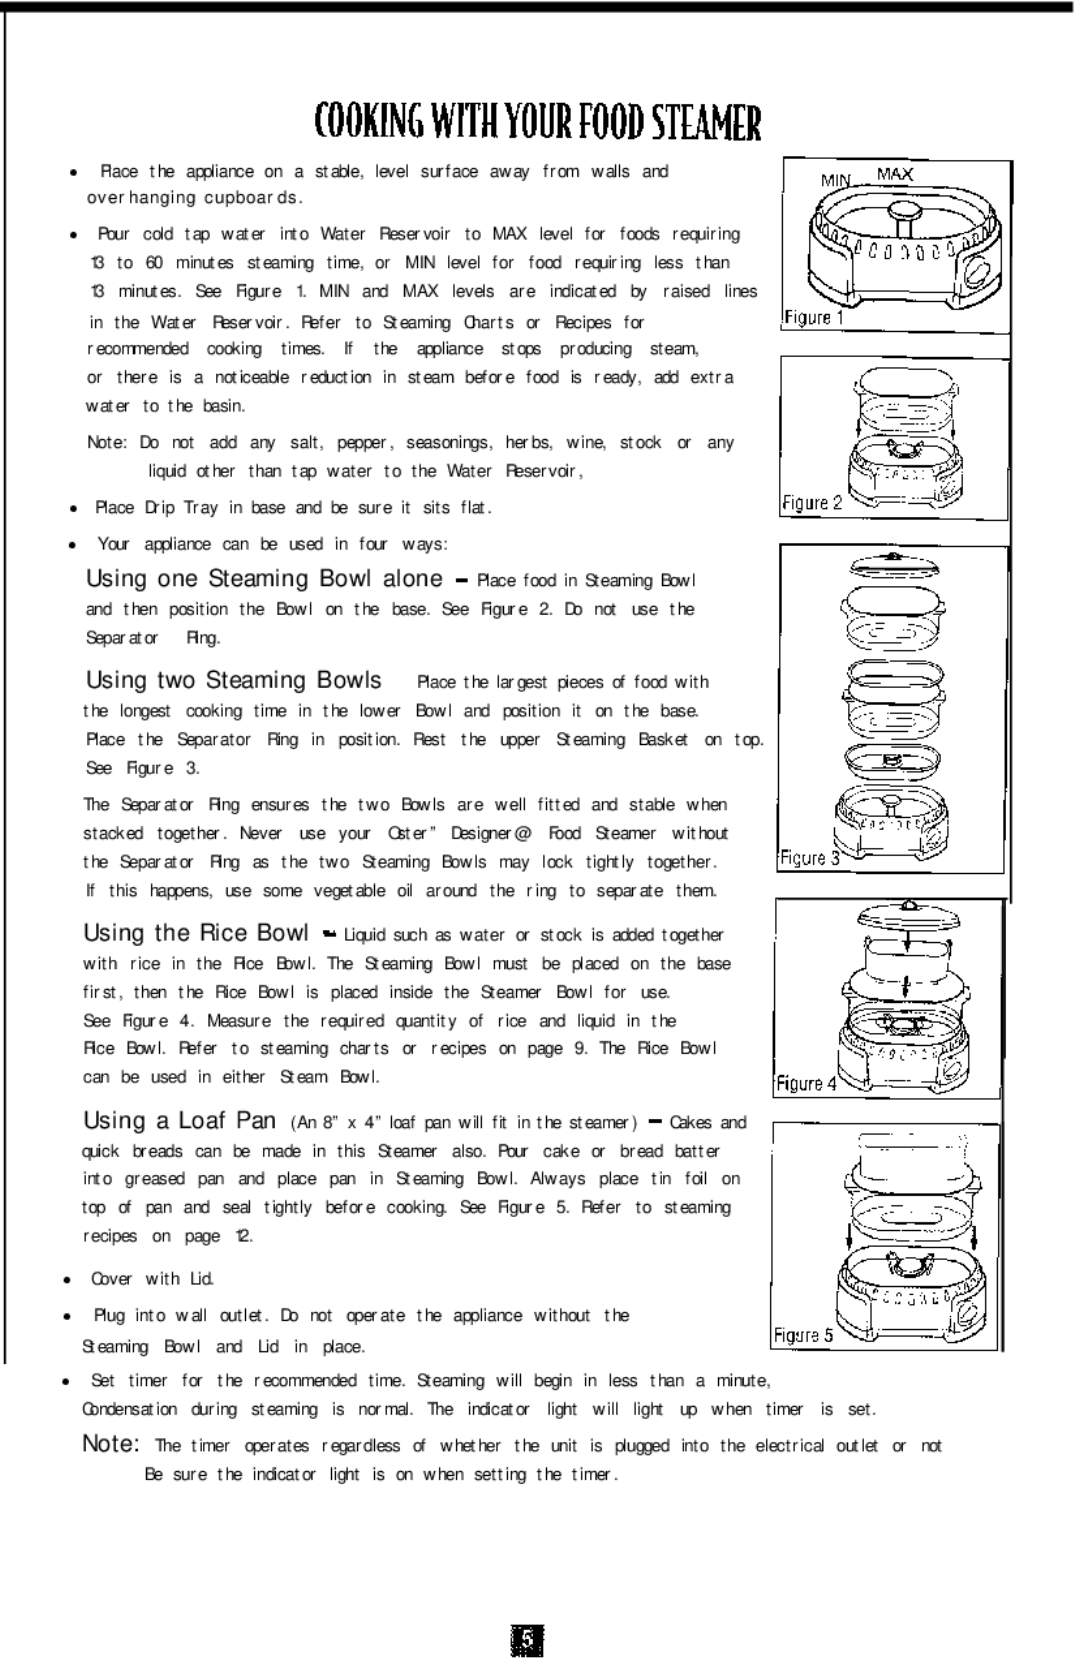
13 minutes. See Figure 1. MIN and MAX levels are indicated by raised lines
in the Water Reservoir. Refer to Steaming Charts or Recipes for recommended cooking times. If the appliance stops producing steam,
or there is a noticeable reduction in steam before food is ready, add extra water to the basin.
Note: Do not add any salt, pepper, seasonings, herbs, wine, stock or any liquid other than tap water to the Water Reservoir,
•Place Drip Tray in base and be sure it sits flat. • Your appliance can be used in four ways:
Using one Steaming Bowl alone - Place food in Steaming Bowl and then position the Bowl on the base. See Figure 2. Do not use the Separator Ring.
Using two Steaming Bowls - Place the largest pieces of food with the longest cooking time in the lower Bowl and position it on the base.
Place the Separator Ring in position. Rest the upper Steaming Basket on top. See Figure 3.
The Separator Ring ensures the two Bowls are well fitted and stable when stacked together. Never use your Oster” Designer@ Food Steamer without the Separator Ring as the two Steaming Bowls may lock tightly together.
If this happens, use some vegetable oil around the ring to separate them.
Using the Rice Bowl - Liquid such as water or stock is added together with rice in the Rice Bowl. The Steaming Bowl must be placed on the base first, then the Rice Bowl is placed inside the Steamer Bowl for use.
See Figure 4. Measure the required quantity of rice and liquid in the
Rice Bowl. Refer to steaming charts or recipes on page 9. The Rice Bowl can be used in either Steam Bowl.
Using a Loaf Pan (An 8” x 4” loaf pan will fit in the steamer) - Cakes and quick breads can be made in this Steamer also. Pour cake or bread batter into greased pan and place pan in Steaming Bowl. Always place tin foil on top of pan and seal tightly before cooking. See Figure 5. Refer to steaming recipes on page 12.
•Cover with Lid.
•Plug into wall outlet. Do not operate the appliance without the Steaming Bowl and Lid in place.
•Set timer for the recommended time. Steaming will begin in less than a minute,
Condensation during steaming is normal. The indicator light will light up when timer is set.
Note: The timer operates regardless of whether the unit is plugged into the electrical outlet or not Be sure the indicator light is on when setting the timer.
