Getting Started
1.10 Power-up Configuration and Self-Test
With the printer off, load the
Note: After performing a
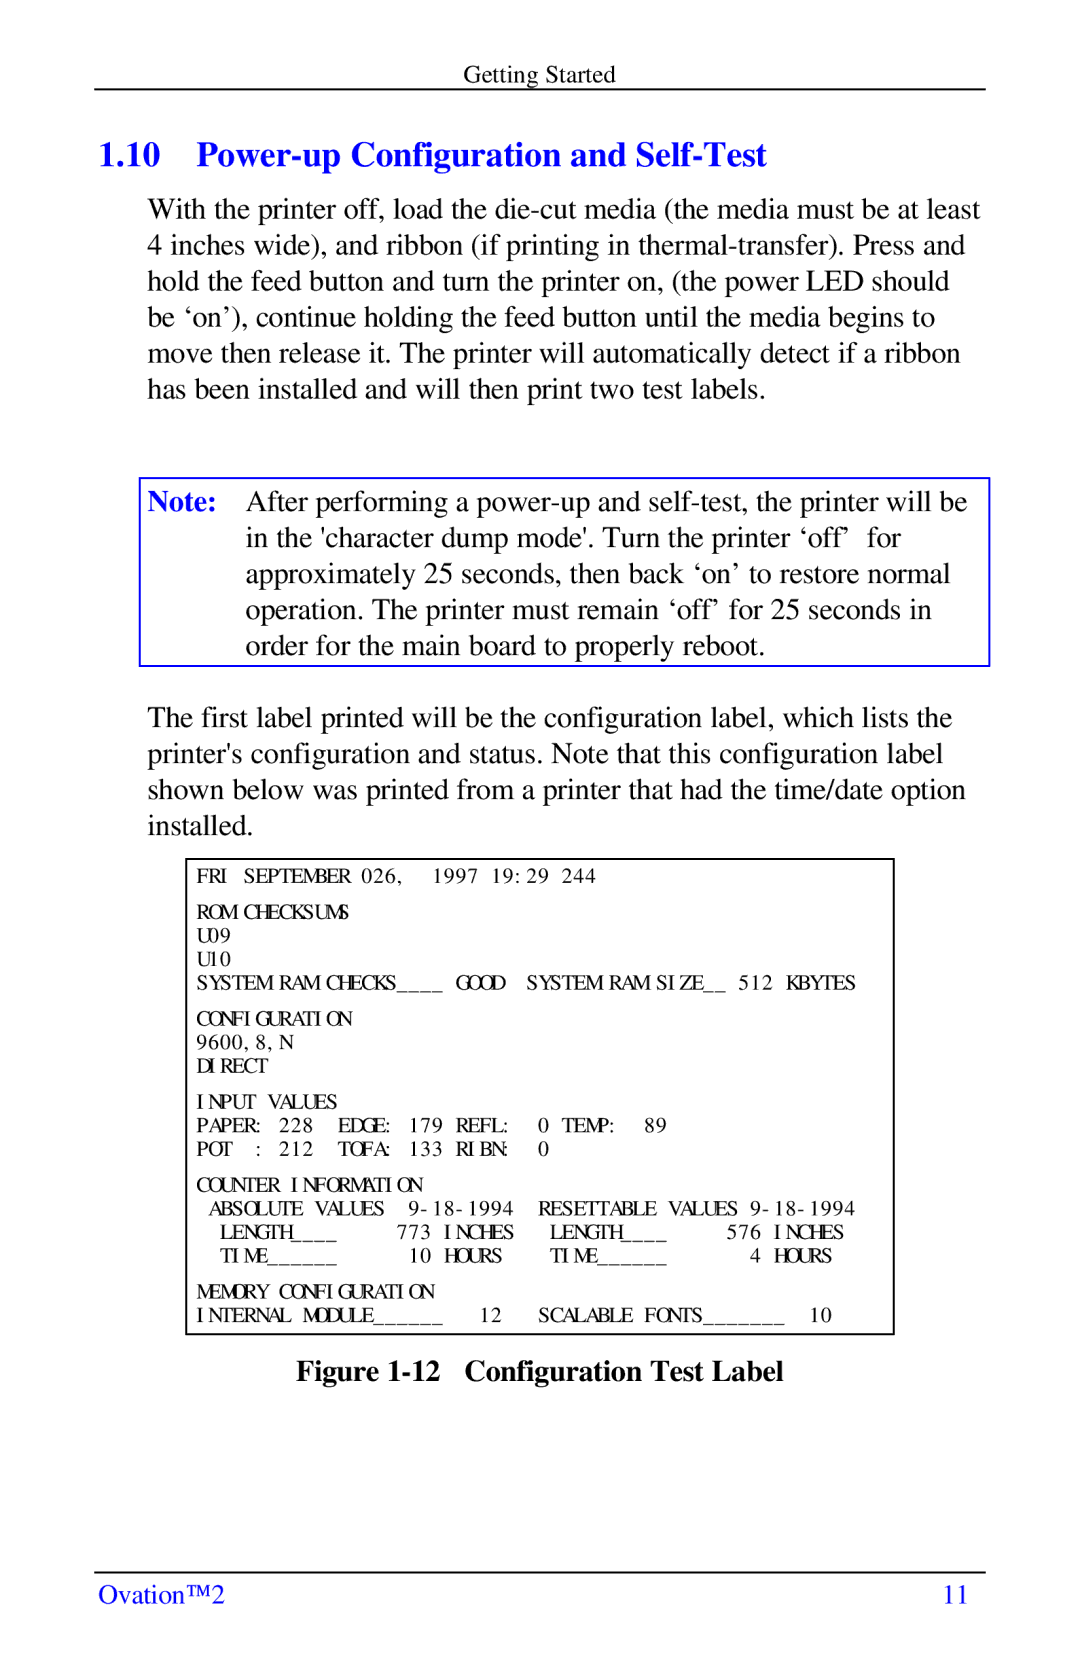
The first label printed will be the configuration label, which lists the printer's configuration and status. Note that this configuration label shown below was printed from a printer that had the time/date option installed.
FRI SEPTEMBER 026, 1997 19:29 244 |
| |||
ROM CHECKSUMS |
|
|
|
|
U09 |
|
|
|
|
U10 |
|
|
|
|
SYSTEM RAM CHECKS____ GOOD | SYSTEM RAM SIZE__ 512 KBYTES | |||
CONFIGURATION |
|
|
|
|
9600,8,N |
|
|
|
|
DIRECT |
|
|
|
|
INPUT VALUES |
|
|
|
|
PAPER: 228 EDGE: | 179 REFL: | 0 TEMP: 89 |
| |
POT : 212 TOFA: | 133 RIBN: | 0 |
| |
COUNTER INFORMATION |
|
| ||
ABSOLUTE VALUES |
| RESETTABLE VALUES | ||
LENGTH____ | 773 INCHES | LENGTH____ | 576 INCHES | |
TIME______ |
| 10 HOURS | TIME______ | 4 HOURS |
MEMORY CONFIGURATION |
|
| ||
INTERNAL MODULE______ 12 | SCALABLE FONTS_______ 10 | |||
|
|
|
|
|
Figure 1-12 Configuration Test Label
Ovation™2 | 11 |