Status Displays Inside the Viewfinder Screen
Setting the Camera ID
The camera ID can be set at the CAMERA ID page of the setting menu.
A camera ID of up to ten characters including English letters, symbols and spaces can be used. The camera ID is recorded when the OUTPUT/AUTO KNEE switch is set to BARS and the color bar signal is being recorded. It is also displayed on the viewfinder screen.
Note{
When the setting menu is displayed, the camera ID is not displayed even if the color bar signal is output.
1 Set the MENU SET/OFF switch to the SET position while the SHIFT/ITEM button and UP button are held down together.
2
3
4
Press the PAGE button to display the MAIN menu screen 2 of 4.
Press the SHIFT/ITEM button to move the cursor to the “CAMERA ID” position.
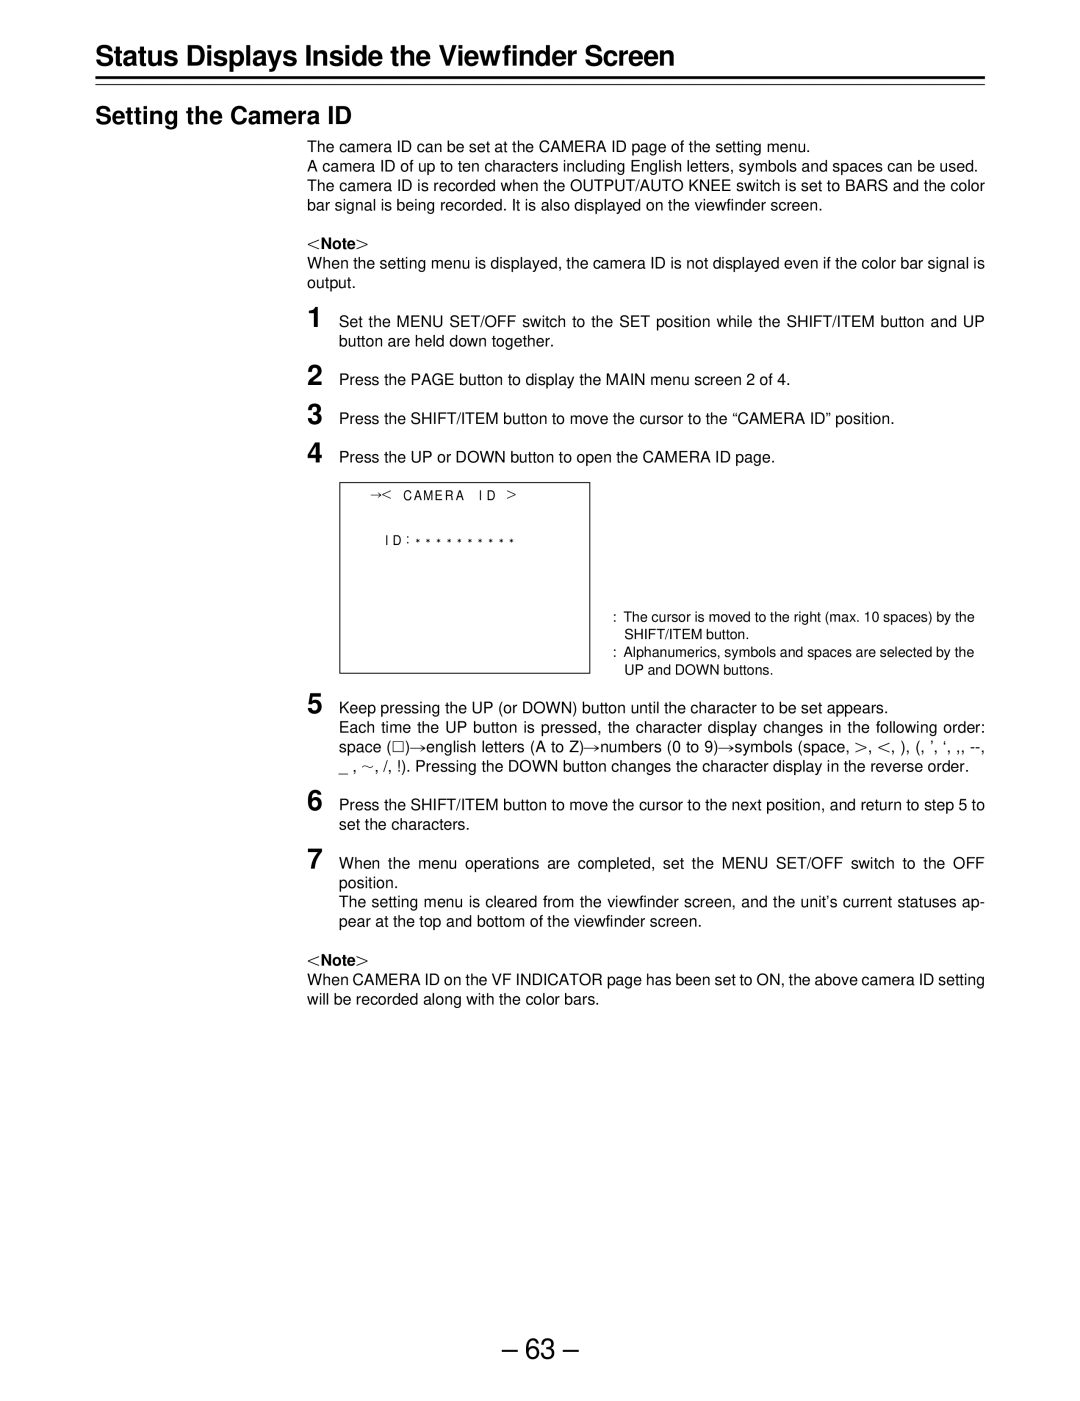
Press the UP or DOWN button to open the CAMERA ID page.
¢ C AME R A I D {
ID : E E E E E E E E E E
:The cursor is moved to the right (max. 10 spaces) by the SHIFT/ITEM button.
:Alphanumerics, symbols and spaces are selected by the UP and DOWN buttons.
5 Keep pressing the UP (or DOWN) button until the character to be set appears.
Each time the UP button is pressed, the character display changes in the following order: space (Å)¢english letters (A to Z)¢numbers (0 to 9)¢symbols (space, {, , ), (, ’, ‘, ,,
6 Press the SHIFT/ITEM button to move the cursor to the next position, and return to step 5 to set the characters.
7 When the menu operations are completed, set the MENU SET/OFF switch to the OFF position.
The setting menu is cleared from the viewfinder screen, and the unit’s current statuses ap- pear at the top and bottom of the viewfinder screen.
Note{
When CAMERA ID on the VF INDICATOR page has been set to ON, the above camera ID setting will be recorded along with the color bars.
– 63 –