Lamp Displays Inside the Viewfinder
Setting the ! Lamp Display
The items subject to the ! lamp display are selected on the “! LED” SUB menu page on the MAIN menu screen 2 of 4. (Under the factory setting, the “! LED” page is not displayed.) To perform operations on the “! LED” page, either switch the unit to the engineer mode or select the “! LED” page on the USER MENU SEL page 2 of 3 on the MAIN menu screen 4 of 4.
ÁFor details on selecting the engineer mode and display page, refer to Setting Menu Configura- tion (page 51).
1 Set the MENU SET/OFF switch to the SET position while the SHIFT/ITEM button and UP button are held down together.
2
3
4
Press the PAGE button to display the MAIN menu screen 2 of 4.
Repeatedly press the SHIFT/ITEM button to move the cursor to the “! LED” position.
Press the UP or DOWN button to open the ! LED page.
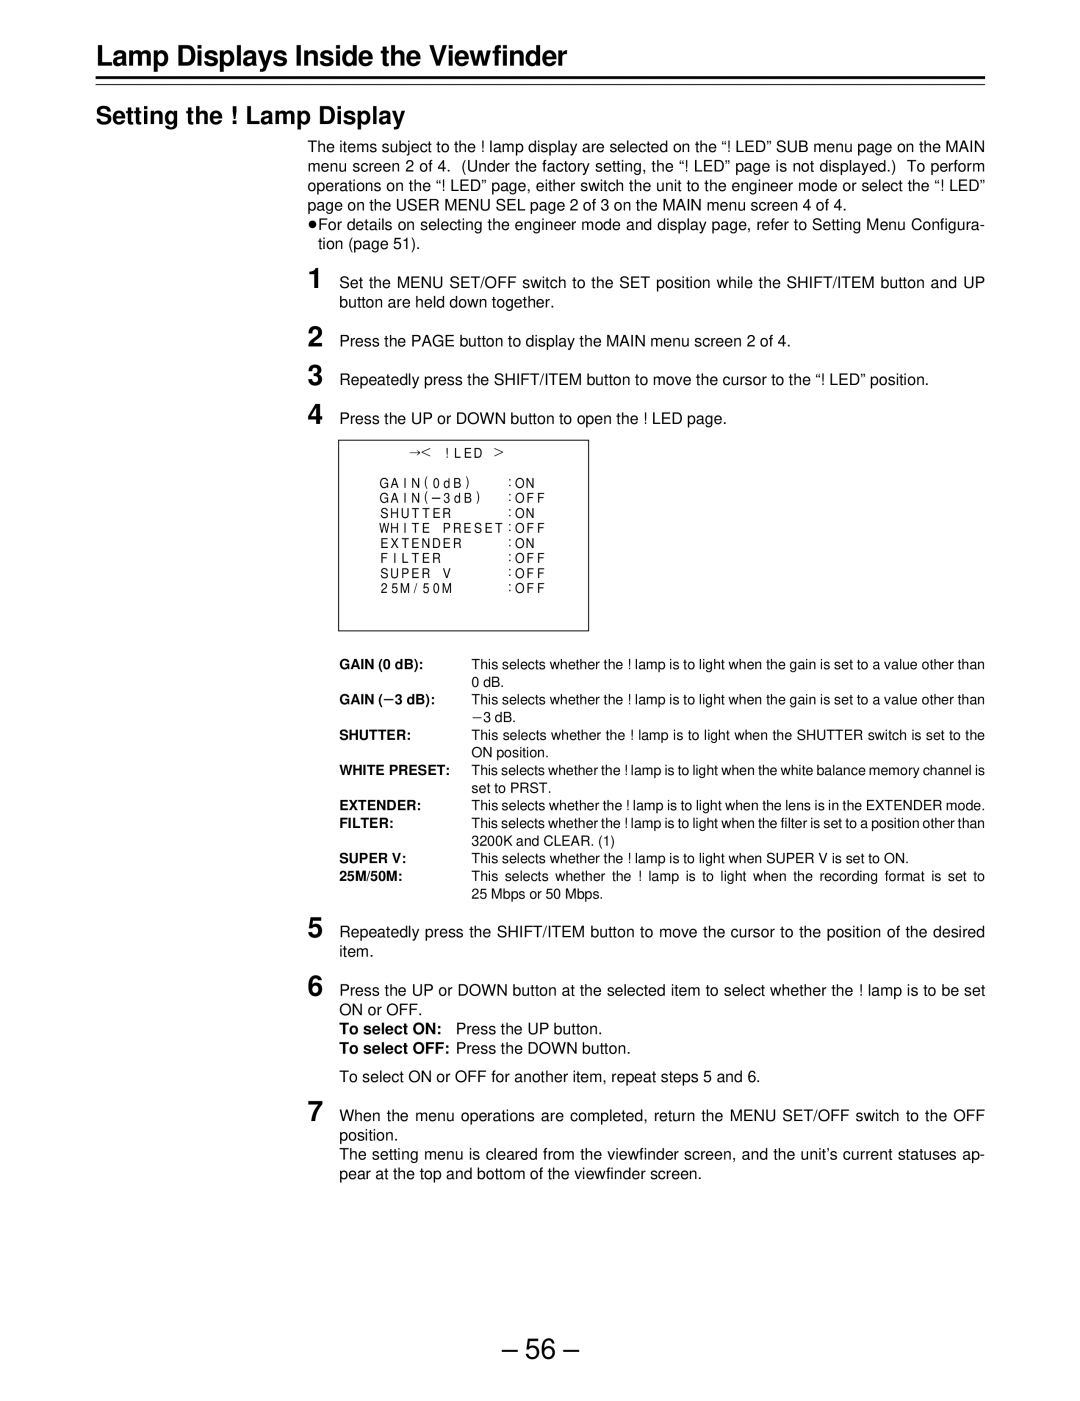
¢ ! L E D | { |
G A I N ( 0 d B ) | : ON |
G A I N ( ∂3 d B ) | : O F F |
S H U T T E R | : ON |
WH I T E P R E S E T : O F F | |
E X T E N D E R | : ON |
F I L T E R | : O F F |
S U P E R V | : O F F |
2 5 M / 5 0 M | : O F F |
GAIN (0 dB): This selects whether the ! lamp is to light when the gain is set to a value other than 0 dB.
GAIN (¶3 dB): This selects whether the ! lamp is to light when the gain is set to a value other than p3 dB.
SHUTTER:This selects whether the ! lamp is to light when the SHUTTER switch is set to the ON position.
WHITE PRESET: This selects whether the ! lamp is to light when the white balance memory channel is set to PRST.
EXTENDER: This selects whether the ! lamp is to light when the lens is in the EXTENDER mode.
FILTER:This selects whether the ! lamp is to light when the filter is set to a position other than 3200K and CLEAR. (1)
SUPER V:This selects whether the ! lamp is to light when SUPER V is set to ON.
25M/50M:This selects whether the ! lamp is to light when the recording format is set to 25 Mbps or 50 Mbps.
5 Repeatedly press the SHIFT/ITEM button to move the cursor to the position of the desired item.
6 Press the UP or DOWN button at the selected item to select whether the ! lamp is to be set ON or OFF.
To select ON: Press the UP button.
To select OFF: Press the DOWN button.
To select ON or OFF for another item, repeat steps 5 and 6.
7 When the menu operations are completed, return the MENU SET/OFF switch to the OFF position.
The setting menu is cleared from the viewfinder screen, and the unit’s current statuses ap- pear at the top and bottom of the viewfinder screen.
– 56 –