Preparation
Inserting/Removing the Batteries
•Check that the camera is turned off and that the lens is retracted.
•Use oxyride batteries (supplied), alkaline batteries (optional) or
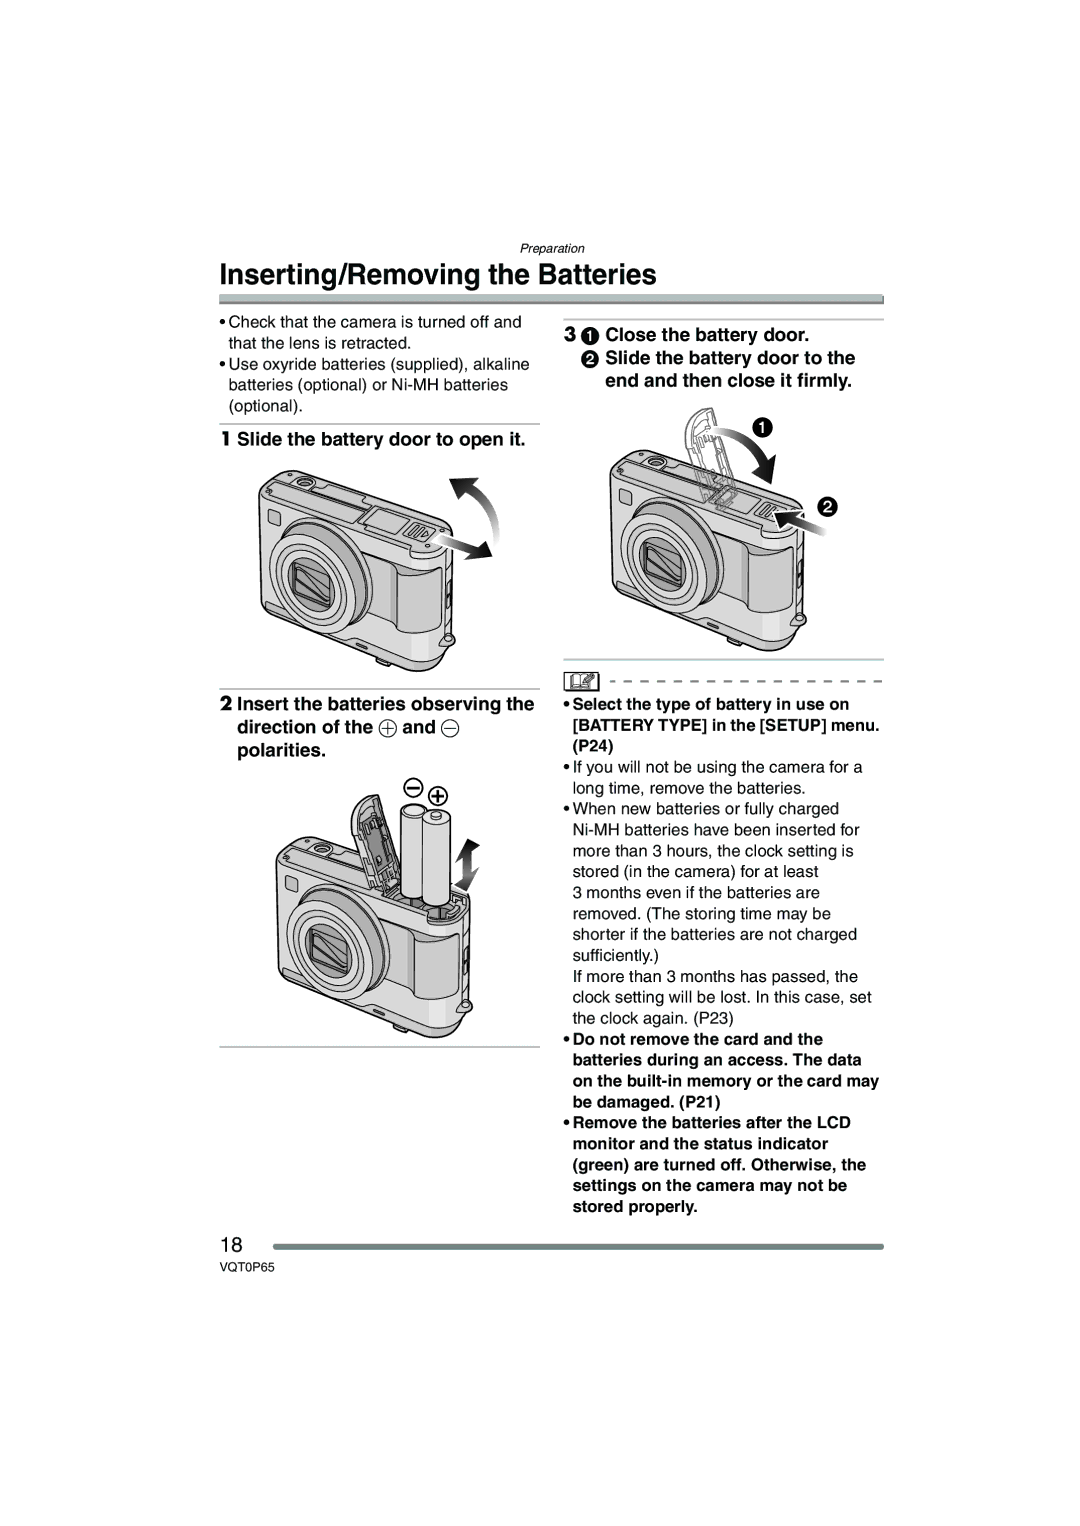
1 Slide the battery door to open it.
3 1 Close the battery door.
2Slide the battery door to the end and then close it firmly.
2 Insert the batteries observing the direction of the + and - polarities.
18
•Select the type of battery in use on [BATTERY TYPE] in the [SETUP] menu. (P24)
•If you will not be using the camera for a long time, remove the batteries.
•When new batteries or fully charged
3 months even if the batteries are removed. (The storing time may be shorter if the batteries are not charged sufficiently.)
If more than 3 months has passed, the clock setting will be lost. In this case, set the clock again. (P23)
•Do not remove the card and the batteries during an access. The data on the
•Remove the batteries after the LCD monitor and the status indicator (green) are turned off. Otherwise, the settings on the camera may not be stored properly.
VQT0P65