Playback (advanced)
•The date may not be printed depending on photo studios or printers even if you set the date print. For further information, ask the photo studio or refer to the operating instructions of the printer.
Preventing Accidental Erasure of the Picture [PROTECT]
You can set the protection for the pictures which you do not want to be deleted by accident.
•DPOF print setting is a convenient function when you print pictures with printers supporting PictBridge. (P88)
•DPOF is an abbreviation of Digital Print Order Format. This feature allows you to write print information into the media and to use such information on the
•If the file is not based on the DCF standard, the DPOF print setting cannot be set. DCF is an abbreviation of [Design rule for Camera File system], stipulated by JEITA [Japan Electronics and Information Technology Industries Association].
•When setting the DPOF print on the camera, delete any previous DPOF print settings made by other equipment.
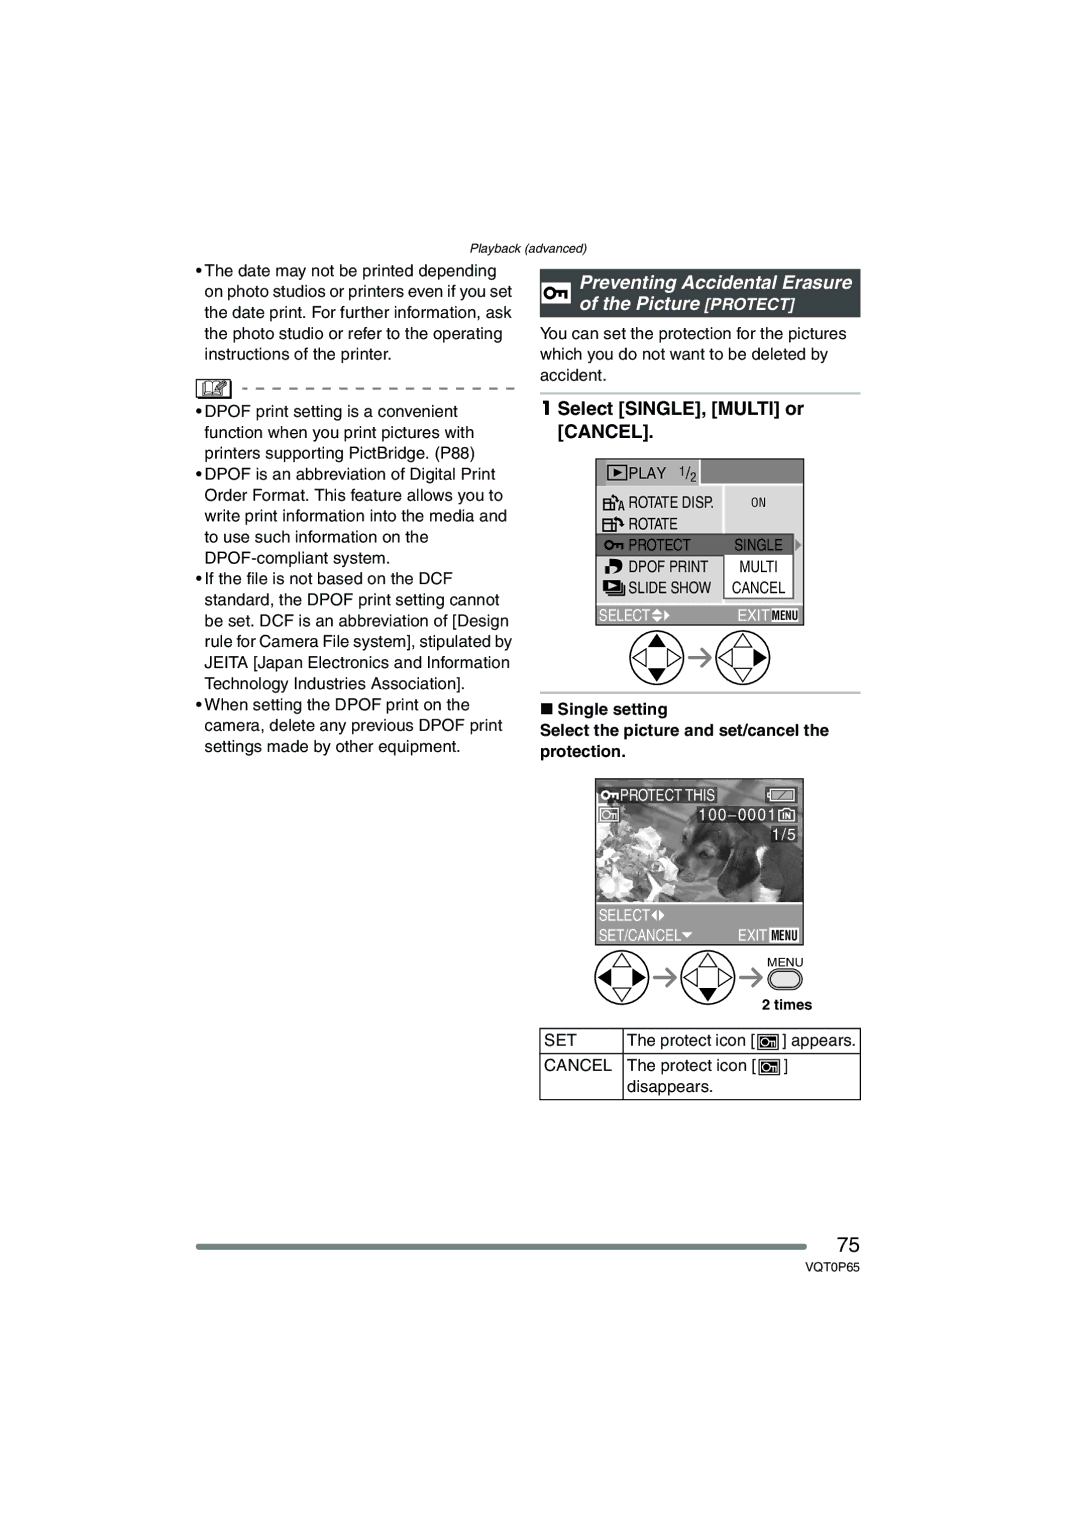
1 Select [SINGLE], [MULTI] or [CANCEL].
![]()
![]()
![]()
![]() PLAY 1/2
PLAY 1/2 ![]()
ROTATE DISP. | ON |
ROTATE |
|
PROTECT | SINGLE |
DPOF PRINT | MULTI |
SLIDE SHOW | CANCEL |
SELECT![]() EXIT MENU
EXIT MENU
∫Single setting
Select the picture and set/cancel the protection.
![]() PROTECT THIS
PROTECT THIS
|
| 100_0001 | |
|
|
| 1/5 |
SELECT |
|
| |
SET/CANCEL | EXIT MENU | ||
|
|
| MENU |
|
|
| 2 times |
SET | The protect icon [ | ] appears. | |
CANCEL | The protect icon [ | ] | |
| disappears. |
| |
75
VQT0P65