Edit mode
Using the DV Cable for Recording (Digital Dubbing)
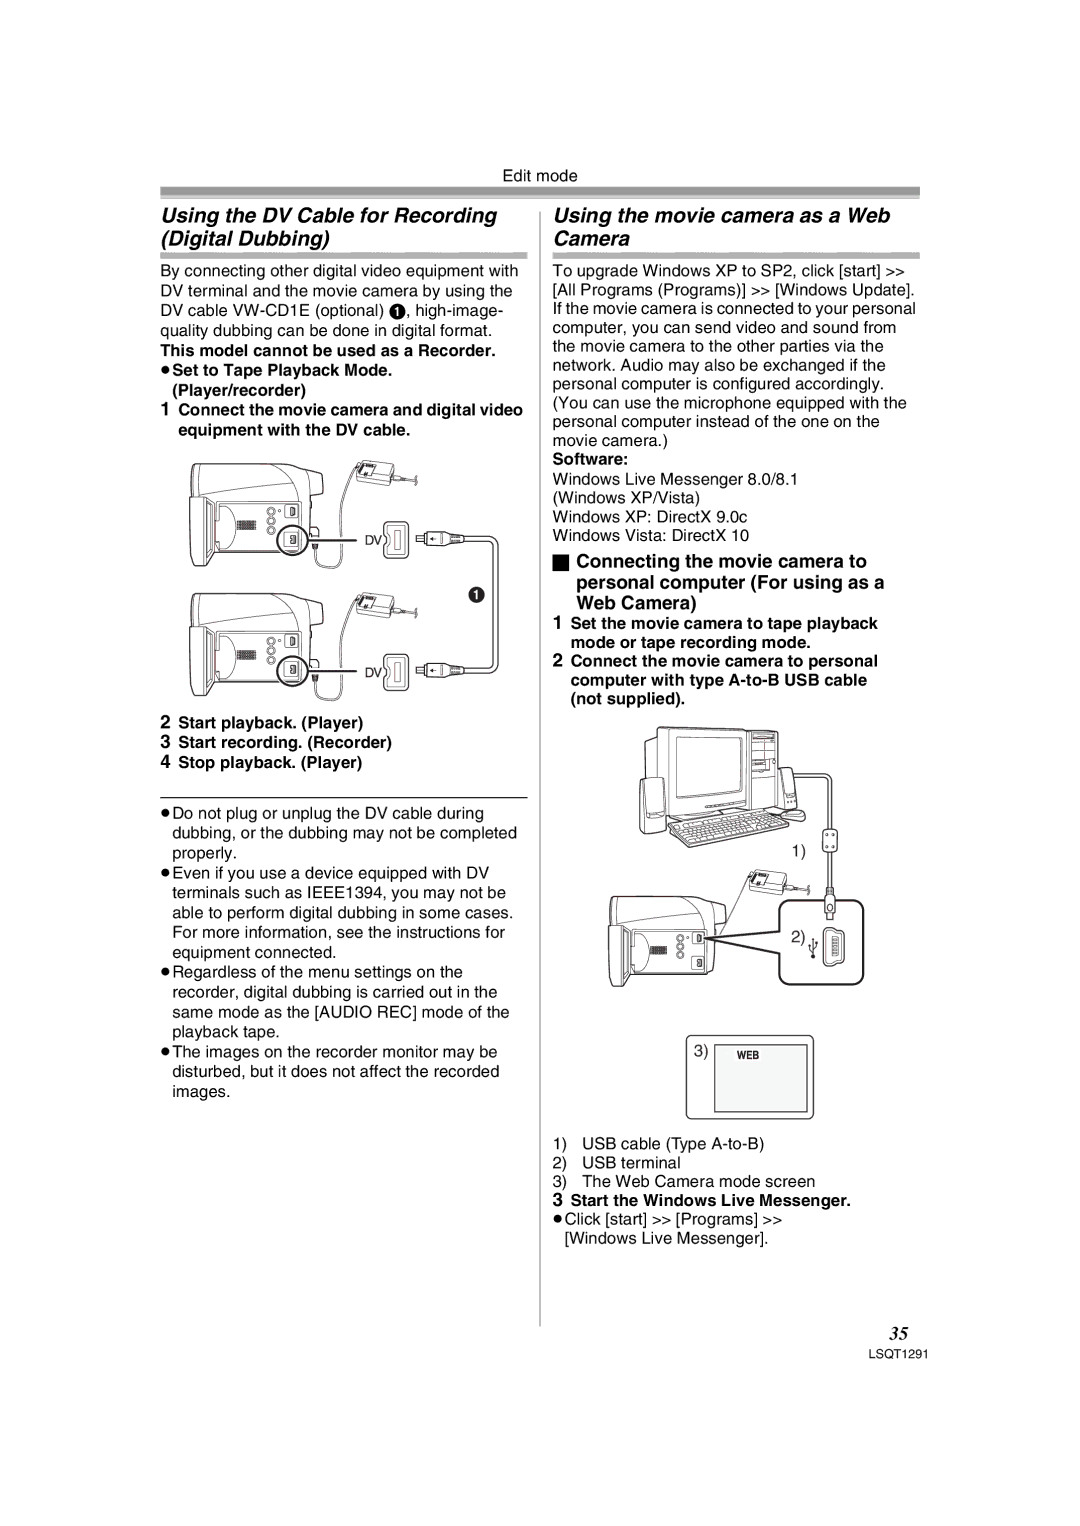
By connecting other digital video equipment with DV terminal and the movie camera by using the DV cable
This model cannot be used as a Recorder. ≥Set to Tape Playback Mode.
(Player/recorder)
1Connect the movie camera and digital video equipment with the DV cable.
1
2Start playback. (Player)
3Start recording. (Recorder)
4Stop playback. (Player)
≥Do not plug or unplug the DV cable during dubbing, or the dubbing may not be completed properly.
≥Even if you use a device equipped with DV terminals such as IEEE1394, you may not be able to perform digital dubbing in some cases. For more information, see the instructions for equipment connected.
≥Regardless of the menu settings on the recorder, digital dubbing is carried out in the same mode as the [AUDIO REC] mode of the playback tape.
≥The images on the recorder monitor may be disturbed, but it does not affect the recorded images.
Using the movie camera as a Web Camera
To upgrade Windows XP to SP2, click [start] >> [All Programs (Programs)] >> [Windows Update]. If the movie camera is connected to your personal computer, you can send video and sound from the movie camera to the other parties via the network. Audio may also be exchanged if the personal computer is configured accordingly. (You can use the microphone equipped with the personal computer instead of the one on the movie camera.)
Software:
Windows Live Messenger 8.0/8.1
(Windows XP/Vista)
Windows XP: DirectX 9.0c
Windows Vista: DirectX 10
ªConnecting the movie camera to personal computer (For using as a
Web Camera)
1Set the movie camera to tape playback mode or tape recording mode.
2Connect the movie camera to personal computer with type
1)
2)
3)
1)USB cable (Type
2)USB terminal
3)The Web Camera mode screen
3Start the Windows Live Messenger.
≥Click [start] >> [Programs] >> [Windows Live Messenger].
35
LSQT1291
