Timer Recording
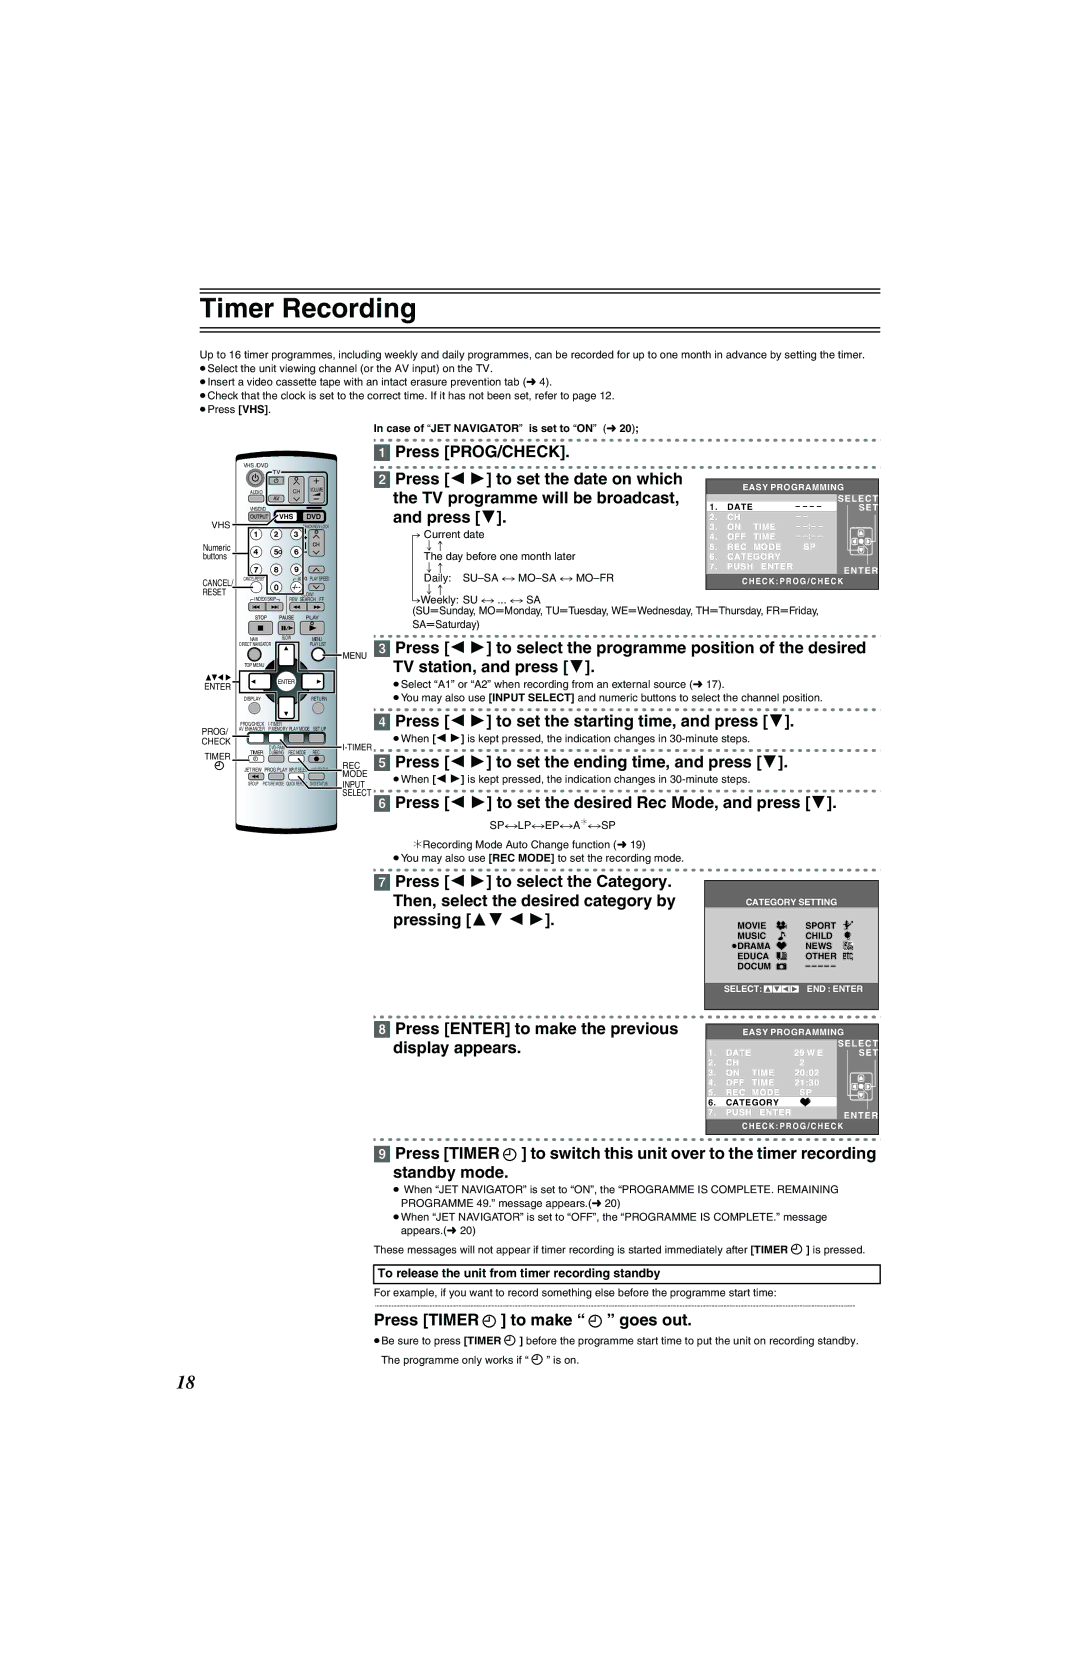
Up to 16 timer programmes, including weekly and daily programmes, can be recorded for up to one month in advance by setting the timer. ≥Select the unit viewing channel (or the AV input) on the TV.
≥Insert a video cassette tape with an intact erasure prevention tab (l 4).
≥Check that the clock is set to the correct time. If it has not been set, refer to page 12. ≥Press [VHS].
VHS /DVD
| AUDIO |
| CH | VOLUME |
|
|
| ||
|
| AV |
|
|
| VHS/DVD |
|
| |
VHS |
| VHS | DVD | |
|
| |||
Numeric |
|
|
|
|
buttons |
|
|
|
|
CANCEL/ CANCEL/RESET |
| PLAY SPEED | ||
RESET |
|
|
| |
INDEX/SKIP | SLOW/ | |||
| REW SEARCH FF | |||
|
|
| PLAY | |
| NAVI | SLOW | MENU | |
| DIRECT NAVIGATOR |
| PLAY LIST | |
| TOP MENU |
|
|
|
ENTER |
| ENTER |
| |
|
|
|
| |
| DISPLAY |
|
| RETURN |
| PROG/CHECK |
|
| |
PROG/ | AV ENHANCER | P.MEMORY PLAY MODE SET UP | ||
|
|
|
| |
CHECK |
|
|
| |
| TIMER | REC MODE | REC | |
TIMER | DUBBING | |||
|
|
|
| |
| JET REW | PROG PLAY INPUT SELECT VHS STATUS | ||
| GROUP PICTURE MODE | QUICK REPLAY DVD STATUS | ||
In case of “JET NAVIGATOR” is set to “ON” (l 20); |
|
|
|
|
|
[1] Press [PROG/CHECK]. |
|
|
|
|
|
[2] Press [2 1] to set the date on which |
|
|
|
|
|
| EASY PROGRAMMING | ||||
the TV programme will be broadcast, |
| ||||
|
|
|
| SELECT | |
1. | DATE |
| – – – – | ||
and press [4]. |
| SET | |||
2. | CH | TIME | – – |
| |
A. Current date | 3. | ON | – |
| |
4. | OFF | TIME | – |
| |
l ;: | 5. | REC MODE | SP |
| |
l The day before one month later | 6. | CATEGORY |
|
| |
l ;: | 7. | PUSH | ENTER |
| ENTER |
l Daily: |
| CHECK:PROG/CHECK | |||
l ;: |
|
|
|
|
|
|
|
|
|
| |
a.Weekly: |
|
|
|
|
|
(SUuSunday, MOuMonday, TUuTuesday, WEuWednesday, THuThursday, FRuFriday, SAuSaturday)
MENU [3] Press [2 1] to select the programme position of the desired TV station, and press [4].
≥Select “A1” or “A2” when recording from an external source (l 17).
≥You may also use [INPUT SELECT] and numeric buttons to select the channel position.
[4]Press [2 1] to set the starting time, and press [4].
≥When [2 1] is kept pressed, the indication changes in
| Press [2 1] to set the ending time, and press [4]. | |
REC | [5] | |
MODE |
| ≥When [2 1] is kept pressed, the indication changes in |
INPUT |
| |
|
| |
SELECT | [6] | Press [2 1] to set the desired Rec Mode, and press [4]. |
¢Recording Mode Auto Change function (l 19)
≥You may also use [REC MODE] to set the recording mode.
[7]Press [2 1] to select the Category.
Then, select the desired category by pressing [34 2 1].
[8]Press [ENTER] to make the previous display appears.
CATEGORY SETTING
≥MOVIE ![]() ≥SPORT
≥SPORT
≥MUSIC ≥CHILD
≥DRAMA ![]() ≥NEWS
≥NEWS
≥EDUCA ![]() ≥OTHER
≥OTHER
≥DOCUM ![]() ≥– – – – –
≥– – – – –
SELECT: ![]()
![]()
![]()
![]() END : ENTER
END : ENTER
EASY PROGRAMMING
|
|
|
| SELECT |
1. | DATE |
| 29 W E | SET |
2. | CH |
| 2 |
|
3. | ON | TIME | 20:02 |
|
4. | OFF | TIME | 21:30 |
|
5. | REC MODE | SP |
| |
6. | CATEGORY |
|
| |
7. | PUSH | ENTER |
| ENTER |
|
|
|
| |
CHECK:PROG/CHECK
[9]Press [TIMER ![]() ] to switch this unit over to the timer recording standby mode.
] to switch this unit over to the timer recording standby mode.
≥ When “JET NAVIGATOR” is set to “ON”, the “PROGRAMME IS COMPLETE. REMAINING
PROGRAMME 49.” message appears.(l 20)
≥When “JET NAVIGATOR” is set to “OFF”, the “PROGRAMME IS COMPLETE.” message appears.(l 20)
These messages will not appear if timer recording is started immediately after [TIMER ![]() ] is pressed.
] is pressed.
To release the unit from timer recording standby
For example, if you want to record something else before the programme start time:
.............................................................................................................................................................................................................................................................................................................................
Press [TIMER  ] to make “
  ” goes out.
≥Be sure to press [TIMER ![]() ] before the programme start time to put the unit on recording standby. The programme only works if “
] before the programme start time to put the unit on recording standby. The programme only works if “ ![]() ” is on.
” is on.
18
