Preparation for the remote control unit
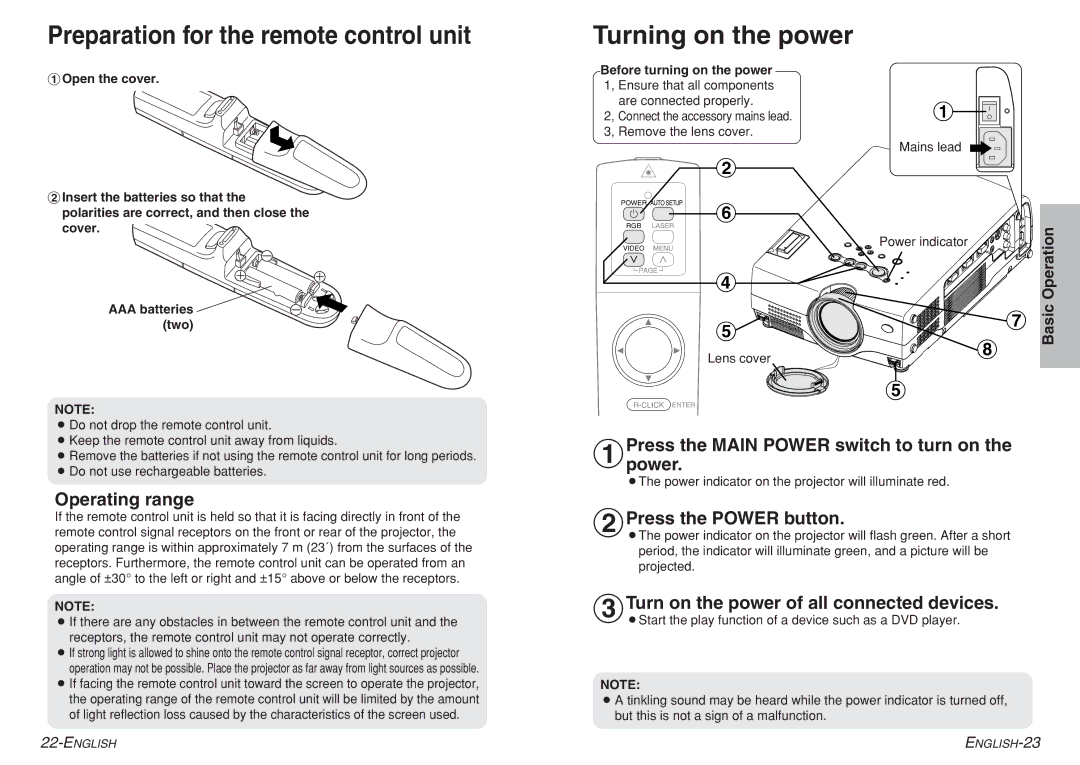
#Open the cover.
$Insert the batteries so that the polarities are correct, and then close the cover.
| -〇� |
+ | + |
〇 | |
| 〇 |
AAA batteries | 〇-� |
(two) |
|
NOTE:
Turning on the power
Before turning on the power 1, Ensure that all components are connected properly.
2, Connect the accessory mains lead. 3, Remove the lens cover.
$
POWER AUTO SETUP(
RGB LASER
VIDEO MENU
![]() PAGE
PAGE ![]()
&
'![]()
![]()
Lens cover
#![]()
![]()
![]()
Mains lead
Power indicator |
| Operation |
|
| |
| ) | Basic |
|
|
*
'
BDo not drop the remote control unit.
BKeep the remote control unit away from liquids.
BRemove the batteries if not using the remote control unit for long periods.
BDo not use rechargeable batteries.
Operating range
If the remote control unit is held so that it is facing directly in front of the remote control signal receptors on the front or rear of the projector, the operating range is within approximately 7 m (23´) from the surfaces of the receptors. Furthermore, the remote control unit can be operated from an angle of ±30° to the left or right and ±15° above or below the receptors.
NOTE:
BIf there are any obstacles in between the remote control unit and the receptors, the remote control unit may not operate correctly.
BIf strong light is allowed to shine onto the remote control signal receptor, correct projector
operation may not be possible. Place the projector as far away from light sources as possible.
BIf facing the remote control unit toward the screen to operate the projector, the operating range of the remote control unit will be limited by the amount of light reflection loss caused by the characteristics of the screen used.
#Presspower.the MAIN POWER switch to turn on the
BThe power indicator on the projector will illuminate red.
$Press the POWER button.
BThe power indicator on the projector will flash green. After a short period, the indicator will illuminate green, and a picture will be projected.
%Turn on the power of all connected devices.
BStart the play function of a device such as a DVD player.
NOTE:
BA tinkling sound may be heard while the power indicator is turned off, but this is not a sign of a malfunction.