&Press the input select button to select the input signal.
Input select | VIDEO | RGB | RGB | |
buttons |
|
| only |
|
Changing | VIDEO |
| RGB1 |
| RGB1 |
|
|
| RGB2 | ||||
|
|
|
|
| |||||||||
|
|
|
|
|
|
|
|
|
|
|
|
| |
signals |
|
|
|
|
|
|
|
|
|
|
|
|
|
|
|
|
|
|
|
|
|
|
|
|
|
| |
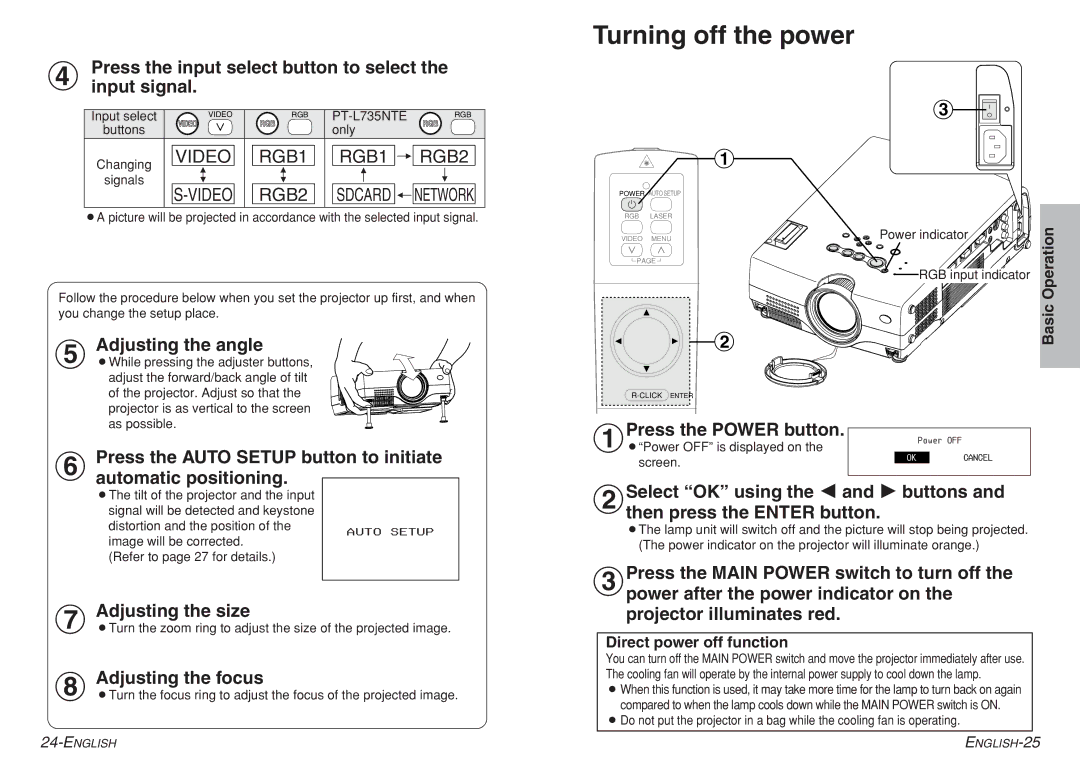
Turning off the power
%![]()
![]()
![]()
#
|
BA picture will be projected in accordance with the selected input signal.
Follow the procedure below when you set the projector up first, and when you change the setup place.
' Adjusting the angle
BWhile pressing the adjuster buttons,
adjust the forward/back angle of tilt of the projector. Adjust so that the projector is as vertical to the screen as possible.
( Press the AUTO SETUP button to initiate |
automatic positioning. |
POWER AUTO SETUP
RGB LASER
VIDEO MENU
![]() PAGE
PAGE ![]()
![]()
![]() $
$
#Press the POWER button.
B“Power OFF” is displayed on the
screen.
Power indicatorOperation RGB input indicator
Basic
Power OFF
OK | CANCEL |
BThe tilt of the projector and the input |
| |
signal will be detected and keystone |
| |
distortion and the position of the | AUTO SETUP | |
image will be corrected. | ||
| ||
(Refer to page 27 for details.) |
|
) Adjusting the size
BTurn the zoom ring to adjust the size of the projected image.
* Adjusting the focus
BTurn the focus ring to adjust the focus of the projected image.
$Select “OK” using the I and H buttons and then press the ENTER button.
BThe lamp unit will switch off and the picture will stop being projected. (The power indicator on the projector will illuminate orange.)
%Press the MAIN POWER switch to turn off the power after the power indicator on the projector illuminates red.
Direct power off function
You can turn off the MAIN POWER switch and move the projector immediately after use. The cooling fan will operate by the internal power supply to cool down the lamp.
BWhen this function is used, it may take more time for the lamp to turn back on again compared to when the lamp cools down while the MAIN POWER switch is ON.
BDo not put the projector in a bag while the cooling fan is operating.