EVF : Look into EVF and adjust VISION ADJUSTMENT to your eyesight.
4 Set REC MODE to “SP” or “SLP” in the CAMERA MODE Menu (page 13).
5 Press RECORD/PAUSE to start or pause recording.
6 Set POWER to OFF when finished.
• To remove the cassette, slide the TAPE EJECT switch (page 11).
Note:
• When Camcorder is aimed at excessively bright objects, or bright lights, a vertical bar may appear in the picture. This is normal for the CCD pick-up. Try to avoid this when possible.
• Using LCD monitor reduces battery operation time. Return LCD monitor to
locked position when not in use.
17
LCD : Adjust LCD monitor brightness level. See “To adjust LCD BRIGHT” below.
(Record/Pause mode)
EVF or LCD Monitor
• Be sure POWER is fully turned to CAMERA position.
• EVF or LCD monitor
turns on/off by the POWER switch.
• Both EVF and LCD monitor turn on when LCD is at 180° (see above left). This allows both you and the subject to view the recording.
Camera Recording
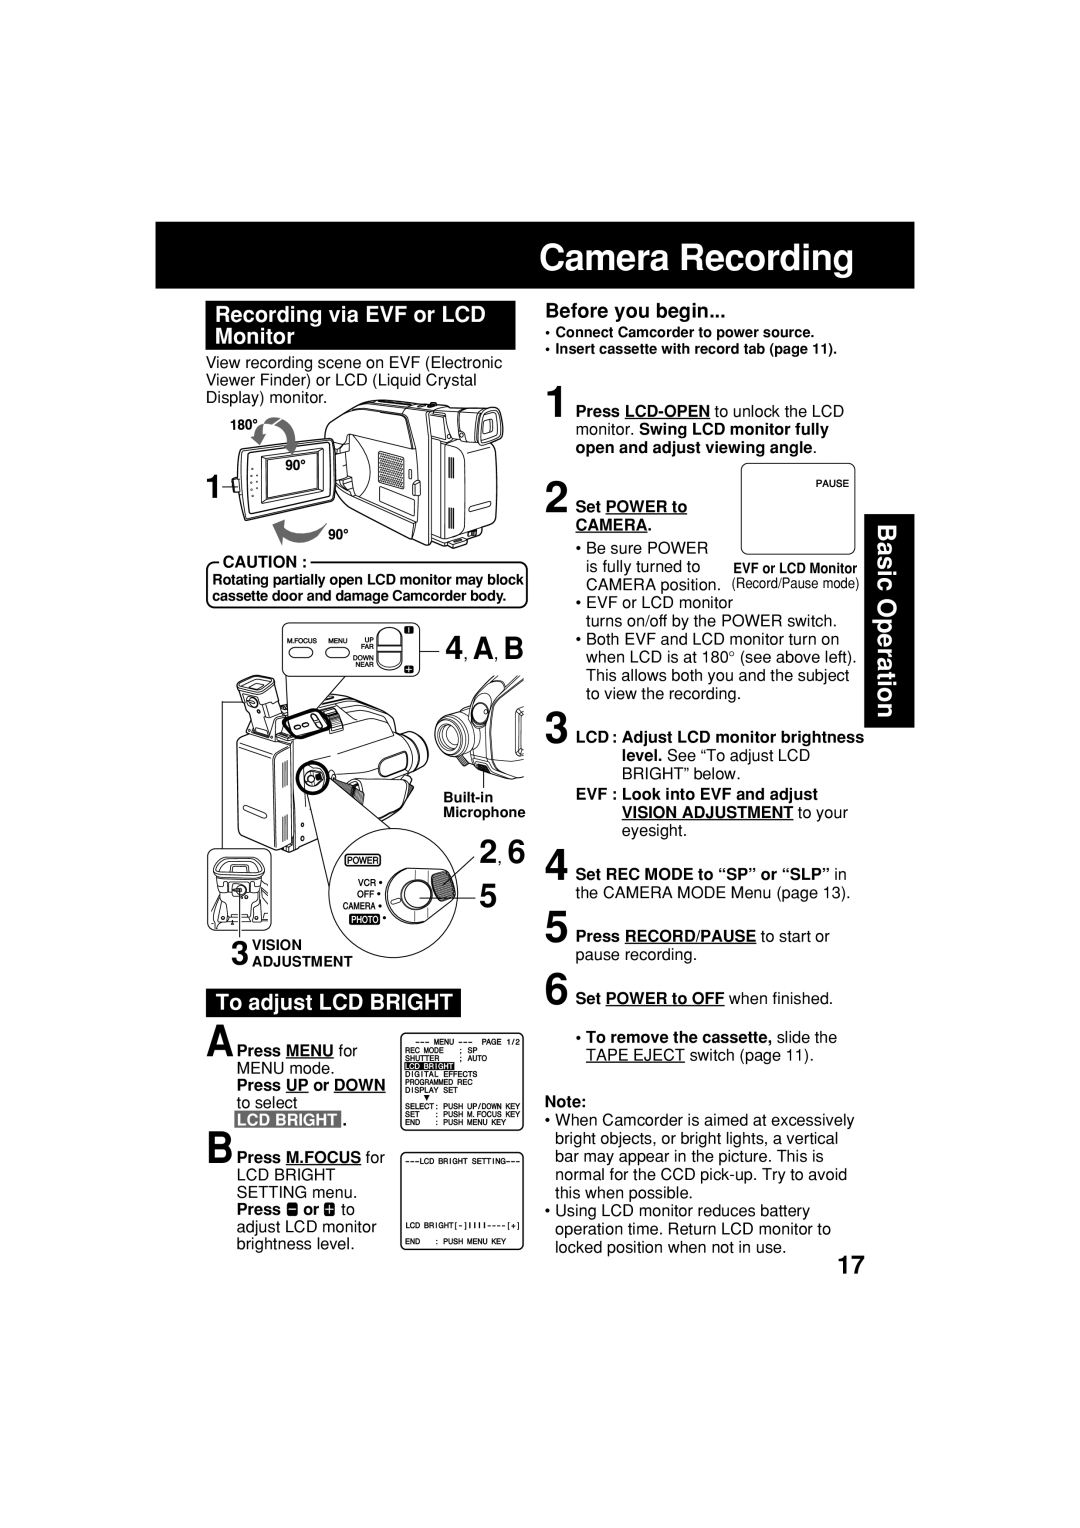
Recording via EVF or LCD Monitor
View recording scene on EVF (Electronic Viewer Finder) or LCD (Liquid Crystal Display) monitor. ![]()
![]()
1![]()

![]()
CAUTION :
Rotating partially open LCD monitor may block cassette door and damage Camcorder body.
Before you begin...
•Connect Camcorder to power source.
•Insert cassette with record tab (page 11).
1Press
2Set POWER to
CAMERA.
Basic
4, A, B
3
Microphone
2, 6
5
3VISIONADJUSTMENT
To adjust LCD BRIGHT
APress MENU for MENU mode.
Press UP or DOWN to select
LCD BRIGHT .
BPress M.FOCUS for
LCD BRIGHT SETTING menu. Press ![]() or
or ![]() to adjust LCD monitor brightness level.
to adjust LCD monitor brightness level.
Operation