PC Connection
Before you begin...
•Insert the Memory Card (optional, page 34).
•Make
•Turn your PC on.
•Set Camcorder POWER to PHOTO.
Using Memory Card Image Data
Pictures captured with your Camcorder can be transferred to your PC.
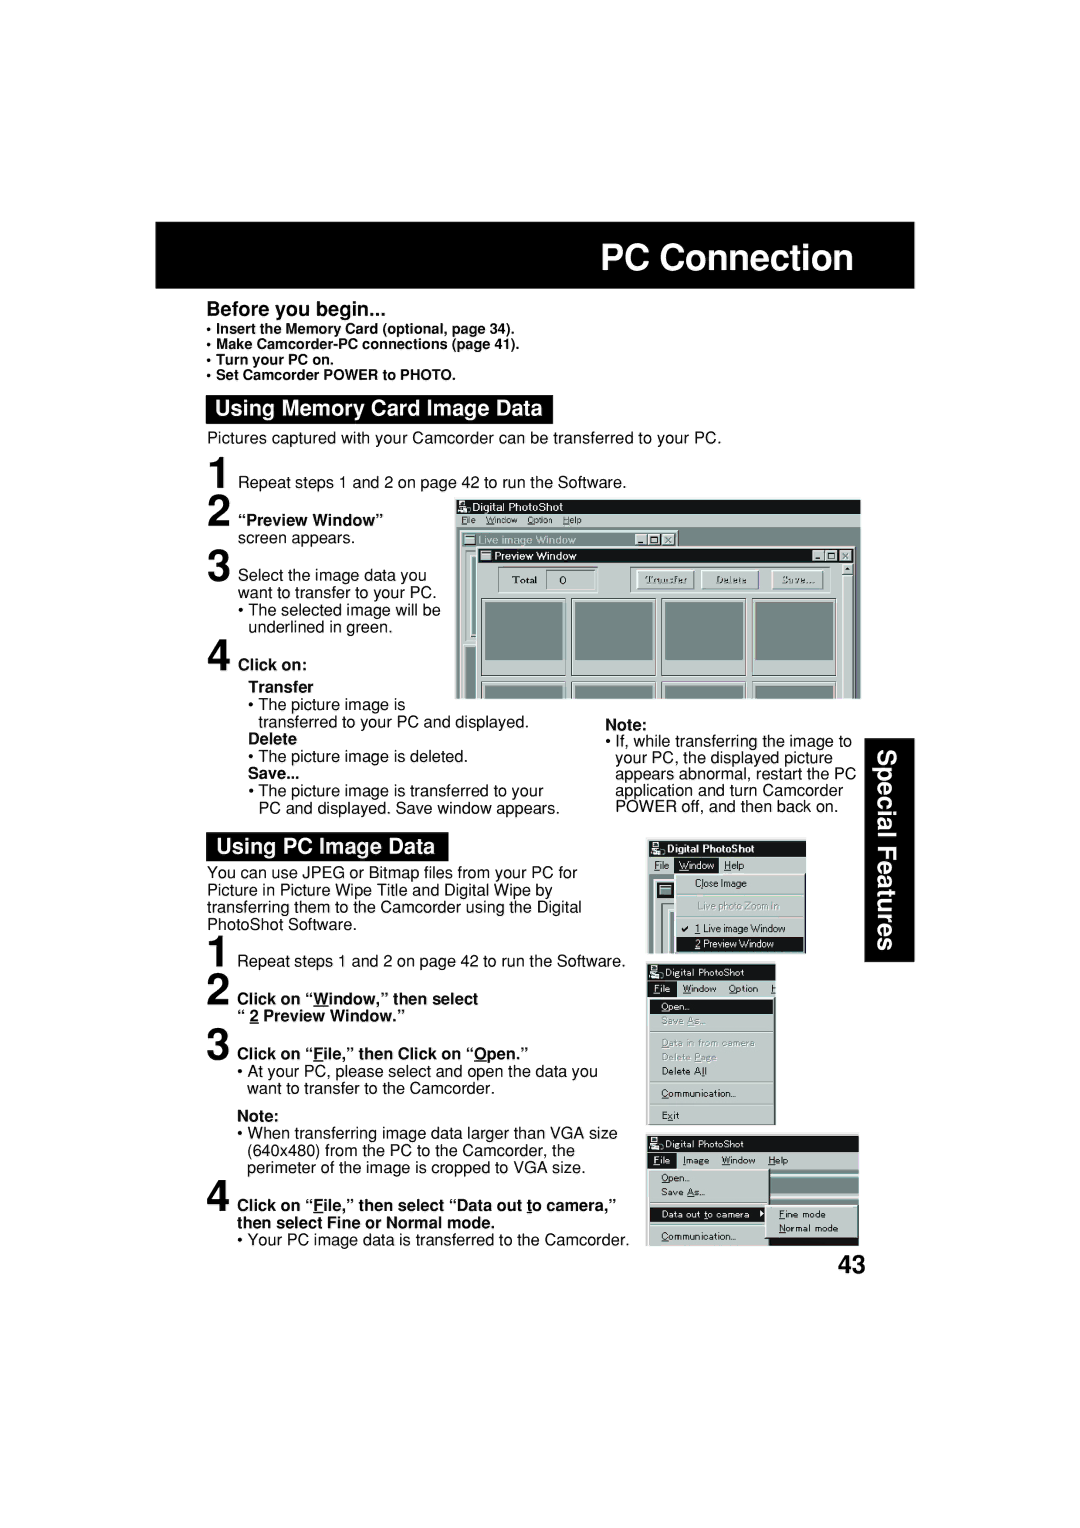
1Repeat steps 1 and 2 on page 42 to run the Software.
2“Preview Window” screen appears.
3Select the image data you want to transfer to your PC.
•The selected image will be underlined in green.
4Click on:
Transfer
•The picture image is
transferred to your PC and displayed.
Delete
•The picture image is deleted.
Save...
•The picture image is transferred to your PC and displayed. Save window appears.
Note:
•If, while transferring the image to your PC, the displayed picture appears abnormal, restart the PC application and turn Camcorder POWER off, and then back on.
Special
Using PC Image Data
You can use JPEG or Bitmap files from your PC for Picture in Picture Wipe Title and Digital Wipe by transferring them to the Camcorder using the Digital PhotoShot Software.
1Repeat steps 1 and 2 on page 42 to run the Software.
2Click on “Window,” then select “ 2 Preview Window.”
3Click on “File,” then Click on “Open.”
•At your PC, please select and open the data you want to transfer to the Camcorder.
Note:
•When transferring image data larger than VGA size (640x480) from the PC to the Camcorder, the perimeter of the image is cropped to VGA size.
4Click on “File,” then select “Data out to camera,” then select Fine or Normal mode.
• Your PC image data is transferred to the Camcorder.
Features
43