PC Connection
Digital PhotoShot Software
A live or captured image can be transferred to your PC (Personal Computer).
Before you begin...
•Turn your PC off.
•Set Camcorder POWER to OFF.
System Requirements for Digital PhotoShot
•IBM PC/AT or compatible.
•Intel Pentium Processor.
•Microsoft Windows95 or Windows98 or WindowsMe or Windows2000 or WindowsXP.
•RAM: 16 MB or more.
•2 MB of available
•256 color monitor (full color recommended).
•3.5 inch 1.44 MB floppy disk drive (for installation).
•
An adaptor
•Mouse or other pointing device.
PC-Camcorder Connection
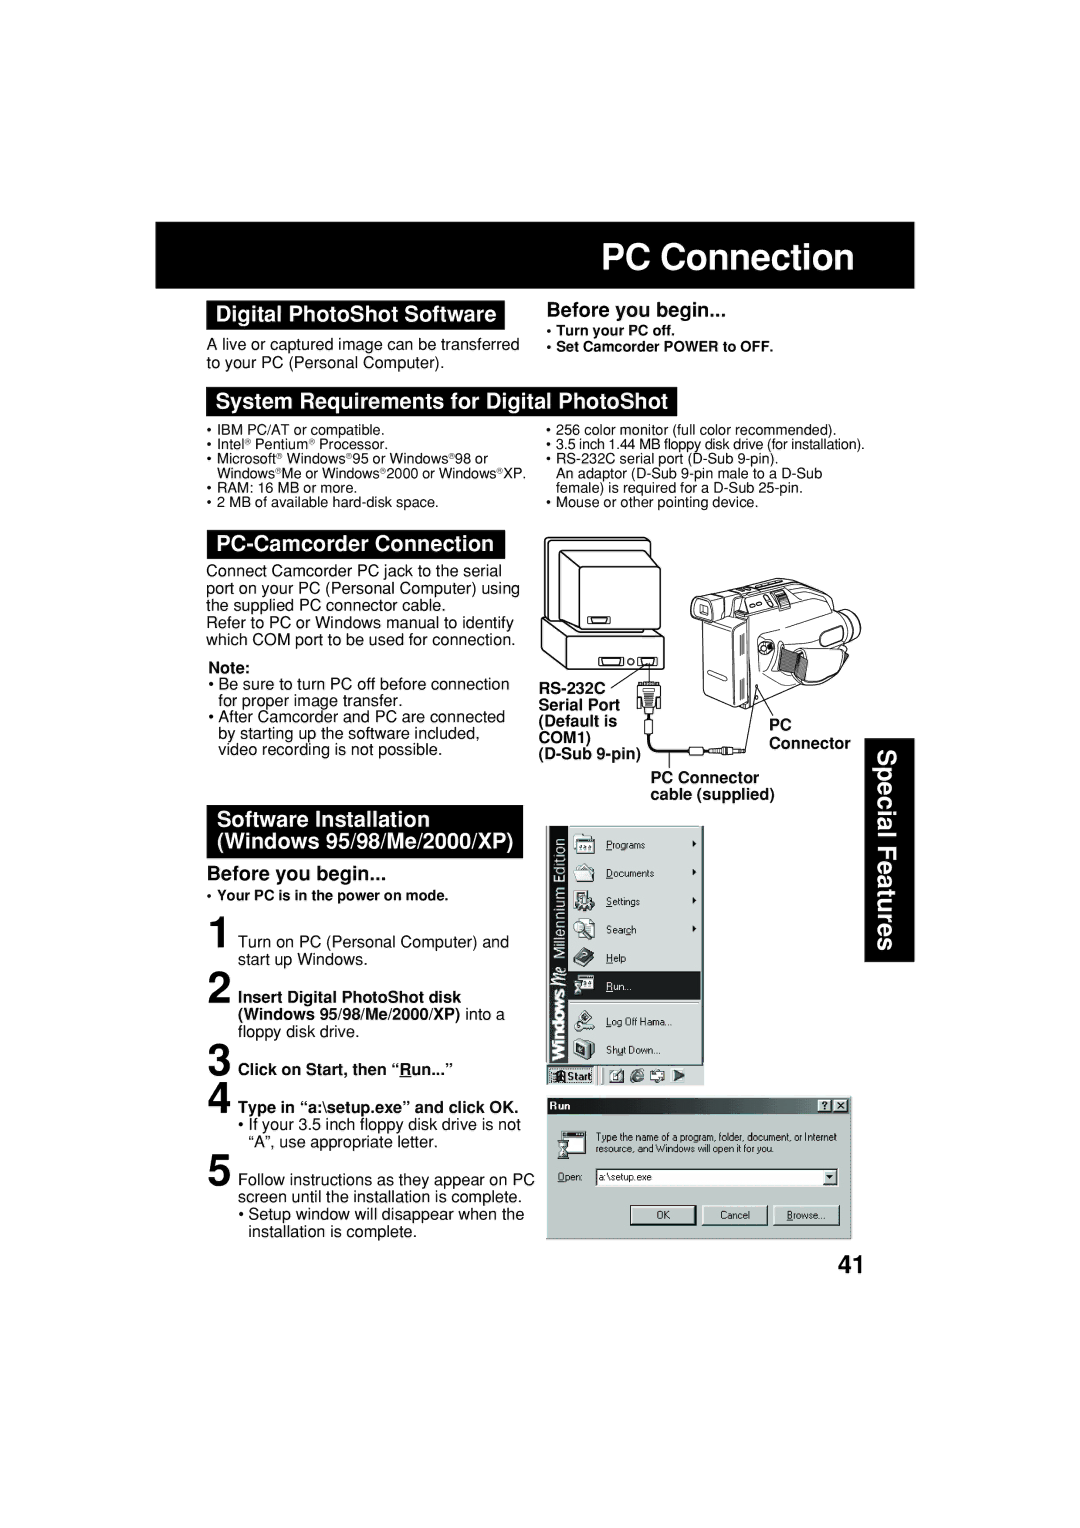
Connect Camcorder PC jack to the serial port on your PC (Personal Computer) using the supplied PC connector cable.
Refer to PC or Windows manual to identify which COM port to be used for connection.
Note:
•Be sure to turn PC off before connection for proper image transfer.
•After Camcorder and PC are connected by starting up the software included, video recording is not possible.
![]() Serial Port
Serial Port ![]() (Default is
(Default is ![]() COM1)
COM1) ![]()
PC Connector
PC Connector cable (supplied)
Software Installation (Windows 95/98/Me/2000/XP)
Before you begin...
•Your PC is in the power on mode.
1 Turn on PC (Personal Computer) and start up Windows.
2Insert Digital PhotoShot disk (Windows 95/98/Me/2000/XP) into a floppy disk drive.
3Click on Start, then “Run...”
4Type in “a:\setup.exe” and click OK.
•If your 3.5 inch floppy disk drive is not “A”, use appropriate letter.
5Follow instructions as they appear on PC screen until the installation is complete.
•Setup window will disappear when the installation is complete.
Special Features
41