Panasonic SA-BTX70 warranty Basic operations, Adjusting speaker level during play, Status messages

Models: SC-BTX70 SA-BTX70

1 56
Download 56 pages 42.5 Kb
Page 18
Image 18
Basic operations

Basic operations

STATUS

Status messages


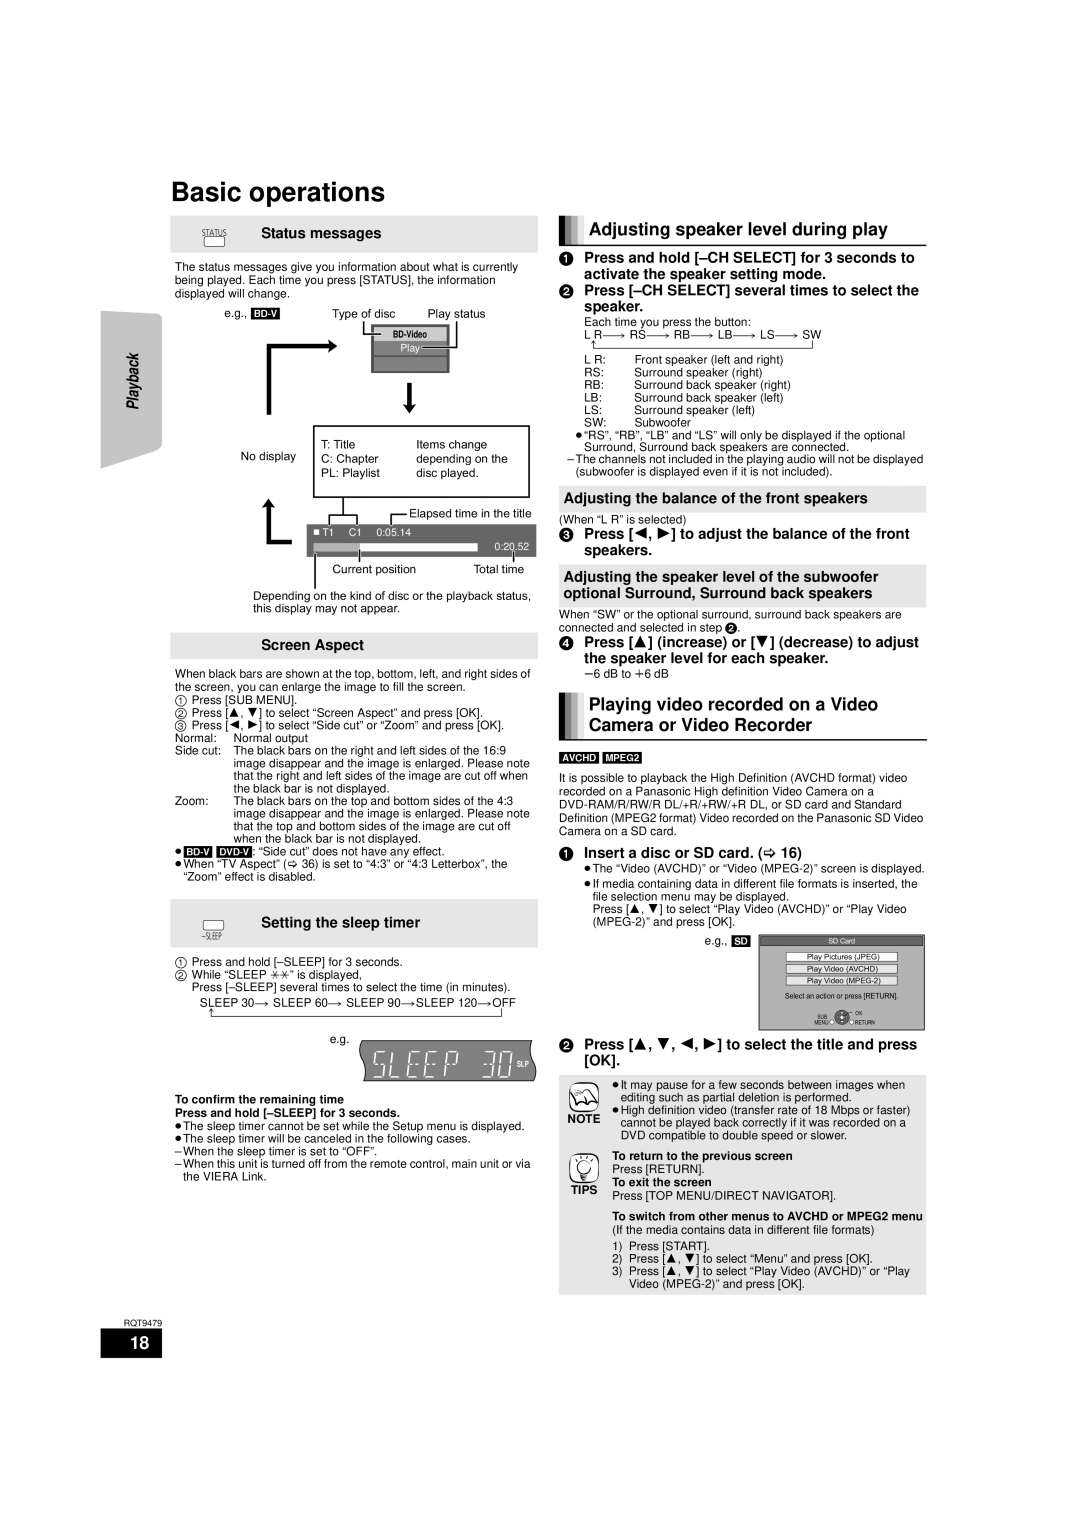
The status messages give you information about what is currently being played. Each time you press [STATUS], the information displayed will change.

e.g., [BD-V]

Type of disc

Play status


BD-Video


Status messages Adjusting speaker level during play Adjusting speaker level during play

1Press and hold [–CH SELECT] for 3 seconds to activate the speaker setting mode.

2Press [–CH SELECT] several times to select the

speaker.

Each time you press the button:

L R—) RS_) RB_) LB_) LS_) SW

Playback

No display

Play

T: Title


Items change


C: Chapter


depending on the


PL: Playlist


disc played.


Elapsed time in the title


^""""""""""""""""""""""""b

L R:

Front speaker (left and right)

RS:

Surround speaker (right)

RB:

Surround back speaker (right)

LB:

Surround back speaker (left)

LS:

Surround speaker (left)

SW:

Subwoofer

≥“RS”, “RB”, “LB” and “LS” will only be displayed if the optional Surround, Surround back speakers are connected.

The channels not included in the playing audio will not be displayed (subwoofer is displayed even if it is not included).

Adjusting the balance of the front speakers

(When “L R” is selected)

T1 C1 0:05.14

0:20.52

Current position

Total time

Depending on the kind of disc or the playback status, this display may not appear.

Screen Aspect

When black bars are shown at the top, bottom, left, and right sides of the screen, you can enlarge the image to fill the screen.

1Press [SUB MENU].

2Press [3, 4] to select “Screen Aspect” and press [OK].

3 Press [2, 1] to select “Side cut” or “Zoom” and press [OK]. Normal: Normal output

Side cut: The black bars on the right and left sides of the 16:9 image disappear and the image is enlarged. Please note that the right and left sides of the image are cut off when

the black bar is not displayed.

Zoom: The black bars on the top and bottom sides of the 4:3 image disappear and the image is enlarged. Please note that the top and bottom sides of the image are cut off when the black bar is not displayed.

[BD-V][DVD-V]: “Side cut” does not have any effect.

≥When “TV Aspect” (> 36) is set to “4:3” or “4:3 Letterbox”, the “Zoom” effect is disabled.

Setting the sleep timer

-SLEEP

1Press and hold [–SLEEP] for 3 seconds.

2 While “SLEEP ££” is displayed,

Press [–SLEEP] several times to select the time (in minutes).

SLEEP 30 ) SLEEP 60 ) SLEEP 90 )SLEEP 120 )OFF ^""""""""""""""""""""""""""""""""b

e.g.

2Press [–CH SELECT] several times to select thespeaker.Adjusting the balance of the front speakersScreen AspectSetting the sleep timer4Press [3] (increase) or [4] (decrease) to adjustthe speaker level for each speaker.1Insert a disc or SD card. (> 16)Manual backgroundManual backgroundManual backgroundManual background SLP

To confirm the remaining time

Press and hold [–SLEEP] for 3 seconds.

≥The sleep timer cannot be set while the Setup menu is displayed. ≥The sleep timer will be canceled in the following cases.

When the sleep timer is set to “OFF”.

When this unit is turned off from the remote control, main unit or via the VIERA Link.

RQT9479

18

3Press [2, 1] to adjust the balance of the front speakers.

Adjusting the speaker level of the subwoofer optional Surround, Surround back speakers

When “SW” or the optional surround, surround back speakers are connected and selected in step 2.

4Press [3] (increase) or [4] (decrease) to adjust

the speaker level for each speaker.

s6 dB to r6 dB

Playing video recorded on a Video Camera or Video Recorder

[AVCHD] [MPEG2]

It is possible to playback the High Definition (AVCHD format) video recorded on a Panasonic High definition Video Camera on a DVD-RAM/R/RW/R DL/+R/+RW/+R DL, or SD card and Standard Definition (MPEG2 format) Video recorded on the Panasonic SD Video Camera on a SD card.

1Insert a disc or SD card. (> 16)

≥The “Video (AVCHD)” or “Video (MPEG-2)” screen is displayed.

≥If media containing data in different file formats is inserted, the file selection menu may be displayed.

Press [3, 4] to select “Play Video (AVCHD)” or “Play Video (MPEG-2)” and press [OK].

e.g., [SD]

SD Card

Play Pictures (JPEG)

Play Video (AVCHD)

Play Video (MPEG-2)

Select an action or press [RETURN].

SUB

OK

MENU

RETURN

2Press [3, 4, 2, 1] to select the title and press [OK].

≥It may pause for a few seconds between images when

editing such as partial deletion is performed.

≥High definition video (transfer rate of 18 Mbps or faster) NOTE cannot be played back correctly if it was recorded on a

DVD compatible to double speed or slower.


To return to the previous screen


Press [RETURN].

TIPS

To exit the screen

Press [TOP MENU/DIRECT NAVIGATOR].


To switch from other menus to AVCHD or MPEG2 menu

(If the media contains data in different file formats)

1)Press [START].

2)Press [3, 4] to select “Menu” and press [OK].

3)Press [3, 4] to select “Play Video (AVCHD)” or “Play Video (MPEG-2)” and press [OK].

Page 18
Image 18
Panasonic SA-BTX70, SC-BTX70 warranty Basic operations, Adjusting speaker level during play, Status messages, Screen Aspect