“iPod_Dock” (Using Lightning connector):
•Make sure that the iPod/iPhone is fully inserted and its back is resting against the cushion pad.
•Make sure to remove the iPod/iPhone from its case.
•Make sure to align your iPod/iPhone with the connector when inserting.
“iPod_Port”:
•Use the dedicated USB cable (not supplied) for iPod/ iPhone/iPad.
•Insert the USB device directly. Do not use any USB extension cable.
•Before removing the USB device, select a source other than “USB”.
Disc tray:
• Remove the CD only after it stops rotating.
Charging an iPod/iPhone/iPad
Charging starts when an iPod/iPhone/iPad is connected to this system.
•During standby mode, charging will not start from the “iPod_Port” connection, however it will start as usual from the “iPod_Dock” connection.
-To charge from the “iPod_Port” connection, start the charging before turning this unit to standby mode.
•See the iPod/iPhone/iPad display for its battery charging status.
•Disconnect the iPod/iPhone/iPad if it is not used for an extended period of time after charging is complete.
•Charging stops when the battery is fully charged. The battery will deplete naturally.
Media information
•Please be aware that Panasonic accepts no responsibility for the loss of data and/or information.
Compatible iPod/iPhone/iPad
Compatible with “iPod_Dock” connection (Using Lightning connector)
iPhone 5
iPod touch (5th generation)
iPod nano (7th generation)
VQT5J68
6
Compatible with “iPod_Port” connection [Using dedicated USB cable (not supplied)]
iPhone 5 / iPhone 4S / iPhone 4 / iPhone 3GS / iPhone 3G / iPhone
iPad (3rd, and 4th generation) / iPad 2 / iPad / iPad mini
iPod touch
1st, 2nd, 3rd, 4th, and 5th generation
iPod nano
2nd, 3rd, 4th, 5th, 6th, and 7th generation
(as of January 2013)
Note:
•Compatibility depends on the software version. Update your iPod/iPhone/iPad to the latest software before using it with this unit.
•Read the User Guide of the iPod/iPhone/iPad for the operating instructions.
Compatible USB devices
• USB devices that support
Note:
•Files are defined as tracks and folders are defined as albums.
•Track must have the extension “.mp3”, “.MP3”, “.flac” or “.FLAC”.
•This system can access up to:
-255 albums (including root folder)
-2500 tracks
-999 tracks in one album
•CBI (Control/Bulk/Interrupt) is not supported.
•Some files can fail to work because of the sector size.
•NTFS file system is not supported (only FAT16/FAT32 file system is supported).
Compatible CD
•This system can play
•Disc must conform to ISO9660 level 1 or 2 (except for extended formats).
Note:
•Some
•MP3 files are defined as tracks and folders are defined as albums.
•This system can access up to:
-
-MP3: 999 tracks, 255 albums (including root folder) and 20 sessions
•Recordings will not necessarily be played in the order you recorded them.
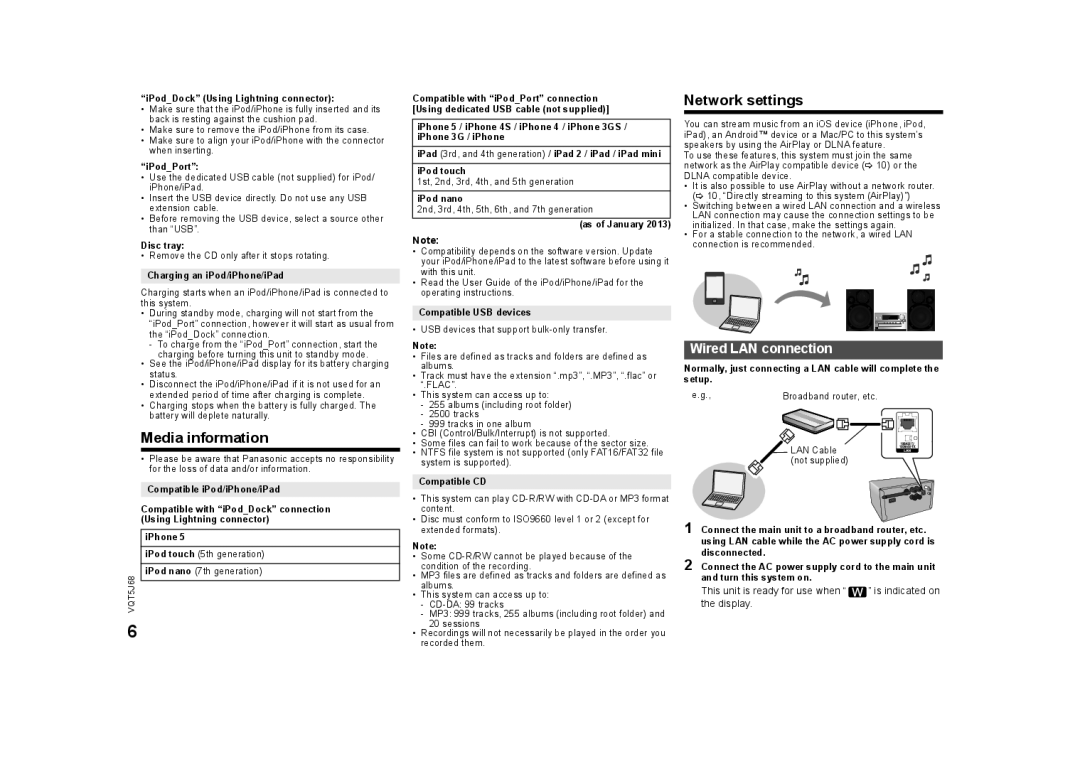
Network settings
You can stream music from an iOS device (iPhone, iPod, iPad), an Android™ device or a Mac/PC to this system’s speakers by using the AirPlay or DLNA feature.
To use these features, this system must join the same network as the AirPlay compatible device (> 10) or the DLNA compatible device.
•It is also possible to use AirPlay without a network router. (> 10, “Directly streaming to this system (AirPlay)”)
•Switching between a wired LAN connection and a wireless LAN connection may cause the connection settings to be initialized. In that case, make the settings again.
•For a stable connection to the network, a wired LAN connection is recommended.
Wired LAN connection
Normally, just connecting a LAN cable will complete the setup.
e.g., | Broadband router, etc. |
| LAN Cable |
| (not supplied) |
1 Connect the main unit to a broadband router, etc. using LAN cable while the AC power supply cord is disconnected.
2 Connect the AC power supply cord to the main unit and turn this system on.
This unit is ready for use when “ ![]() ” is indicated on the display.
” is indicated on the display.