Using Auto Recording Function
When the input signal is detected, the recording starts automatically.
1 Connect the SD Multi AV Device with the external device. (l 38)
≥Always use the AC adaptor. This function does not work with the battery alone.
2 Set up the external device such as timer setting.
3 Confirm that the image or sound signal is not output.
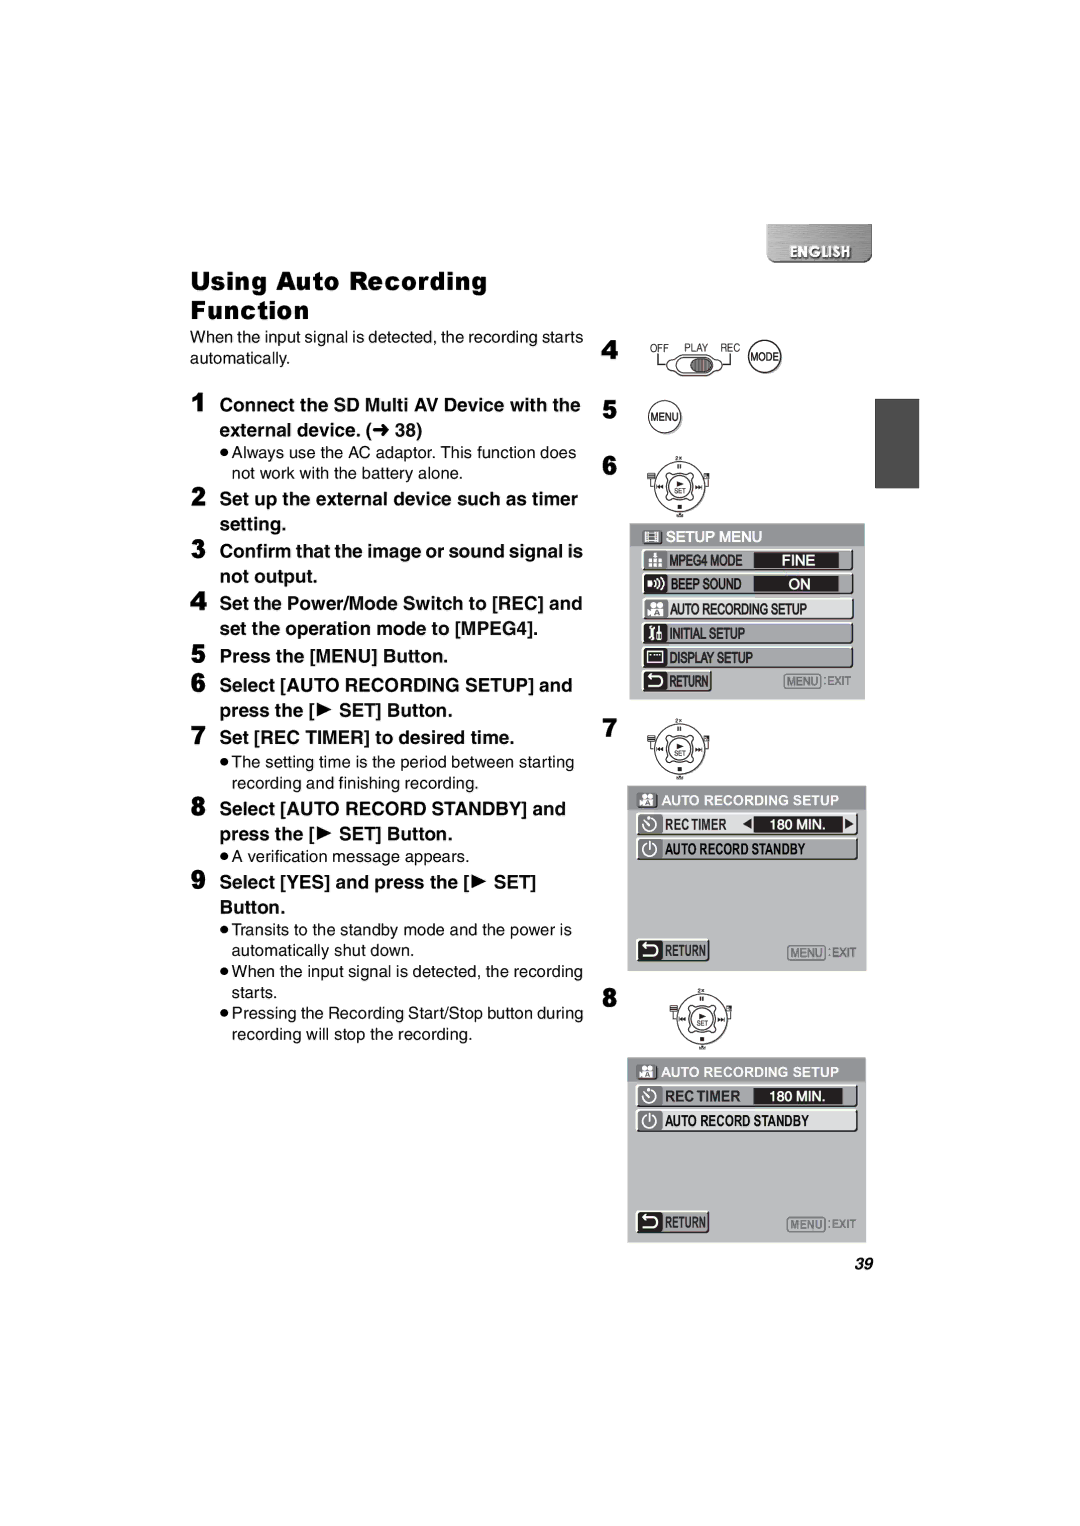
4 Set the Power/Mode Switch to [REC] and set the operation mode to [MPEG4].
5 Press the [MENU] Button.
6 Select [AUTO RECORDING SETUP] and press the [1 SET] Button.
7 Set [REC TIMER] to desired time.
≥The setting time is the period between starting recording and finishing recording.
8 Select [AUTO RECORD STANDBY] and press the [1 SET] Button.
≥A verification message appears.
9 Select [YES] and press the [1 SET]
Button.
≥Transits to the standby mode and the power is automatically shut down.
≥When the input signal is detected, the recording starts.
≥Pressing the Recording Start/Stop button during recording will stop the recording.
4
5
6
7
OFF PLAY REC
MODE
MENU
SETUP MENU |
|
MPEG4 MODE | FINE |
BEEP SOUND | ON |
AUTO RECORDING SETUP | |
INITIAL SETUP |
|
DISPLAY SETUP |
|
RETURN | MENU EXIT |
![]() AUTO RECORDING SETUP
AUTO RECORDING SETUP
REC TIMER | 180 MIN. |
AUTO RECORD STANDBY | |
RETURN | MENU EXIT |
8
![]() AUTO RECORDING SETUP
AUTO RECORDING SETUP
REC TIMER | 180 MIN. |
AUTO RECORD STANDBY | |
RETURN | MENU EXIT |
39