■Scene Select Settings
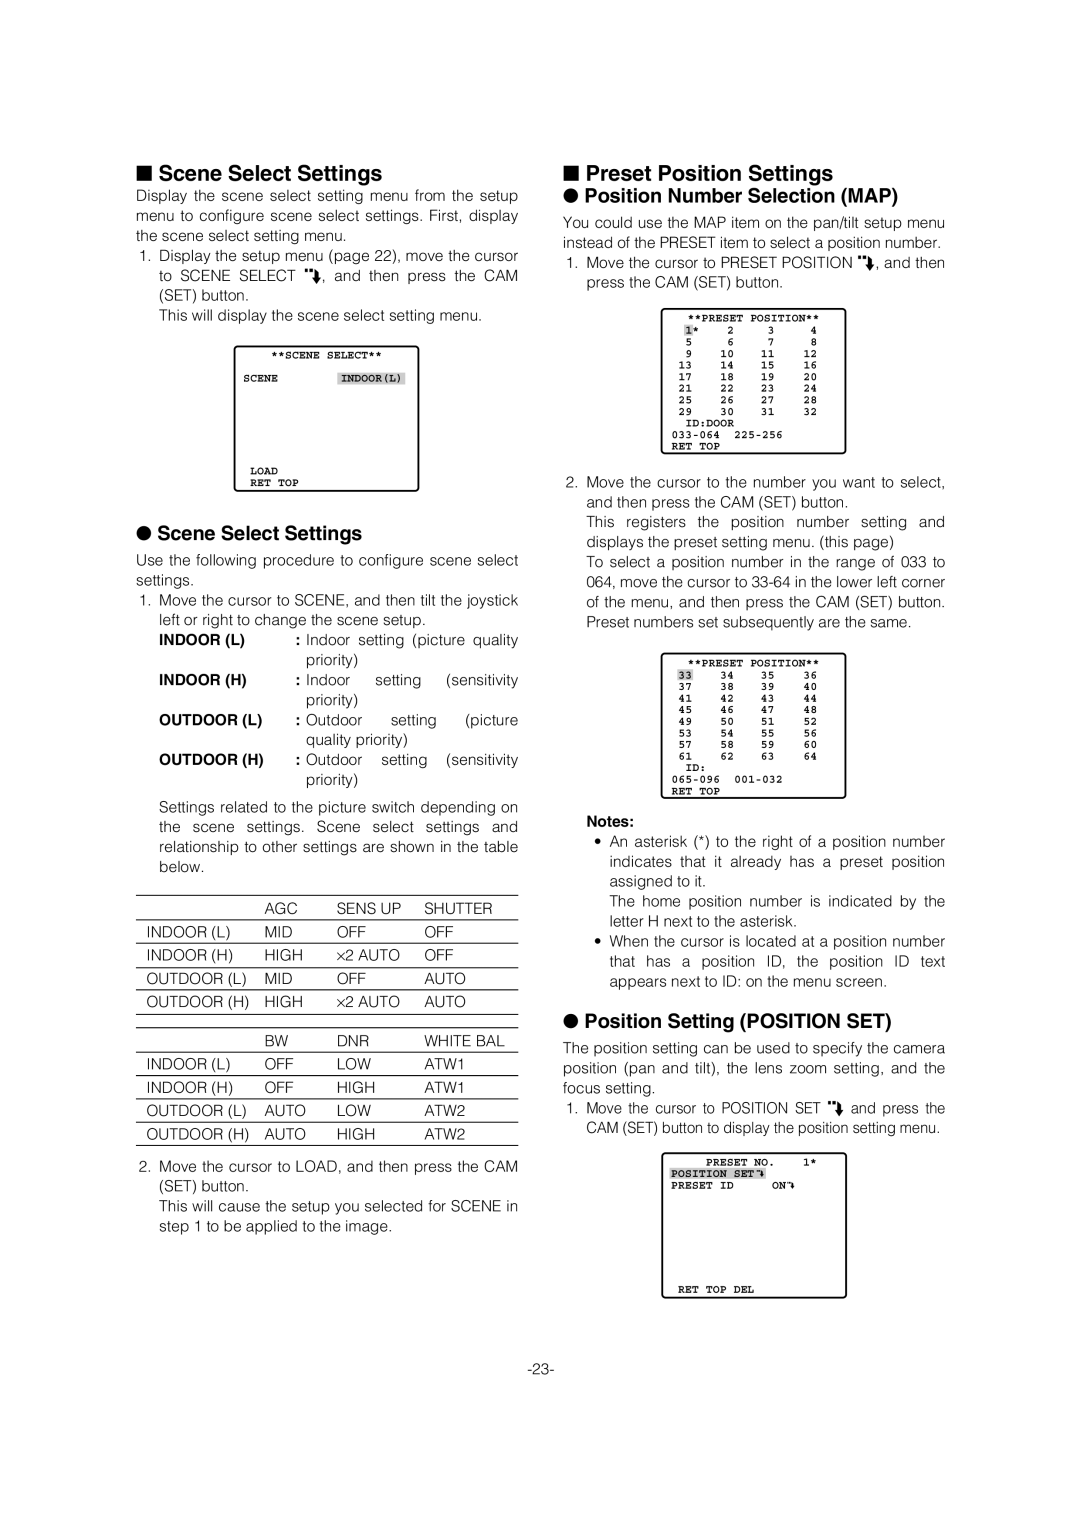
Display the scene select setting menu from the setup menu to configure scene select settings. First, display the scene select setting menu.
1.Display the setup menu (page 22), move the cursor to SCENE SELECT O, and then press the CAM (SET) button.
This will display the scene select setting menu.
**SCENE SELECT**
SCENE INDOOR(L)
LOAD
RET TOP
●Scene Select Settings
Use the following procedure to configure scene select settings.
1.Move the cursor to SCENE, and then tilt the joystick left or right to change the scene setup.
INDOOR (L) : Indoor setting (picture quality
| priority) |
|
|
INDOOR (H) | : Indoor | setting | (sensitivity |
| priority) |
|
|
OUTDOOR (L) | : Outdoor | setting | (picture |
| quality priority) |
| |
OUTDOOR (H) | : Outdoor | setting | (sensitivity |
| priority) |
|
|
Settings related to the picture switch depending on the scene settings. Scene select settings and relationship to other settings are shown in the table below.
| AGC | SENS UP | SHUTTER |
INDOOR (L) | MID | OFF | OFF |
INDOOR (H) | HIGH | ⋅2 AUTO | OFF |
|
|
|
|
OUTDOOR (L) | MID | OFF | AUTO |
|
|
|
|
OUTDOOR (H) | HIGH | ⋅2 AUTO | AUTO |
|
|
|
|
|
|
|
|
| BW | DNR | WHITE BAL |
INDOOR (L) | OFF | LOW | ATW1 |
|
|
|
|
INDOOR (H) | OFF | HIGH | ATW1 |
|
|
|
|
OUTDOOR (L) | AUTO | LOW | ATW2 |
|
|
|
|
OUTDOOR (H) | AUTO | HIGH | ATW2 |
|
|
|
|
2.Move the cursor to LOAD, and then press the CAM (SET) button.
This will cause the setup you selected for SCENE in step 1 to be applied to the image.
■Preset Position Settings
●Position Number Selection (MAP)
You could use the MAP item on the pan/tilt setup menu instead of the PRESET item to select a position number.
1.Move the cursor to PRESET POSITION O, and then press the CAM (SET) button.
**PRESET POSITION**
| 1 | * | 2 | 3 | 4 |
5 |
| 6 | 7 | 8 | |
9 |
| 10 | 11 | 12 | |
13 |
| 14 | 15 | 16 | |
17 |
| 18 | 19 | 20 | |
21 |
| 22 | 23 | 24 | |
25 |
| 26 | 27 | 28 | |
29 |
| 30 | 31 | 32 | |
ID:DOOR
RET TOP
2.Move the cursor to the number you want to select, and then press the CAM (SET) button.
This registers the position number setting and displays the preset setting menu. (this page)
To select a position number in the range of 033 to 064, move the cursor to
**PRESET POSITION**
33 |
| 34 | 35 | 36 |
37 |
| 38 | 39 | 40 |
41 |
| 42 | 43 | 44 |
45 |
| 46 | 47 | 48 |
49 |
| 50 | 51 | 52 |
53 |
| 54 | 55 | 56 |
57 |
| 58 | 59 | 60 |
61 |
| 62 | 63 | 64 |
ID: |
|
|
| |
RET TOP
Notes:
•An asterisk (*) to the right of a position number indicates that it already has a preset position assigned to it.
The home position number is indicated by the letter H next to the asterisk.
•When the cursor is located at a position number that has a position ID, the position ID text appears next to ID: on the menu screen.
●Position Setting (POSITION SET)
The position setting can be used to specify the camera position (pan and tilt), the lens zoom setting, and the focus setting.
1.Move the cursor to POSITION SET O and press the CAM (SET) button to display the position setting menu.
PRESET NO. 1*
POSITION SET ![]()
PRESET ID | ON |
RET TOP DEL
