Initialize the camera
Use the INITIAL SET switch to reset the settings of the camera to the default.
IMPORTANT:
•The settings including the network settings will be initialized. Note that the preset position settings and the CRT key
(SSL encryption key) used for the HTTPS protocol will not be initialized.
Step 1
Pull out the
Step 2
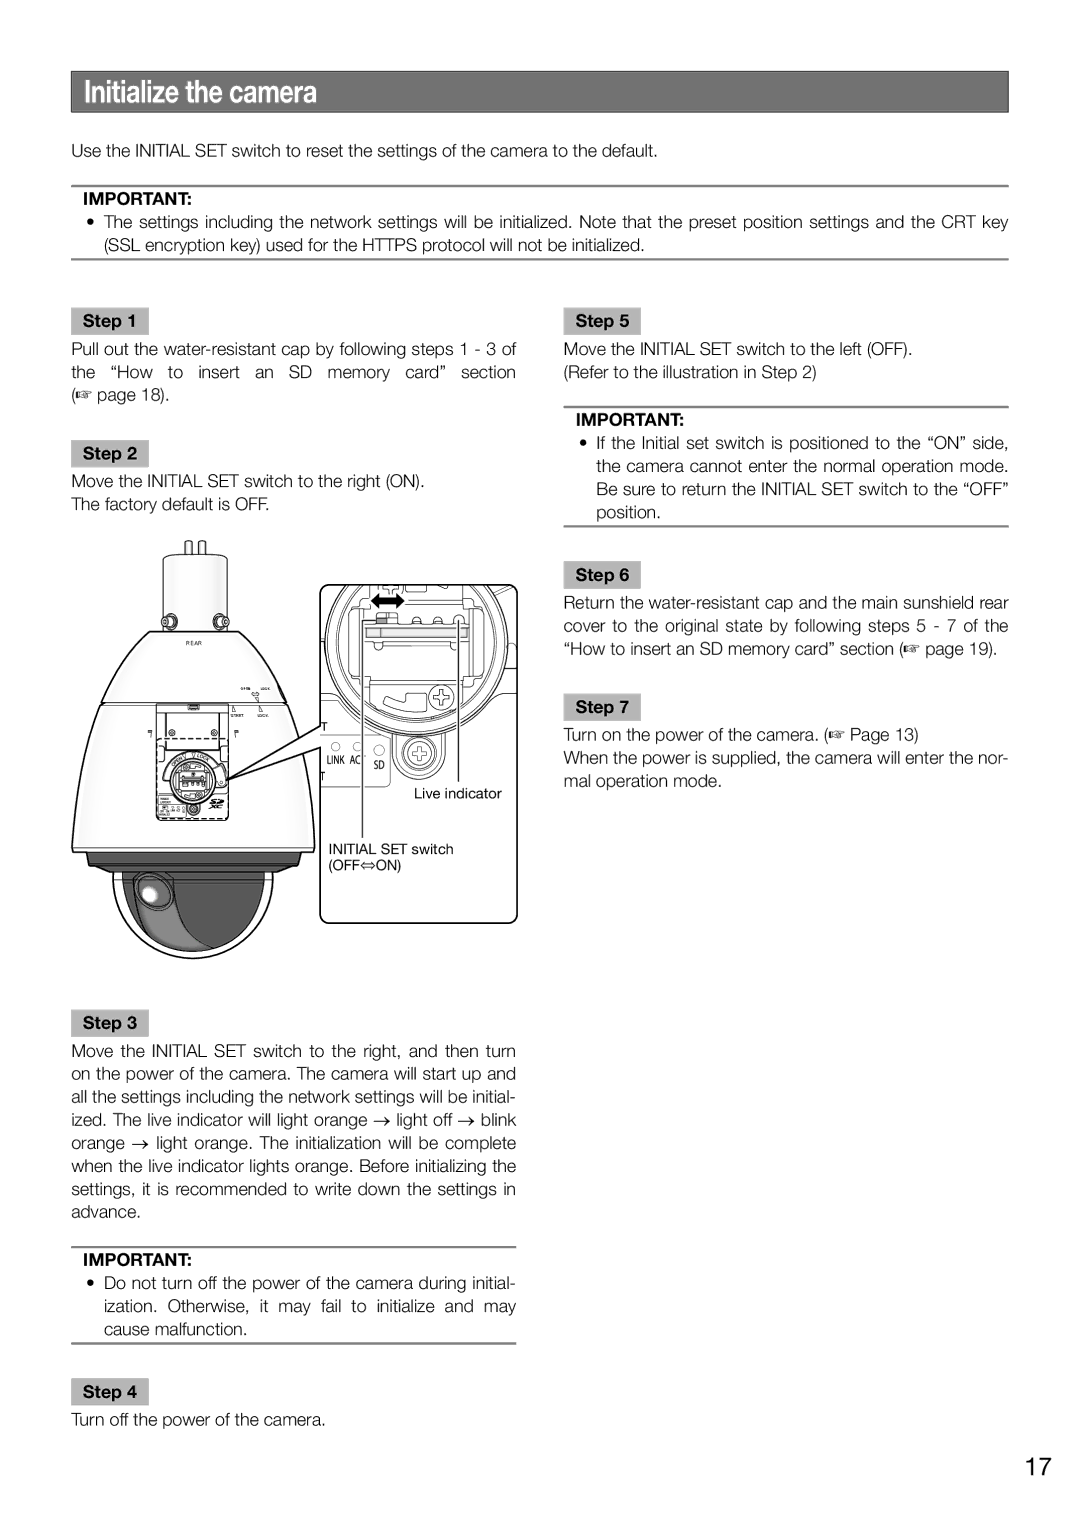
Move the INITIAL SET switch to the right (ON). The factory default is OFF.
Step 5
Move the INITIAL SET switch to the left (OFF). (Refer to the illustration in Step 2)
IMPORTANT:
•If the Initial set switch is positioned to the “ON” side, the camera cannot enter the normal operation mode. Be sure to return the INITIAL SET switch to the “OFF” position.
Step 6
REAR
OPEN LOCK
START LOCK
Live indicator |
INITIAL SET switch (OFFON)
Return the
Step 7
Turn on the power of the camera. (☞ Page 13)
When the power is supplied, the camera will enter the nor- mal operation mode.
Step 3
Move the INITIAL SET switch to the right, and then turn on the power of the camera. The camera will start up and all the settings including the network settings will be initial- ized. The live indicator will light orange → light off → blink orange → light orange. The initialization will be complete when the live indicator lights orange. Before initializing the settings, it is recommended to write down the settings in advance.
IMPORTANT:
•Do not turn off the power of the camera during initial- ization. Otherwise, it may fail to initialize and may cause malfunction.
Step 4
Turn off the power of the camera.
17
