Step 1 9
A.LOOSELY assemble two
(NOTE: THIS CONNECTIONWILL BE TIGHTENED AFTER THE CABLE HAS BEEN ROUTED)
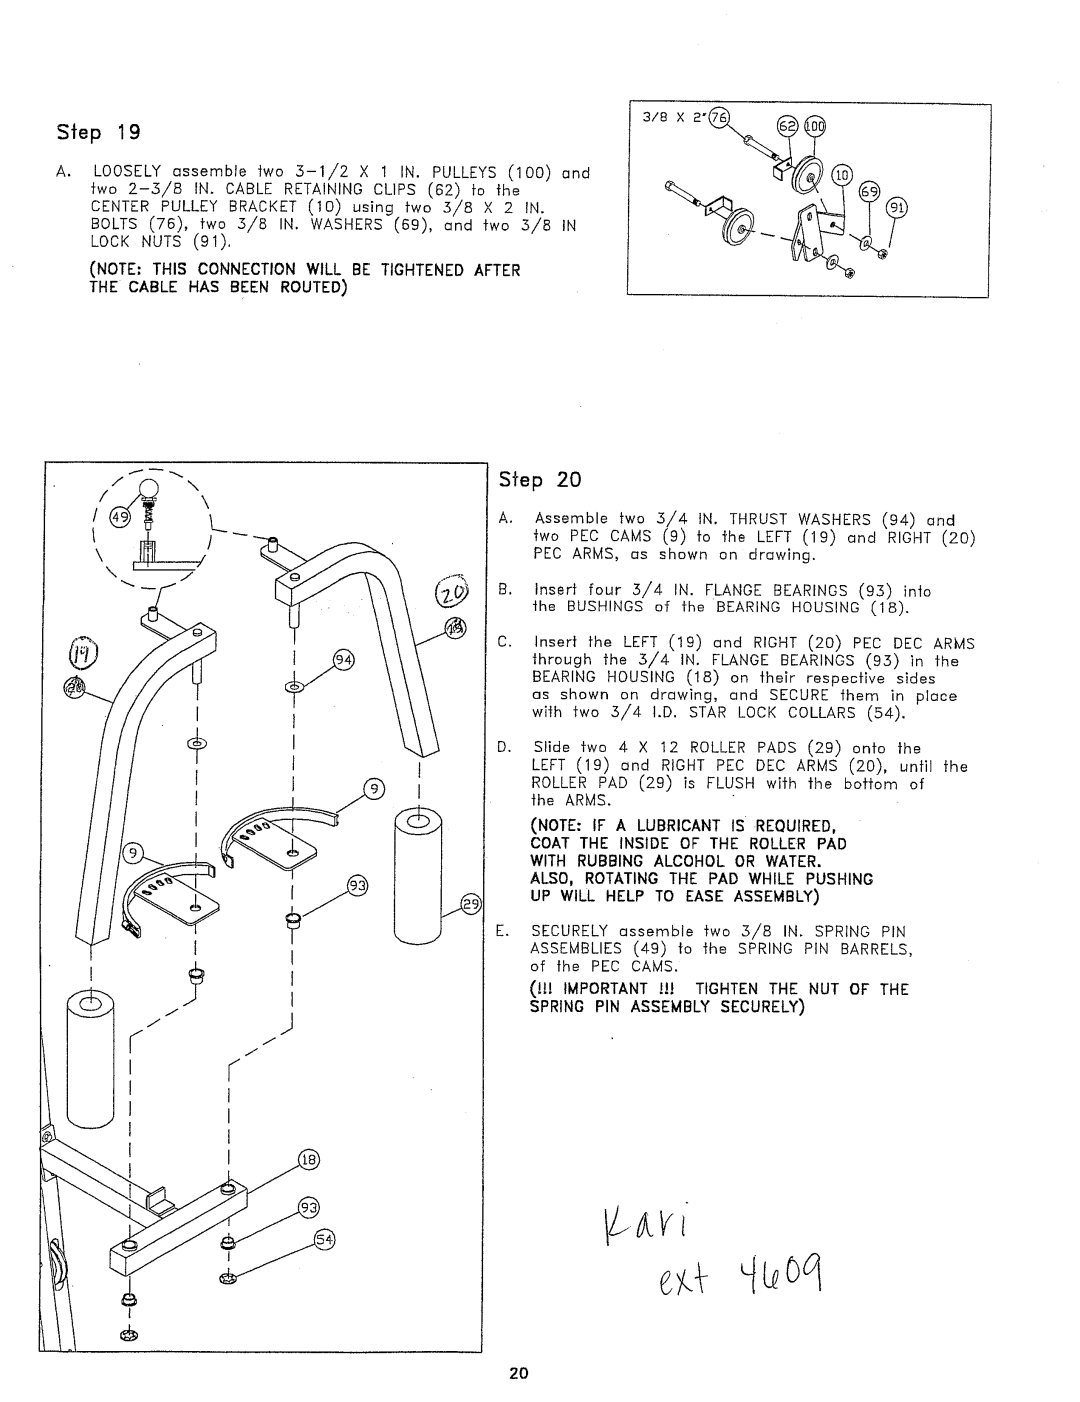
Step 20
A. Assemble two 3/4 IN. THRUST WASHERS(94) and two PEC CAMS(9) fo the LEFT (19) and RIGHT PEC ARMS, as shown on drawing.
B. Insert four ,5/4 IN. FLANGEBEARINOS(93) into the BUSHINGSof the BEARING HOUSING(18).
Go Insert the LEFT (19) and RIOHT (20) PEC DEC through the 3/4 IN. FLANGEBEARINGS(95) in the BEARINGHOUSINO(18) on ~heir respective sides us shown on drawing, end SECUREthem in place with two 3/4 I.D. STAR LOCKCOLLARS(54).
Slide two 4 X 12 ROLLERPADS (29) onto the LEFT (19) and RIGHT PEC DEC ARMS(20), until ROLLER PAD (29) is FLUSH with the bottom ~he ARMS.
(NOTE: IF A LUBRICANTIS REQUIRED, COAT THE INSIDE OF THE ROLLER PAD WITH RUBBING ALCOHOLOR WATER. ALSO, ROTATING THE PAD WHILE PUSHING UP WILL HELP TO EASE ASSEMBLY)
SECURELYassemble two 3/8 IN, SPRING PIN ASSEMBLIES(49) to the SPRINGPIN BARRELS, of the PEC CAMS.
(!!! IMPORTANT!!} TIGHTEN THE NUT OF THE
SPRING PIN ASSEMBLYSECURELY)
I
I
20