1752 and 1754 SHDSL Router User’s Guide
page. Check the interface details, then click on the Delete button.
Configuring NAT
To configure NAT, you need to:
1.Enable Security; see the Enabling Security section.
2.Create at least two different security interface types based on existing LAN services; see the Configuring Security Interfaces section.
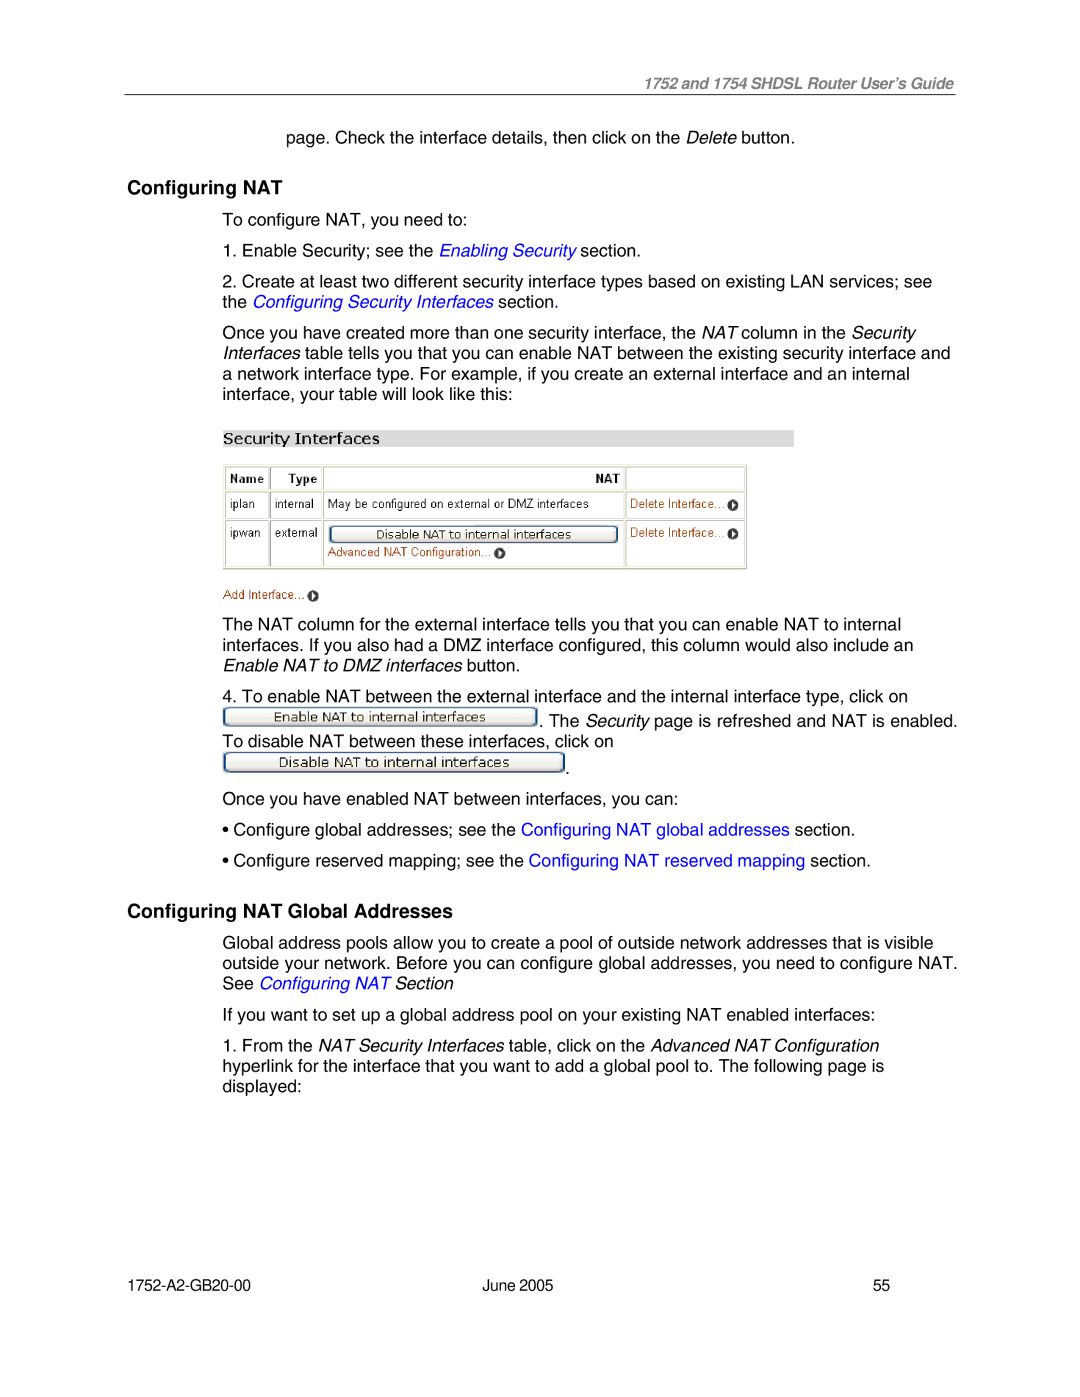
Once you have created more than one security interface, the NAT column in the Security Interfaces table tells you that you can enable NAT between the existing security interface and a network interface type. For example, if you create an external interface and an internal interface, your table will look like this:
The NAT column for the external interface tells you that you can enable NAT to internal interfaces. If you also had a DMZ interface configured, this column would also include an Enable NAT to DMZ interfaces button.
4. To enable NAT between the external interface and the internal interface type, click on
![]() . The Security page is refreshed and NAT is enabled. To disable NAT between these interfaces, click on
. The Security page is refreshed and NAT is enabled. To disable NAT between these interfaces, click on
![]() .
.
Once you have enabled NAT between interfaces, you can:
•Configure global addresses; see the Configuring NAT global addresses section.
•Configure reserved mapping; see the Configuring NAT reserved mapping section.
Configuring NAT Global Addresses
Global address pools allow you to create a pool of outside network addresses that is visible outside your network. Before you can configure global addresses, you need to configure NAT. See Configuring NAT Section
If you want to set up a global address pool on your existing NAT enabled interfaces:
1.From the NAT Security Interfaces table, click on the Advanced NAT Configuration hyperlink for the interface that you want to add a global pool to. The following page is displayed:
June 2005 | 55 |