The two terminal blocks on the SMD2000-24T are independent feeds. Chassis power is supplied by only one terminal block at a time; the second supply is merely backup. Likewise, the two terminal blocks do not load-share. Each terminal block must be supplied with the adequate amperage to run the chassis.
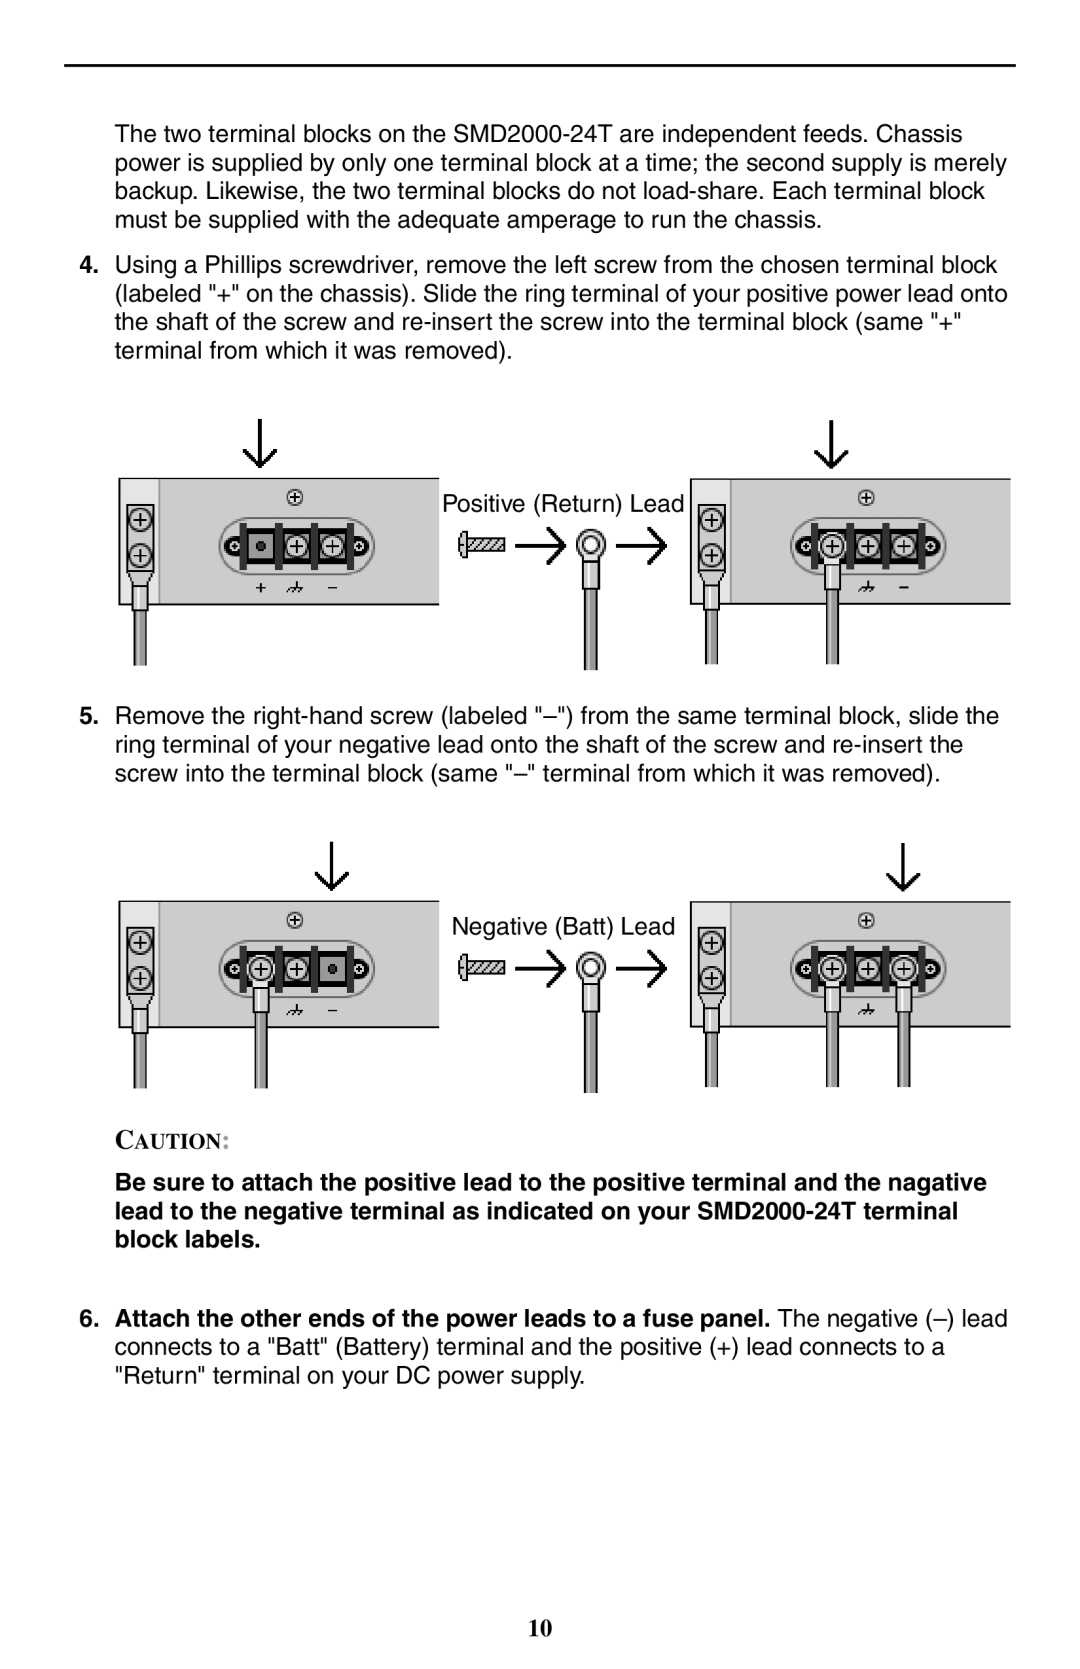
4.Using a Phillips screwdriver, remove the left screw from the chosen terminal block (labeled "+" on the chassis). Slide the ring terminal of your positive power lead onto the shaft of the screw and re-insert the screw into the terminal block (same "+" terminal from which it was removed).
Positive (Return) Lead
5.Remove the right-hand screw (labeled "–") from the same terminal block, slide the ring terminal of your negative lead onto the shaft of the screw and re-insert the screw into the terminal block (same "–" terminal from which it was removed).
Negative (Batt) Lead
CAUTION:
Be sure to attach the positive lead to the positive terminal and the nagative lead to the negative terminal as indicated on your SMD2000-24T terminal block labels.
6.Attach the other ends of the power leads to a fuse panel. The negative (–) lead connects to a "Batt" (Battery) terminal and the positive (+) lead connects to a "Return" terminal on your DC power supply.

