4UNPACKING AND PLACEMENT GUIDELINES FOR THE C 1

Unpacking Your C 1

Carefully unpack your C 1 from the shipping carton and remove all the enclosed accessories:

Master and SideKick remote controls, with six AAA batteries

Serial cable, D9 female to 3.5-mm male plug, for programming remotes

AC cord

18 BNC-to-RCA adapters for component-video/RGB jacks

1 Omnidirectional electret condenser microphone for autocalibration, with 25-foot cord and 3.5-mm plug

1 AA battery for microphone

2 trigger-control wires, each with a 2.5-mm sub-mini plug on one end and a 3.5-mm mini plug on the other

While you are unpacking your C 1, inspect it thoroughly for possible shipping damage and tell your Parasound dealer right away if you find any. If possible, save and store both the inner and outer cartons and–most especially–the foam packing inserts, so you can use them if you have to ship the C 1, or to protect it when you move. To save room in storage, you can cut the seams on the bottom of the cartons and flatten them.

Placement Guidelines

The C 1 will be easiest to use and stay reliable longer if you follow these simple guidelines:

Place the C 1 on a shelf that will adequately support its weight.

Unless you’ll control the C 1 through remote infrared sensors, pick a shelf placed where you can aim the remote controls at the C 1 easily. (If you do use remote sensors, be sure the remotes’ beams can’t reach the remote and front-panel sensors at the same time.)

Place the C 1 where its front-panel display will face you directly. (The display is designed to be viewed no more than 15° to either side of its axis and no more than 30° above or 10° below axis.) If this is not possible, the display’s contents can also be sent to a remote video display; see page 49 for details.)

Keep the C 1 away from heat sources such as air ducts or radiators.

Leave at least 1" of space on all sides and the top. This helps facilitate passive heat dissipation.

If you’re installing the C 1 yourself, use cables long enough to leave at least two feet of slack; that enables you to pull the C 1 out to change connections without inadvertently disconnecting things. If you’re putting the C 1 in a cabinet, make sure there’s grab space on each side; with a space that’s at least 22 inches wide, you’ll be able to turn the unit around for easy access to its rear connections.

Rack Mounting Your Parasound C 1

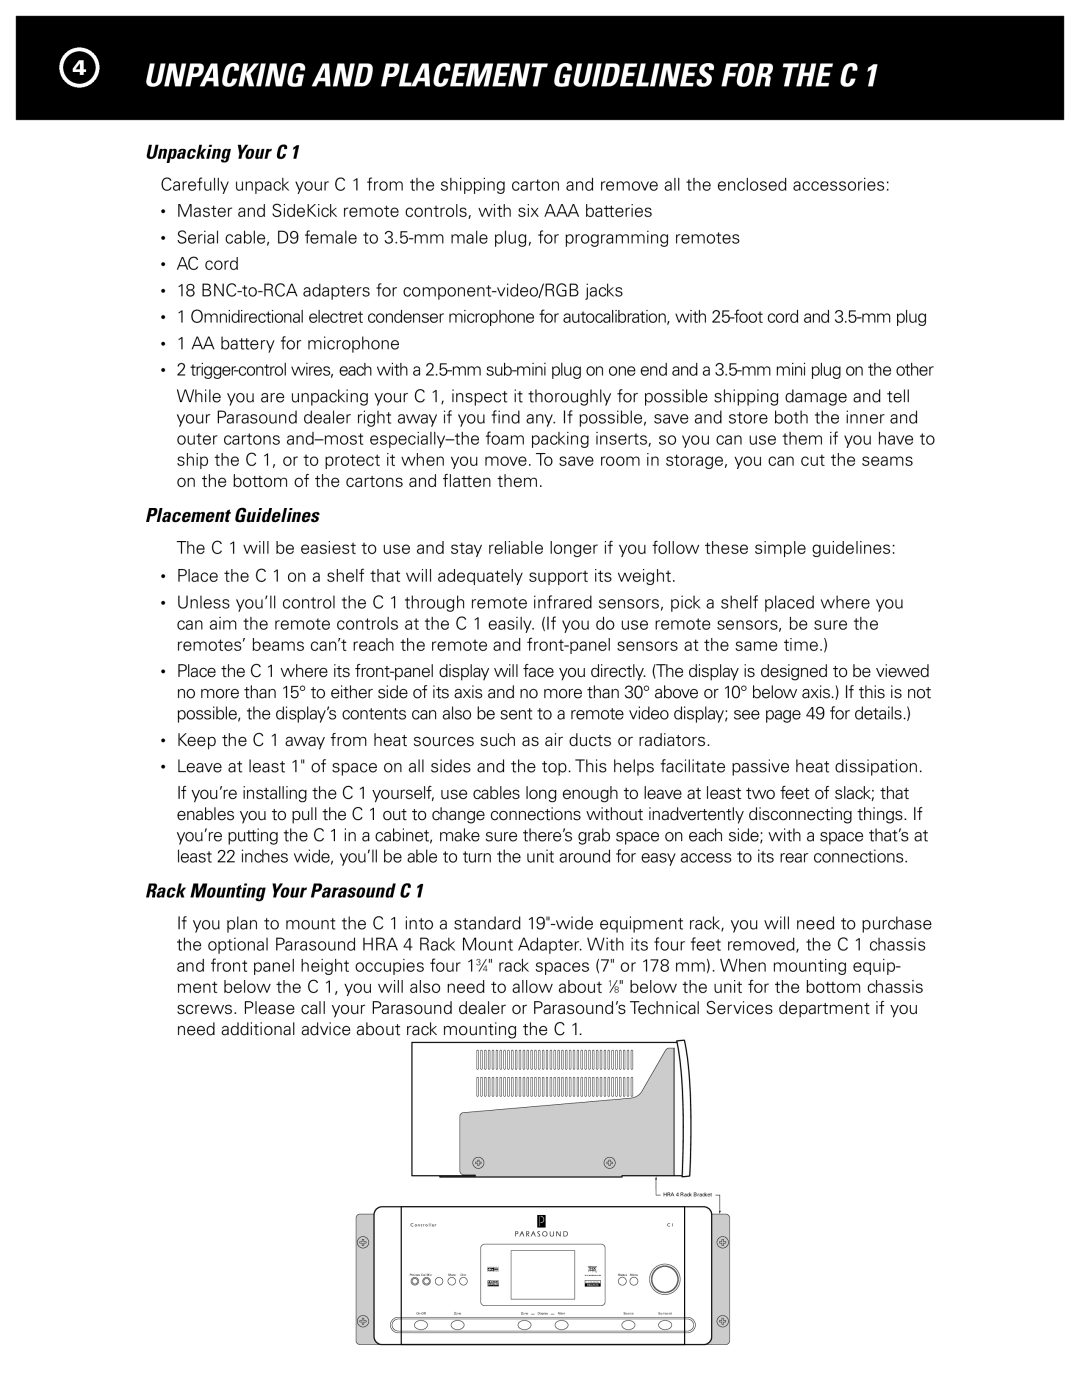
If you plan to mount the C 1 into a standard 19"-wide equipment rack, you will need to purchase the optional Parasound HRA 4 Rack Mount Adapter. With its four feet removed, the C 1 chassis and front panel height occupies four 134" rack spaces (7" or 178 mm). When mounting equip- ment below the C 1, you will also need to allow about 18" below the unit for the bottom chassis screws. Please call your Parasound dealer or Parasound’s Technical Services department if you need additional advice about rack mounting the C 1.

C o n t r o l l e r

HRA 4 Rack Bracket

C 1

Phones Cal Mic

Mute Dim


Status Menu


On-Off

Zone

Zone

Display

Main

Source

Surround

Page 4
Image 4
Parasound Halo C1 Controller manual Unpacking and Placement Guidelines for the C, Unpacking Your C

Halo C1 Controller specifications

The Parasound Halo C1 Controller emerges as a premium choice for audio enthusiasts seeking high-performance home theater solutions. This exceptional product combines innovative technology with user-friendly features, ensuring an unparalleled listening experience for both music and movie lovers.

At its core, the Halo C1 Controller serves as a powerful preamplifier and processor, designed to manage and control audio and video signals effectively. It is equipped with a balanced XLR input and multiple RCA inputs, allowing seamless integration with various audio sources. With support for high-resolution audio formats, including PCM and DSD, the Halo C1 delivers pristine sound quality that enhances the listening experience.

One of the defining characteristics of the Halo C1 is its advanced digital processing capabilities. The unit features Dolby Digital and DTS decoding, along with several proprietary audio technologies that elevate its performance. Its ability to upmix stereo signals into multi-channel formats contributes to an immersive surround sound experience, making it an ideal companion for both music playback and movie watching.

The Halo C1 also boasts an intuitive user interface, complete with an easy-to-navigate on-screen display. This feature simplifies the setup and configuration process, allowing users to personalize their audio experience to suit their preferences. For added convenience, the C1 supports remote control operation, enabling users to adjust settings without leaving their seats.

In terms of connectivity, the Halo C1 provides an impressive array of options. It includes HDMI inputs and outputs, ensuring compatibility with modern AV equipment and facilitating the transmission of high-definition video alongside high-fidelity audio. Additionally, it features variable and fixed outputs, making it adaptable for different system configurations.

Another standout feature of the Halo C1 is its robust power supply. The unit employs a toroidal transformer, ensuring clean and stable power delivery that translates into superior sound performance. This design choice minimizes power supply noise, which can adversely affect audio quality.

In conclusion, the Parasound Halo C1 Controller is a sophisticated and versatile audio solution that caters to both audiophiles and home theater enthusiasts. With its exceptional performance, advanced technology, and user-friendly features, the Halo C1 stands out as a key component for creating a high-quality audio and video experience in any home entertainment system. Its ability to adapt and enhance the listening experience makes it a worthy investment for anyone serious about sound quality.