C o n n e c t i n g t h e P r i n t e r ’ s P o w e r S u p p l y
To connect the power supply to the printer:
1. Turn off the printer. Press the power switch on the side of the printer to the off (O) position.
2. Place the power supply in a suitable location, preferably on a table, near an electrical outlet.
3. Plug the
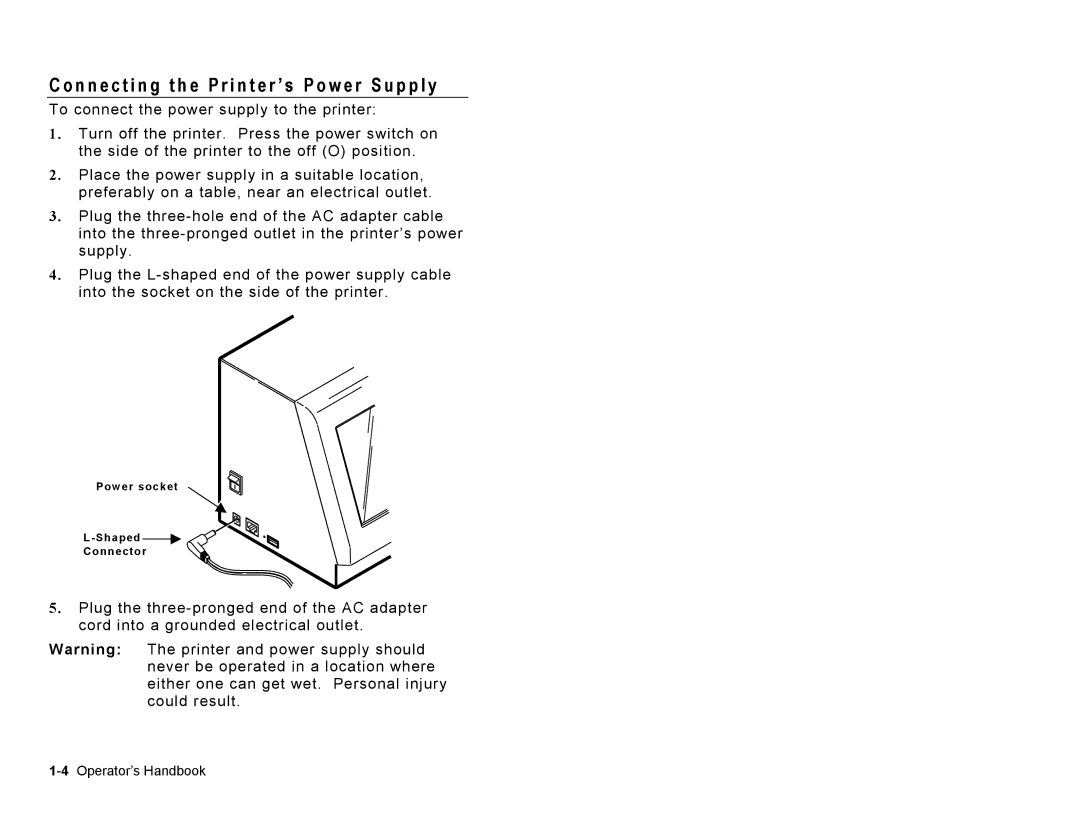
4. Plug the
Power socket
Connector
5. Plug the
Warning: The printer and power supply should never be operated in a location where either one can get wet. Personal injury could result.