L o a d i n g L a b e l s
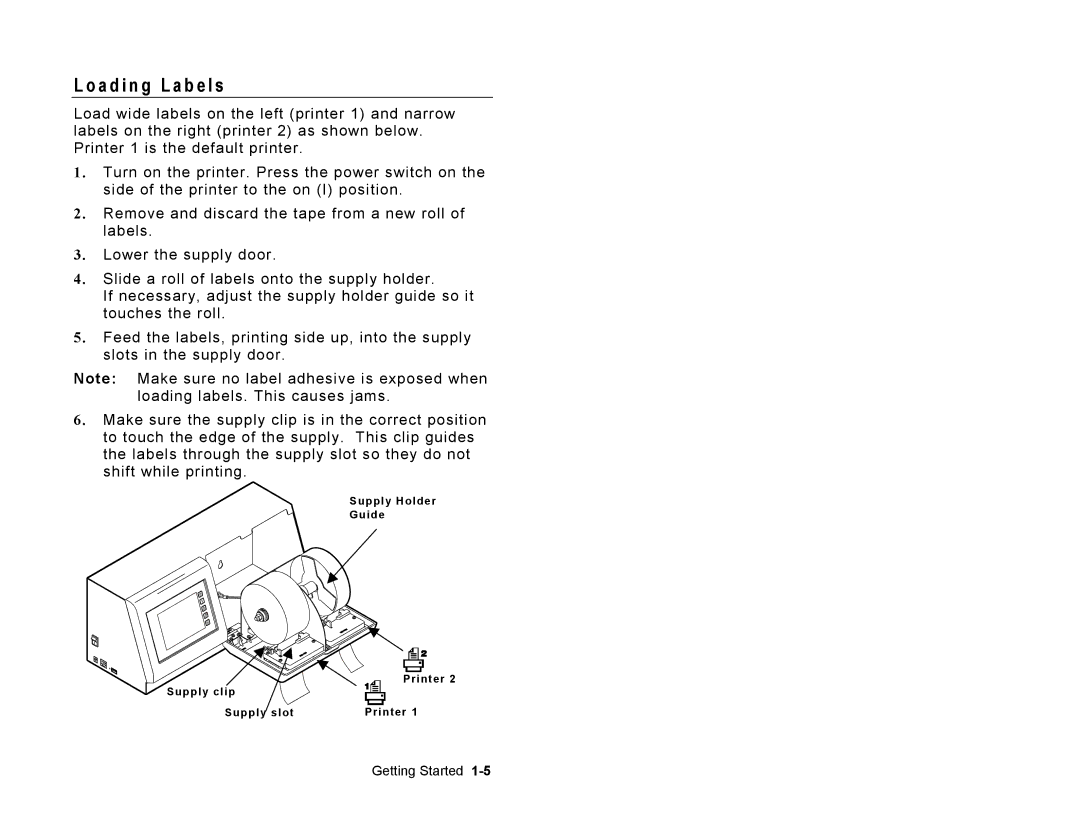
Load wide labels on the left (printer 1) and narrow labels on the right (printer 2) as shown below. Printer 1 is the default printer.
1. Turn on the printer. Press the power switch on the side of the printer to the on (I) position.
2. Remove and discard the tape from a new roll of labels.
3. Lower the supply door.
4. Slide a roll of labels onto the supply holder.
If necessary, adjust the supply holder guide so it touches the roll.
5. Feed the labels, printing side up, into the supply slots in the supply door.
Note: Make sure no label adhesive is exposed when loading labels. This causes jams.
6. Make sure the supply clip is in the correct position to touch the edge of the supply. This clip guides the labels through the supply slot so they do not shift while printing.
Supply Holder
Guide
Supply clip | Printer 2 |
| |
Supply slot | Printer 1 |
Getting Started