L o a d i n g R i b b o n
1. Open the cover.
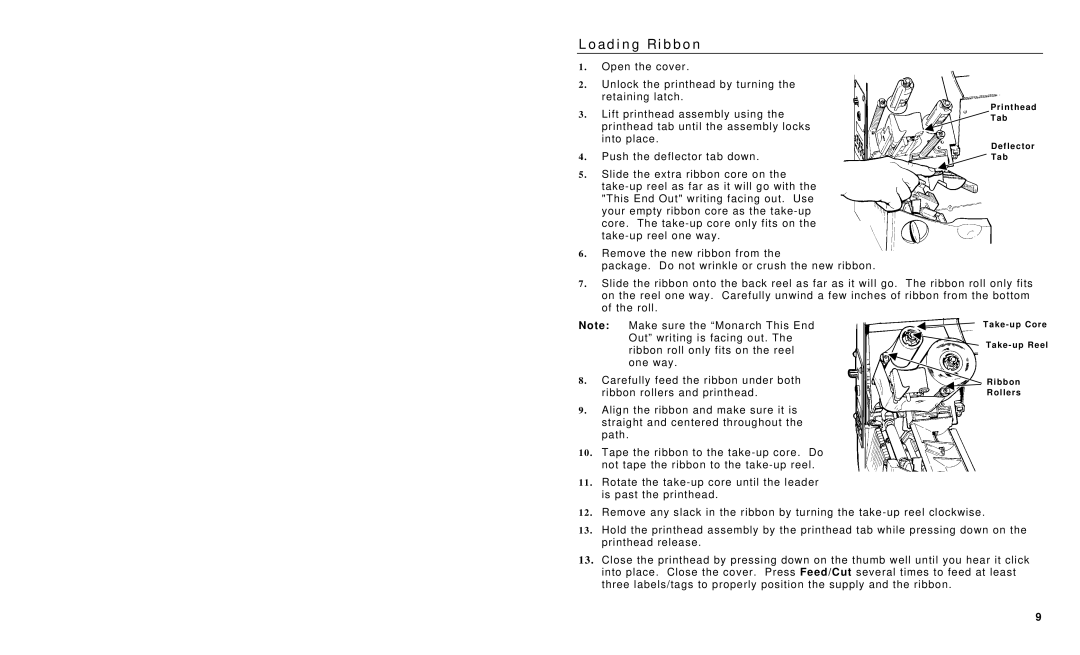
2. Unlock the printhead by turning the retaining latch.
3. Lift printhead assembly using the printhead tab until the assembly locks into place.
4. Push the deflector tab down.
5. Slide the extra ribbon core on the
6. Remove the new ribbon from the
package. Do not wrinkle or crush the new ribbon.
Printhead ![]() Tab
Tab
Deflector ![]() Tab
Tab
7. Slide the ribbon onto the back reel as far as it will go. The ribbon roll only fits on the reel one way. Carefully unwind a few inches of ribbon from the bottom of the roll.
Note: Make sure the “Monarch This End Out” writing is facing out. The ribbon roll only fits on the reel one way.
8. Carefully feed the ribbon under both ribbon rollers and printhead.
9. Align the ribbon and make sure it is straight and centered throughout the path.
10. Tape the ribbon to the
11. Rotate the
Ribbon
Rollers
12. Remove any slack in the ribbon by turning the
13. Hold the printhead assembly by the printhead tab while pressing down on the printhead release.
13. Close the printhead by pressing down on the thumb well until you hear it click into place. Close the cover. Press Feed/Cut several times to feed at least three labels/tags to properly position the supply and the ribbon.
9