WARNING: Adequate ventilation is required for proper operation of the DVR. Allow two inches of space above the unit and on each side for air circulation.
1.Connect cameras to the CAMERA INPUT connectors (BNC) on the rear of the DVR. Refer to Table A for video coaxial cable distances.
2.Connect a monitor to one of the VIDEO OUTPUT connectors (BNC) on the rear of the DVR. Refer to Table A for video coaxial cable distances.
3.To save data from the DVR, use the USB flash drive or connect a peripheral recording device to the remaining VIDEO OUTPUT connector (BNC) on the rear of the DVR. Refer to Table A for video coaxial cable distances.
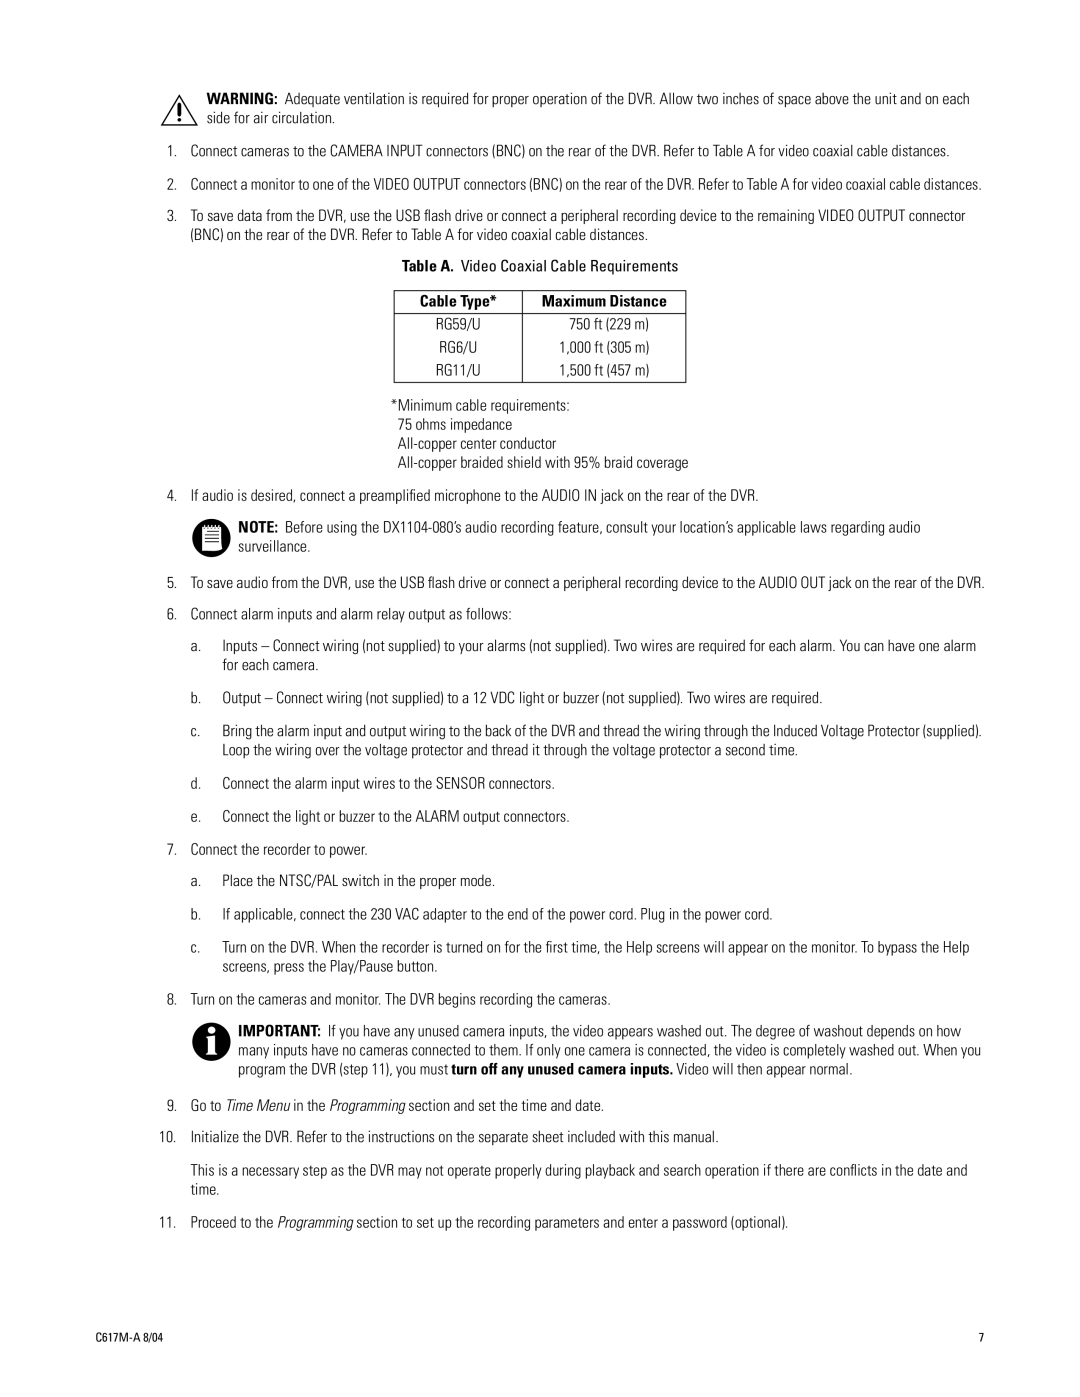
Table A. Video Coaxial Cable Requirements
Cable Type* | Maximum Distance |
RG59/U | 750 ft (229 m) |
RG6/U | 1,000 ft (305 m) |
RG11/U | 1,500 ft (457 m) |
|
|
*Minimum cable requirements: 75 ohms impedance
4. If audio is desired, connect a preamplified microphone to the AUDIO IN jack on the rear of the DVR.
NOTE: Before using the
5.To save audio from the DVR, use the USB flash drive or connect a peripheral recording device to the AUDIO OUT jack on the rear of the DVR.
6.Connect alarm inputs and alarm relay output as follows:
a.Inputs – Connect wiring (not supplied) to your alarms (not supplied). Two wires are required for each alarm. You can have one alarm for each camera.
b.Output – Connect wiring (not supplied) to a 12 VDC light or buzzer (not supplied). Two wires are required.
c.Bring the alarm input and output wiring to the back of the DVR and thread the wiring through the Induced Voltage Protector (supplied). Loop the wiring over the voltage protector and thread it through the voltage protector a second time.
d.Connect the alarm input wires to the SENSOR connectors.
e.Connect the light or buzzer to the ALARM output connectors.
7.Connect the recorder to power.
a.Place the NTSC/PAL switch in the proper mode.
b.If applicable, connect the 230 VAC adapter to the end of the power cord. Plug in the power cord.
c.Turn on the DVR. When the recorder is turned on for the first time, the Help screens will appear on the monitor. To bypass the Help screens, press the Play/Pause button.
8.Turn on the cameras and monitor. The DVR begins recording the cameras.
IMPORTANT: If you have any unused camera inputs, the video appears washed out. The degree of washout depends on how many inputs have no cameras connected to them. If only one camera is connected, the video is completely washed out. When you program the DVR (step 11), you must turn off any unused camera inputs. Video will then appear normal.
9.Go to Time Menu in the Programming section and set the time and date.
10.Initialize the DVR. Refer to the instructions on the separate sheet included with this manual.
This is a necessary step as the DVR may not operate properly during playback and search operation if there are conflicts in the date and time.
11.Proceed to the Programming section to set up the recording parameters and enter a password (optional).
7 |