Install the Enclosure and Set Pan Position
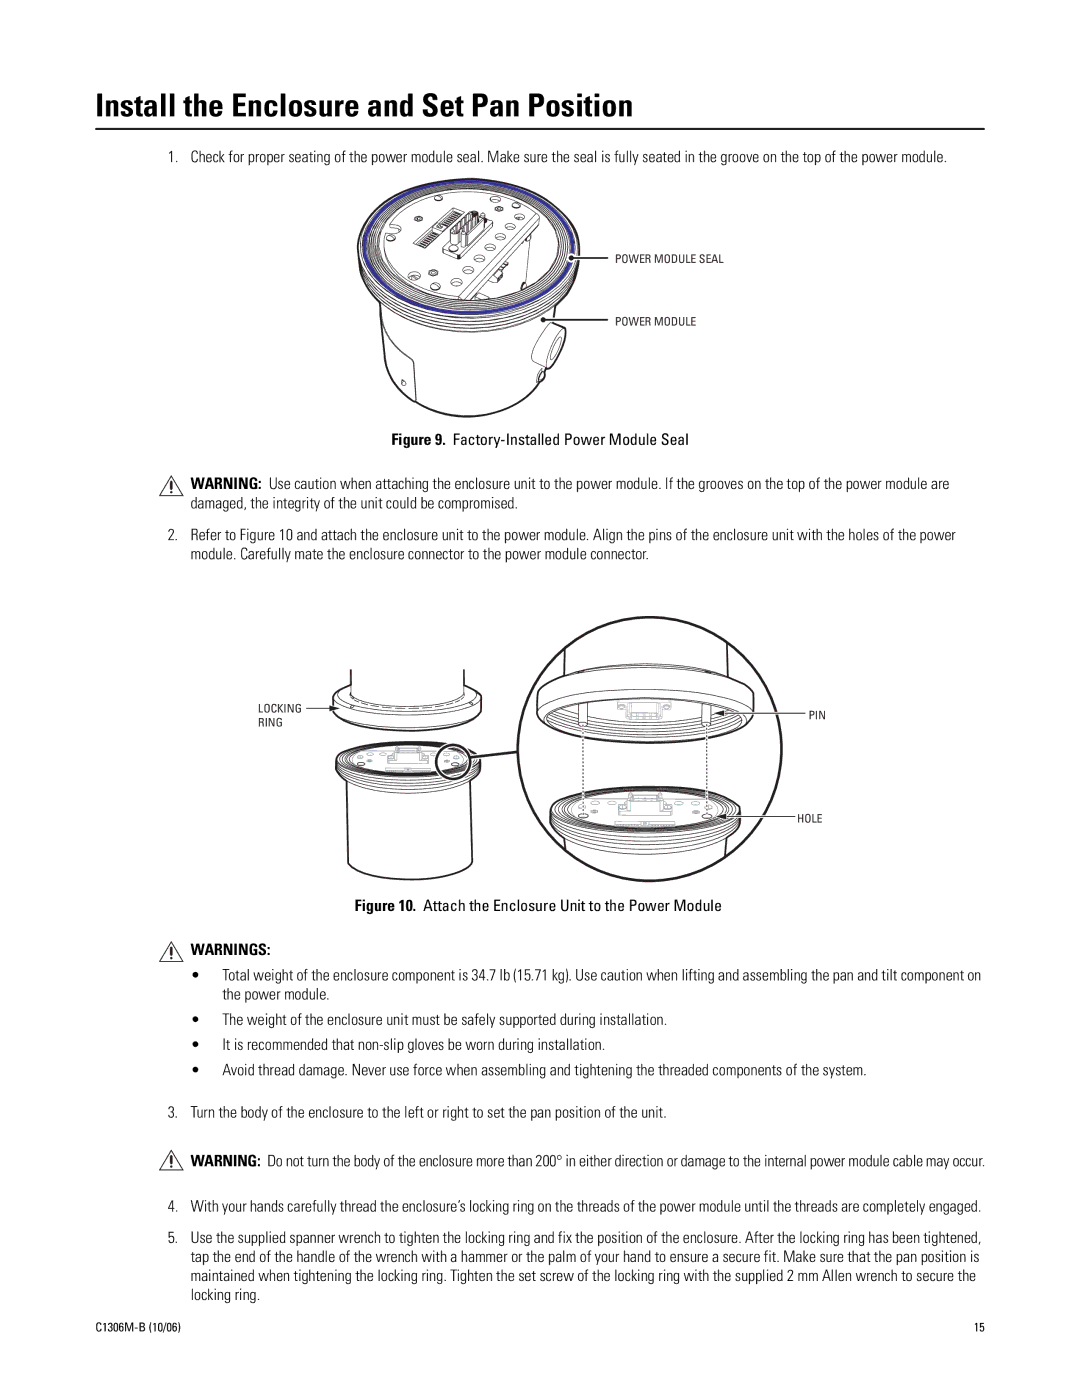
1. Check for proper seating of the power module seal. Make sure the seal is fully seated in the groove on the top of the power module.
POWER MODULE SEAL
POWER MODULE
Figure 9. Factory-Installed Power Module Seal
WARNING: Use caution when attaching the enclosure unit to the power module. If the grooves on the top of the power module are damaged, the integrity of the unit could be compromised.
2.Refer to Figure 10 and attach the enclosure unit to the power module. Align the pins of the enclosure unit with the holes of the power module. Carefully mate the enclosure connector to the power module connector.
LOCKING
RING
PIN
HOLE
Figure 10. Attach the Enclosure Unit to the Power Module
WARNINGS:
•Total weight of the enclosure component is 34.7 lb (15.71 kg). Use caution when lifting and assembling the pan and tilt component on the power module.
•The weight of the enclosure unit must be safely supported during installation.
•It is recommended that non-slip gloves be worn during installation.
•Avoid thread damage. Never use force when assembling and tightening the threaded components of the system.
3.Turn the body of the enclosure to the left or right to set the pan position of the unit.
WARNING: Do not turn the body of the enclosure more than 200° in either direction or damage to the internal power module cable may occur.
4.With your hands carefully thread the enclosure’s locking ring on the threads of the power module until the threads are completely engaged.
5.Use the supplied spanner wrench to tighten the locking ring and fix the position of the enclosure. After the locking ring has been tightened, tap the end of the handle of the wrench with a hammer or the palm of your hand to ensure a secure fit. Make sure that the pan position is maintained when tightening the locking ring. Tighten the set screw of the locking ring with the supplied 2 mm Allen wrench to secure the locking ring.
15 |