Install the Power Module
Attach the power module to the mounting surface. Use only installation methods and materials capable of supporting four times the maximum specified load of the system (140 lb/63.5 kg).
NOTE: If required, install the optional TXB translator, fiber module, or UTP board before installing the power module. Refer to the installation instructions supplied with the TXB translator, fiber module, or UTP board for installation instructions.
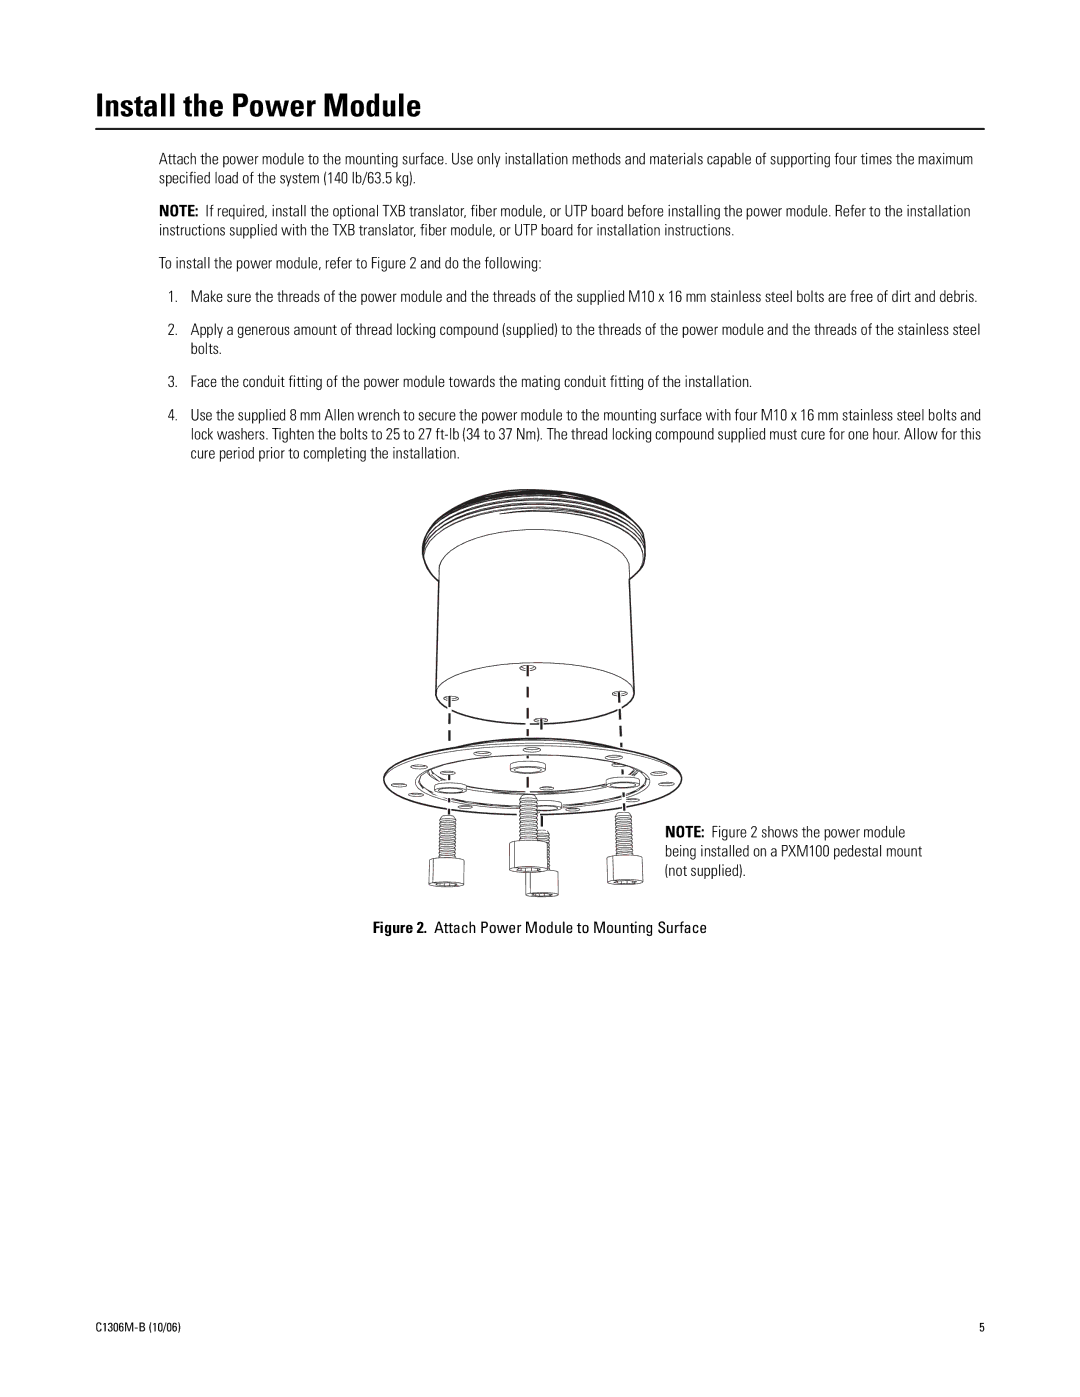
To install the power module, refer to Figure 2 and do the following:
1.Make sure the threads of the power module and the threads of the supplied M10 x 16 mm stainless steel bolts are free of dirt and debris.
2.Apply a generous amount of thread locking compound (supplied) to the threads of the power module and the threads of the stainless steel bolts.
3.Face the conduit fitting of the power module towards the mating conduit fitting of the installation.
4.Use the supplied 8 mm Allen wrench to secure the power module to the mounting surface with four M10 x 16 mm stainless steel bolts and lock washers. Tighten the bolts to 25 to 27
NOTE: Figure 2 shows the power module being installed on a PXM100 pedestal mount (not supplied).
Figure 2. Attach Power Module to Mounting Surface
5 |