Maintenance
CAMERA MODULE REPLACEMENT
DANGER: To reduce the risk of ignition of hazardous atmospheres, disconnect the equipment from the power supply before opening. Keep assembly tightly closed when operating.
To replace the camera module, do the following:
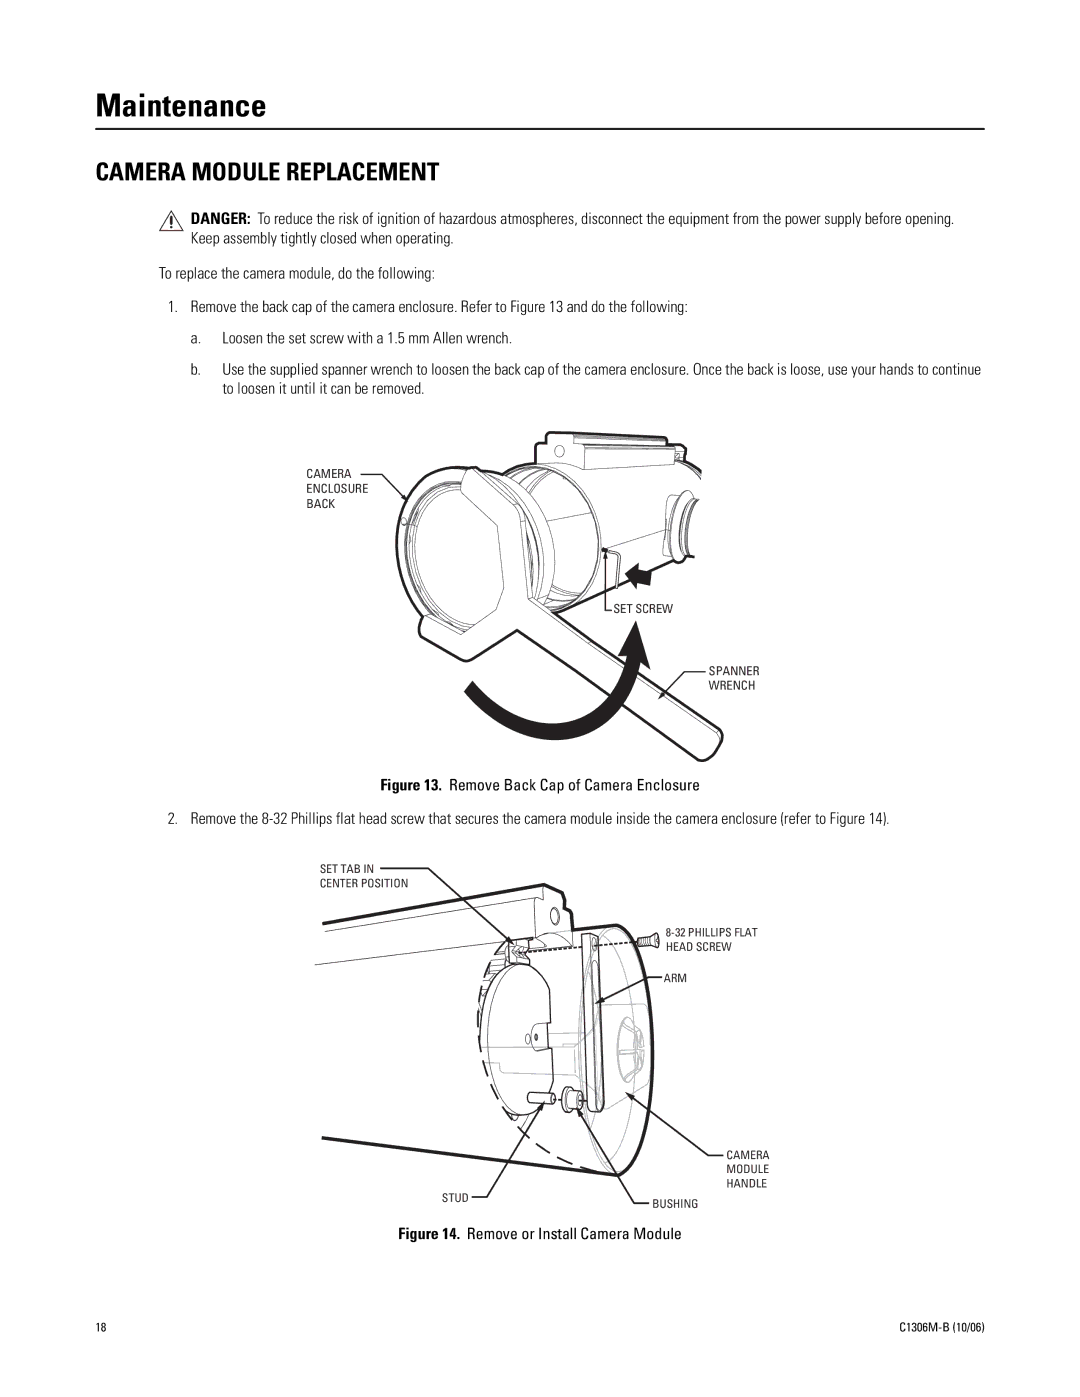
1.Remove the back cap of the camera enclosure. Refer to Figure 13 and do the following:
a.Loosen the set screw with a 1.5 mm Allen wrench.
b.Use the supplied spanner wrench to loosen the back cap of the camera enclosure. Once the back is loose, use your hands to continue to loosen it until it can be removed.
CAMERA
ENCLOSURE
BACK
SET SCREW
SPANNER
WRENCH
Figure 13. Remove Back Cap of Camera Enclosure
2. Remove the 8-32 Phillips flat head screw that secures the camera module inside the camera enclosure (refer to Figure 14).
SET TAB IN
CENTER POSITION
ARM
CAMERA
MODULE
HANDLE
STUD | BUSHING |
|
Figure 14. Remove or Install Camera Module
18 |
