Mounting the FX82051 Module Using the Wall Clip
NOTE: Before mounting the FX82051 module to a wall, ensure that there is adequate space at both ends for viewing the
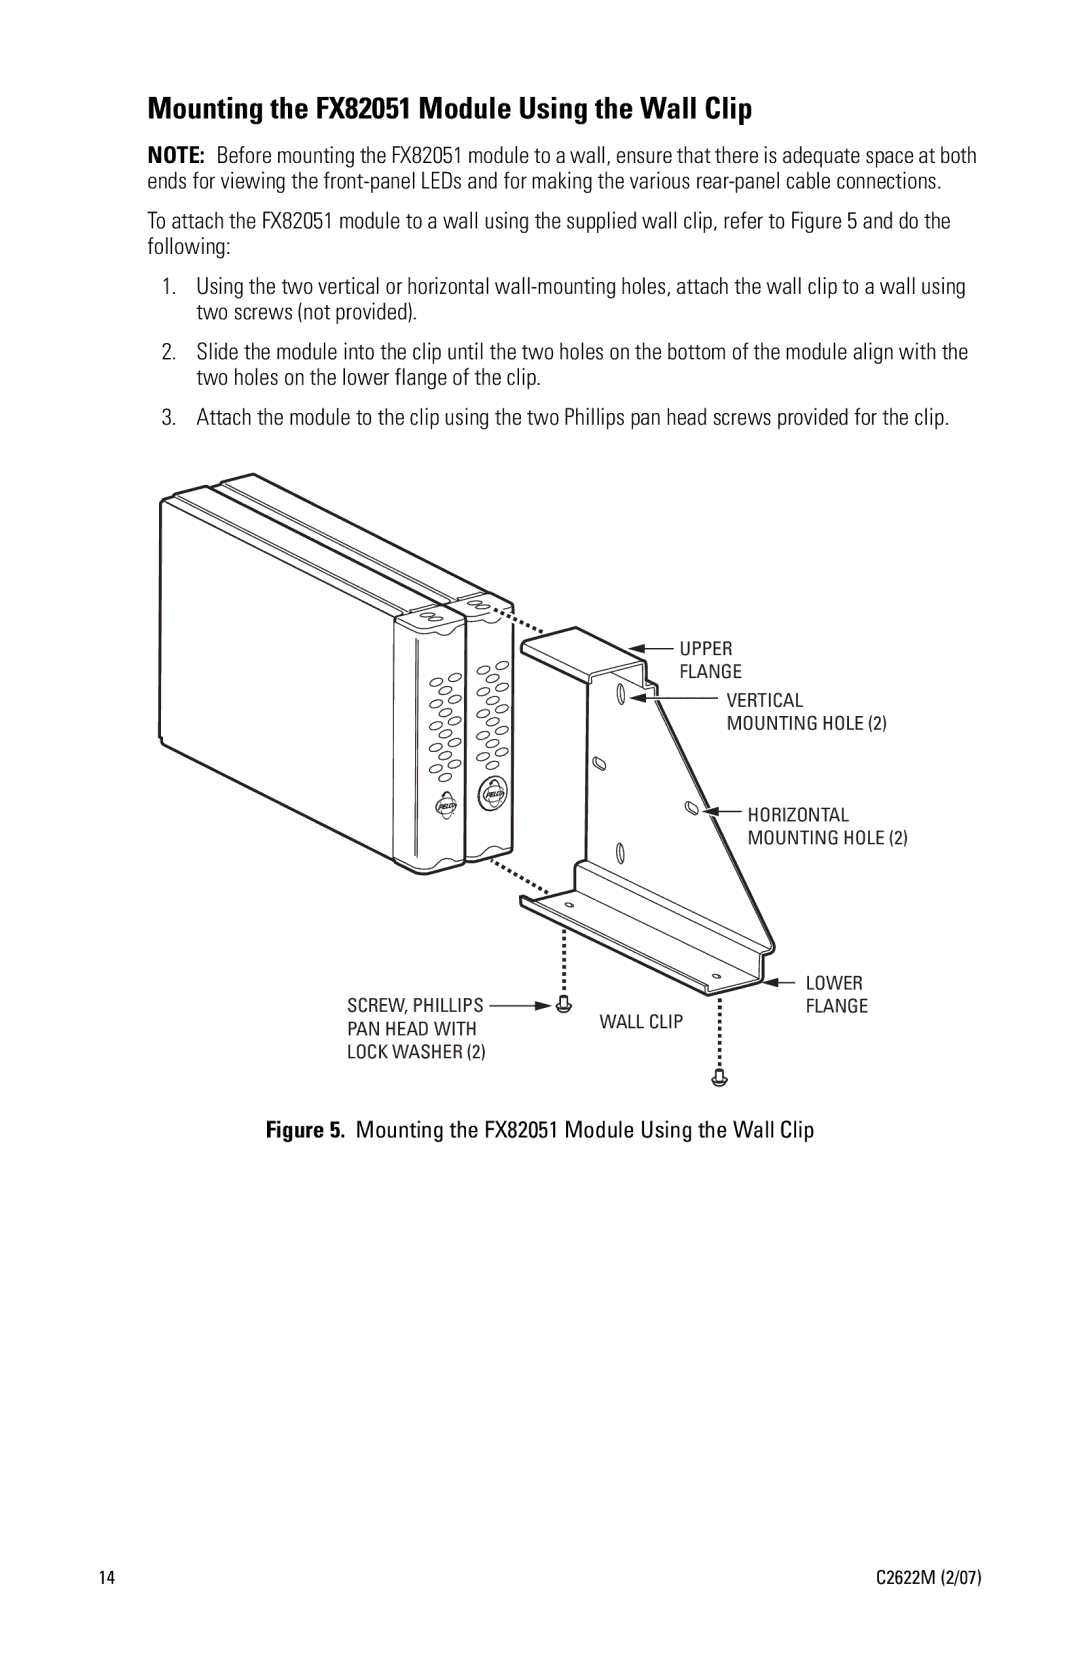
To attach the FX82051 module to a wall using the supplied wall clip, refer to Figure 5 and do the following:
1.Using the two vertical or horizontal
2.Slide the module into the clip until the two holes on the bottom of the module align with the two holes on the lower flange of the clip.
3.Attach the module to the clip using the two Phillips pan head screws provided for the clip.
![]() UPPER
UPPER
FLANGE
VERTICAL
MOUNTING HOLE (2)
![]() HORIZONTAL
HORIZONTAL
MOUNTING HOLE (2)
SCREW, PHILLIPS | LOWER |
FLANGE | |
PAN HEAD WITH | WALL CLIP |
| |
LOCK WASHER (2) |
|
Figure 5. Mounting the FX82051 Module Using the Wall Clip
14 | C2622M (2/07) |