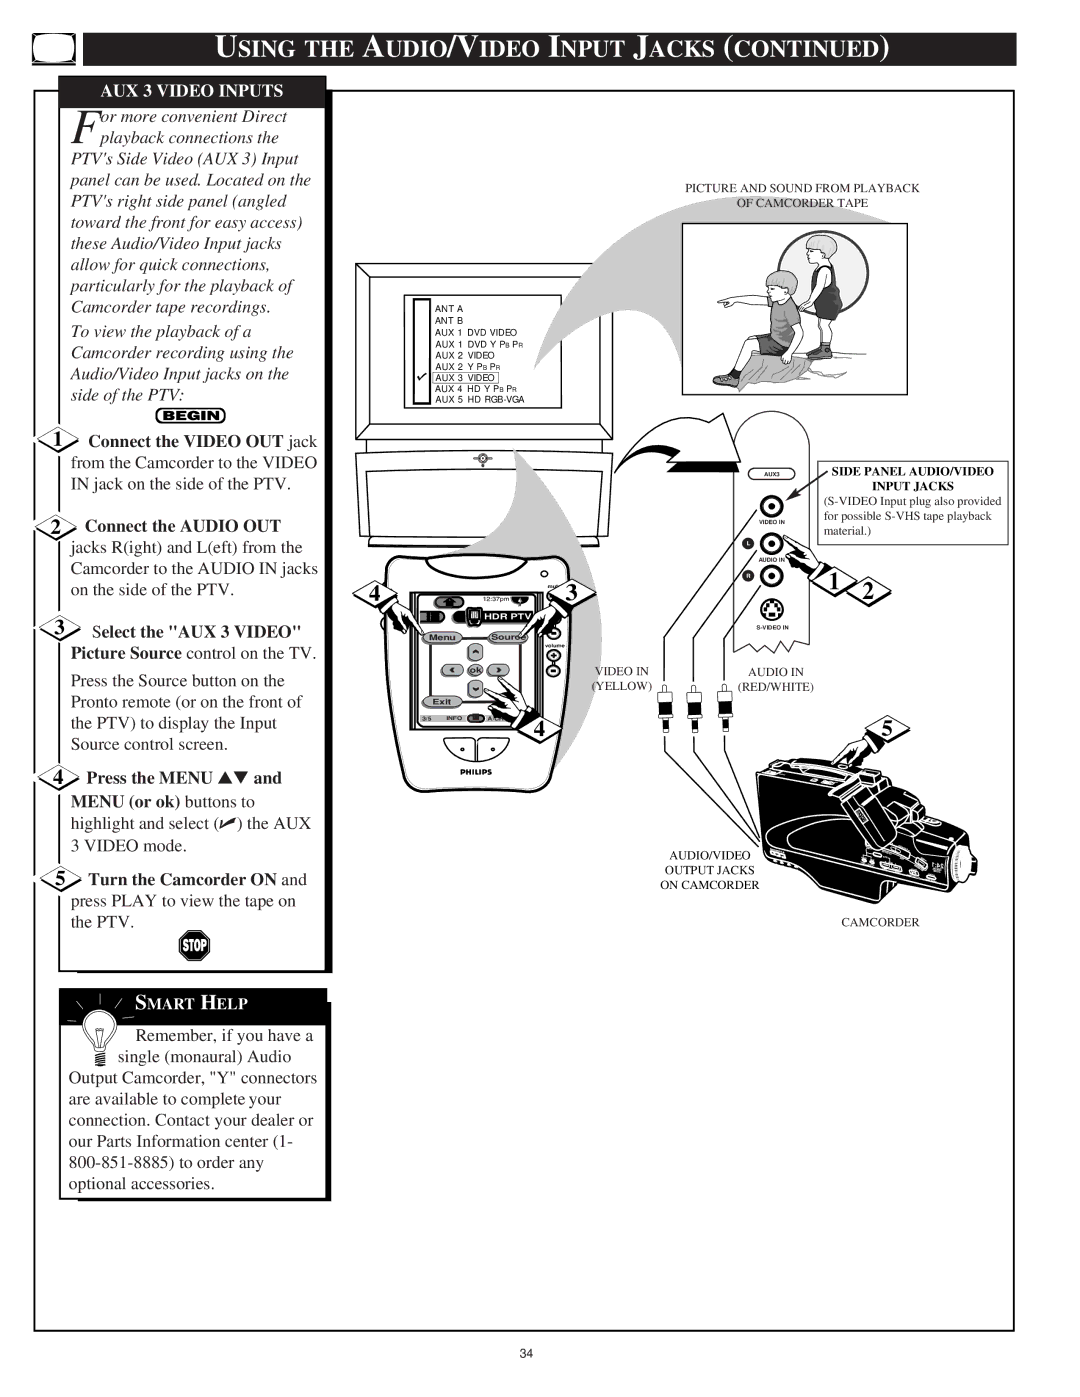
USING THE AUDIO/VIDEO INPUT JACKS (CONTINUED)
AUX 3 VIDEO INPUTS
For more convenient Direct playback connections the
PTV's Side Video (AUX 3) Input panel can be used. Located on the PTV's right side panel (angled toward the front for easy access) these Audio/Video Input jacks allow for quick connections, particularly for the playback of
PICTURE AND SOUND FROM PLAYBACK
OF CAMCORDER TAPE
Camcorder tape recordings.
To view the playback of a Camcorder recording using the Audio/Video Input jacks on the side of the PTV:
1Connect the VIDEO OUT jack from the Camcorder to the VIDEO IN jack on the side of the PTV.
2Connect the AUDIO OUT jacks R(ight) and L(eft) from the Camcorder to the AUDIO IN jacks on the side of the PTV.
3Select the "AUX 3 VIDEO" Picture Source control on the TV.
Press the Source button on the Pronto remote (or on the front of the PTV) to display the Input Source control screen.
ANT A
ANT B
AUX 1 DVD VIDEO
AUX 1 DVD Y PB PR
AUX 2 VIDEO
AUX 2 Y PB PR
AUX 3 VIDEO
AUX 4 HD Y PB PR
AUX 5 HD
DN
4 | m 3 |
| channel |
| HDR PTV + |
Menu | Source |
| volume |
| + |
ok | VIDEO IN |
| (YELLOW) |
Exit |
|
3/5 INFO | A/CH |
| 4 |
AUX3 | SIDE PANEL AUDIO/VIDEO | ||
|
| INPUT JACKS | |
| |||
VIDEO IN | for possible | ||
material.) | |||
| |||
L |
|
| |
AUDIO IN | 1 | 2 | |
R | |||
|
| ||
AUDIO IN
(RED/WHITE)
5
4Press the MENU ▲▼ and MENU (or ok) buttons to highlight and select (✔) the AUX 3 VIDEO mode.
5Turn the Camcorder ON and press PLAY to view the tape on the PTV.
SMART HELP
![]()
![]()
![]() Remember, if you have a
Remember, if you have a ![]() single (monaural) Audio
single (monaural) Audio
Output Camcorder, "Y" connectors are available to complete your connection. Contact your dealer or our Parts Information center (1-
AUDIO/VIDEO
OUTPUT JACKS
ON CAMCORDER
CAMCORDER
34