Cautions:
¡We strongly recommend that you wear gloves for installation work to protect yourself from injuries. ¡When bending the mounting tab of the mounting collar with a screwdriver, be careful not to injure your
hands and fingers.
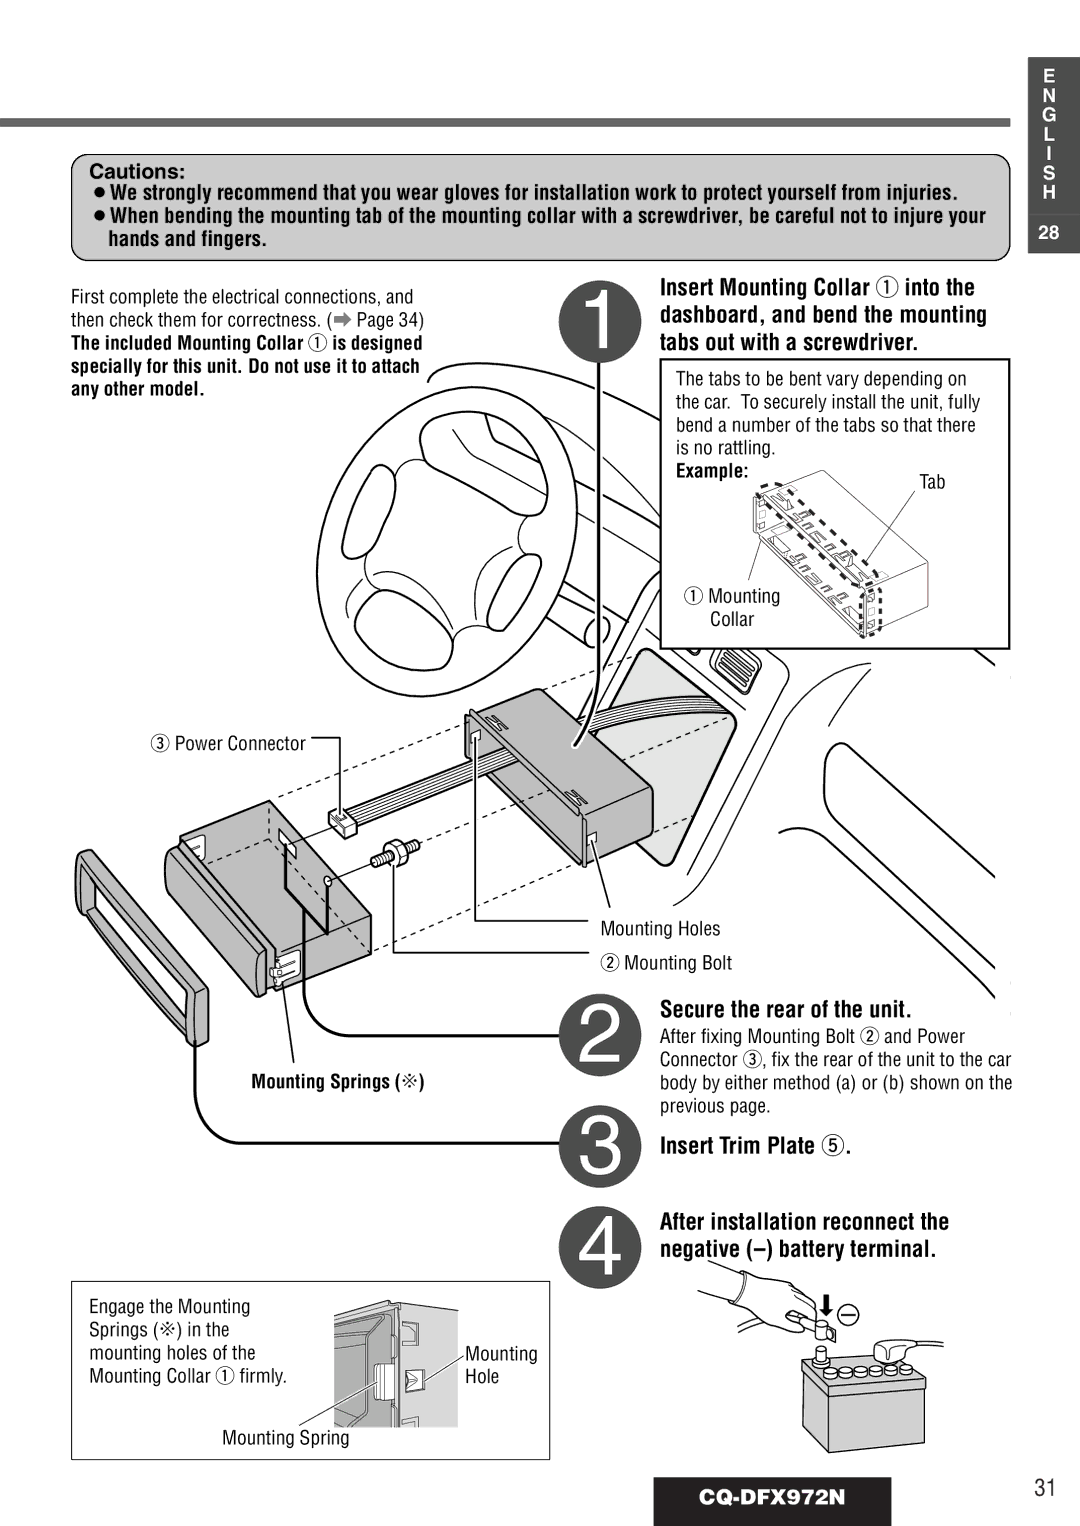
First complete the electrical connections, and | 1 | Insert Mounting Collar q into the | ||
dashboard, and bend the mounting | ||||
then check them for correctness. (a Page 34) | ||||
The included Mounting Collar q is designed | tabs out with a screwdriver. |
| ||
specially for this unit. Do not use it to attach |
|
|
| |
| The tabs to be bent vary depending on | |||
any other model. |
| |||
| the car. To securely install the unit, fully | |||
|
| |||
|
| bend a number of the tabs so that there | ||
|
| is no rattling. |
| |
|
| Example: | Tab | |
|
|
| ||
q Mounting
Collar
e Power Connector
Mounting Holes
w Mounting Bolt
E
N
G
L
I
S
H
28
2
Mounting Springs (C)
Secure the rear of the unit.
After fixing Mounting Bolt w and Power Connector e, fix the rear of the unit to the car body by either method (a) or (b) shown on the previous page.
Engage the Mounting Springs (C) in the mounting holes of the Mounting Collar q firmly.
3
4
Mounting
Hole
Insert Trim Plate t.
After installation reconnect the negative (–) battery terminal.
Mounting Spring