7Accessories and connections
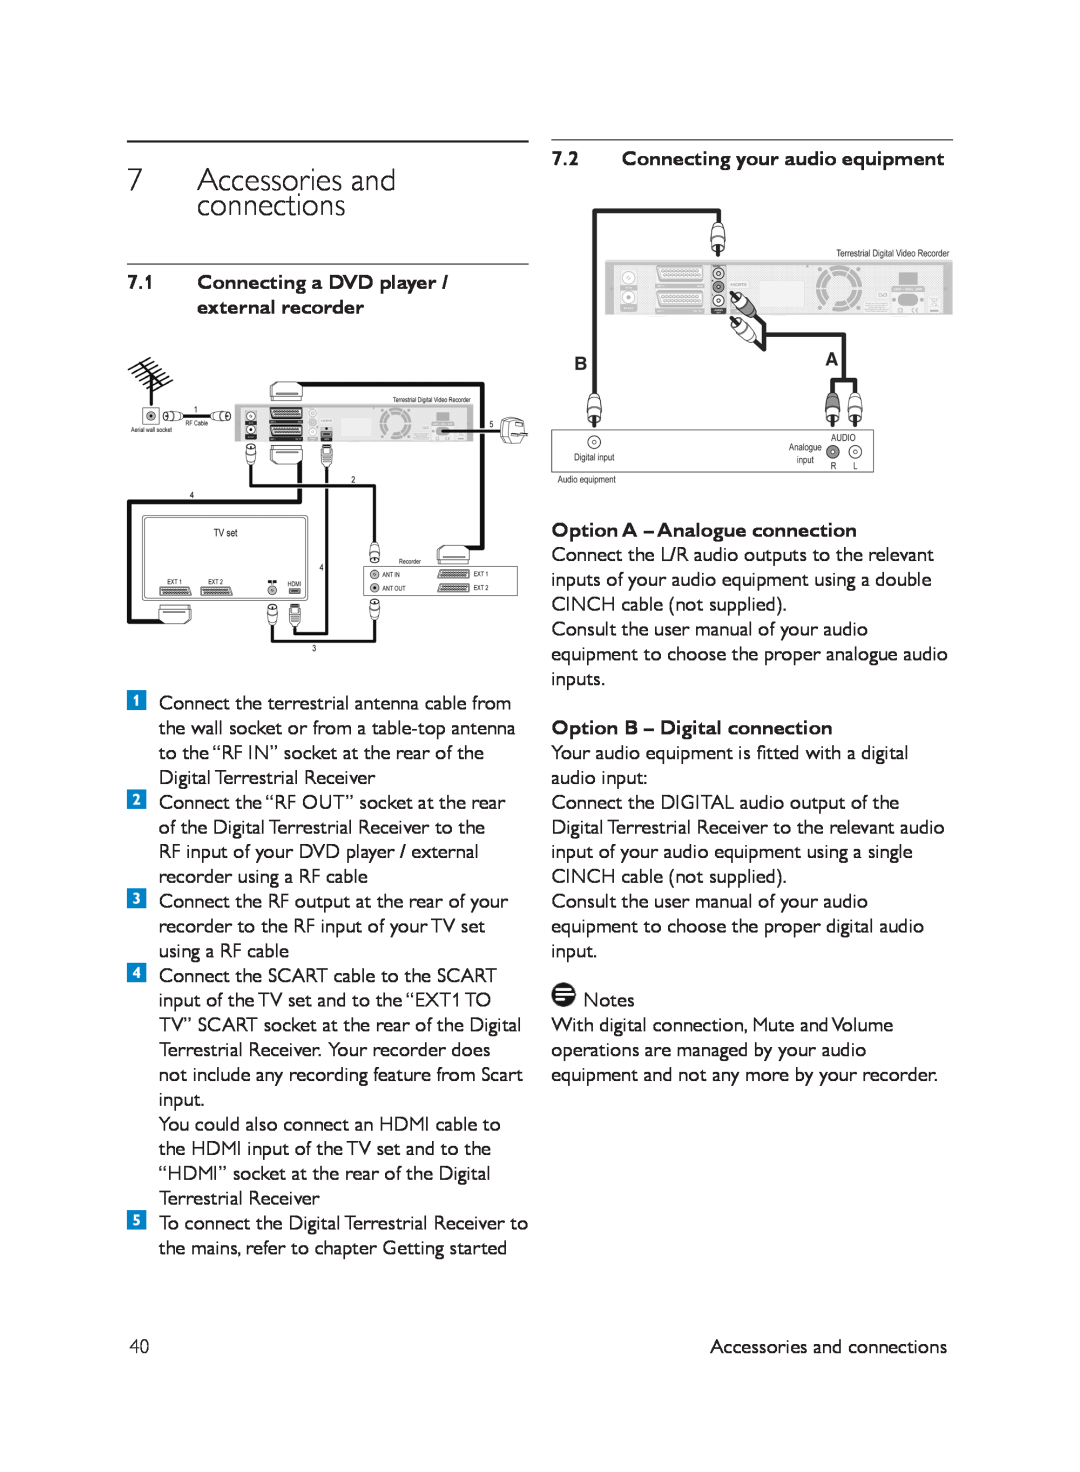
7.2Connecting your audio equipment
7.1Connecting a DVD player / external recorder
Connect the terrestrial antenna cable from the wall socket or from a
Connect the “RF OUT” socket at the rear of the Digital Terrestrial Receiver to the RF input of your DVD player / external recorder using a RF cable
Connect the RF output at the rear of your recorder to the RF input of your TV set using a RF cable
Connect the SCART cable to the SCART input of the TV set and to the “EXT1 TO TV” SCART socket at the rear of the Digital Terrestrial Receiver. Your recorder does not include any recording feature from Scart input.
You could also connect an HDMI cable to the HDMI input of the TV set and to the “HDMI” socket at the rear of the Digital Terrestrial Receiver
To connect the Digital Terrestrial Receiver to the mains, refer to chapter Getting started
Option A – Analogue connection Connect the L/R audio outputs to the relevant inputs of your audio equipment using a double CINCH cable (not supplied).
Consult the user manual of your audio equipment to choose the proper analogue audio inputs.
Option B – Digital connection
Your audio equipment is fitted with a digital audio input:
Connect the DIGITAL audio output of the Digital Terrestrial Receiver to the relevant audio input of your audio equipment using a single CINCH cable (not supplied).
Consult the user manual of your audio equipment to choose the proper digital audio input.
![]() Notes
Notes
With digital connection, Mute and Volume operations are managed by your audio equipment and not any more by your recorder.
40 | Accessories and connections |