Set TV TYPE accordingly. Details are on page 33.
Set AUDIO OUT to ANALOG. Details are on page 36.
5
Press POWER y or DVD y to turn on the Player.
Turn on the TV and set the TV to the correct Audio/Video In channel. Such channels may be called AUX or AUXILIARY IN, AUDIO/VIDEO or A/V IN, EXT1 or EXT2, etc. These chan- nels often are near channel 00. See your TV owner’s manual for details. Or, change channels at the TV until you see the Player’s blue background screen on the TV.
4
3
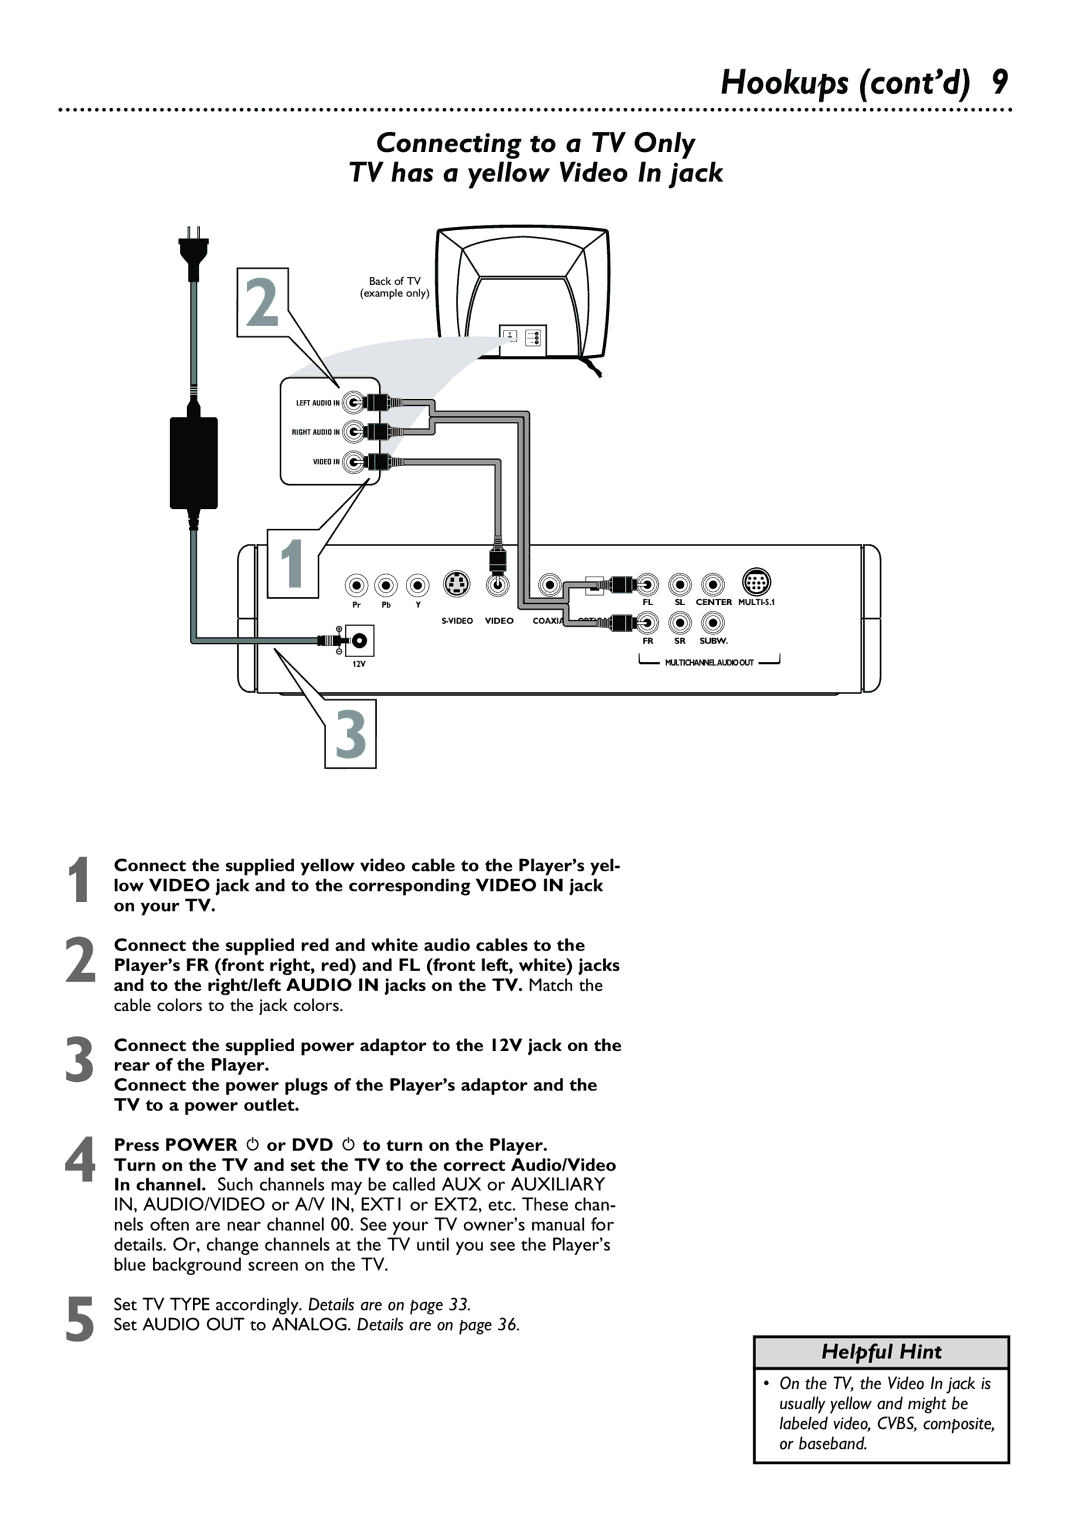
1 Connect the supplied yellow video cable to the Player’s yel- low VIDEO jack and to the corresponding VIDEO IN jack on your TV.
2 Connect the supplied red and white audio cables to the Player’s FR (front right, red) and FL (front left, white) jacks and to the right/left AUDIO IN jacks on the TV. Match the cable colors to the jack colors.
3 Connect the supplied power adaptor to the 12V jack on the rear of the Player.
Connect the power plugs of the Player’s adaptor and the TV to a power outlet.
Hookups (cont’d) 9
Connecting to a TV Only
TV has a yellow Video In jack
2 | Back of TV |
| (example only) |
LEFT AUDIO IN
RIGHT AUDIO IN
VIDEO IN
![]() 1
1![]()
Pr | Pb | Y | FL | SL | CENTER |
|
| COAXIAL OPTICAL |
|
| |
|
|
| FR | SR | SUBW. |
12V |
|
|
| MULTICHANNELAUDIOOUT | |
Helpful Hint
• On the TV, the Video In jack is usually yellow and might be labeled video, CVBS, composite, or baseband.
