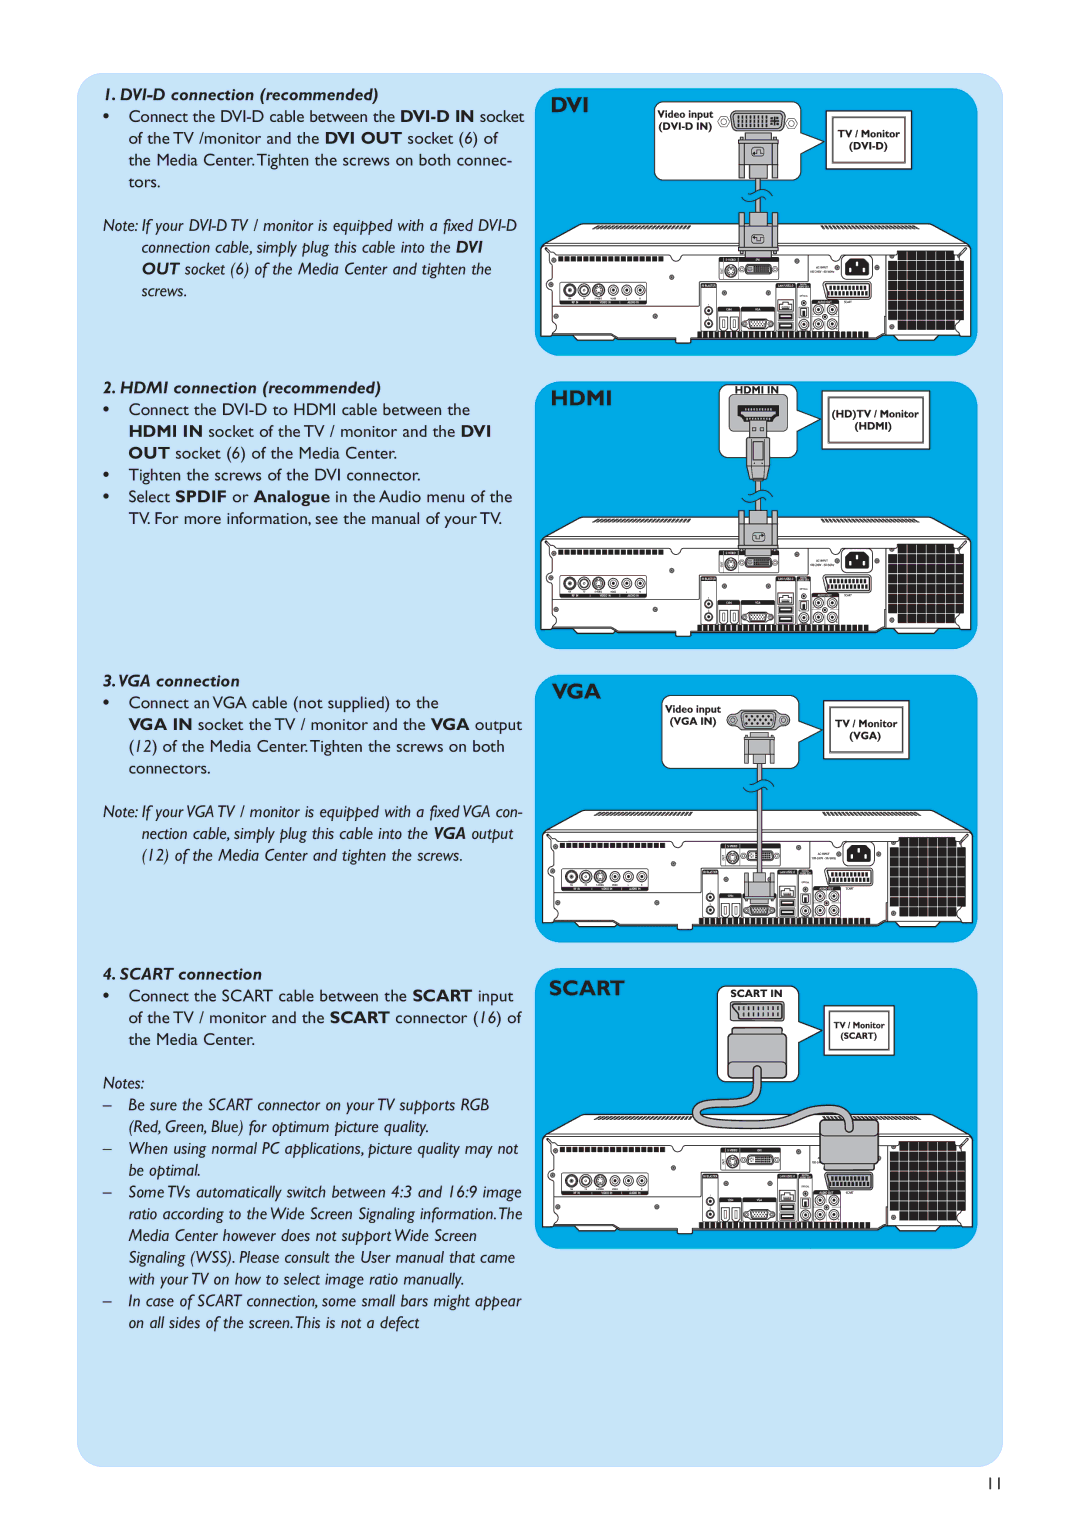
1. DVI-D connection (recommended)
• Connect the
of the TV /monitor and the DVI OUT socket (6) of the Media Center.Tighten the screws on both connec- tors.
Note: If your
2. HDMI connection (recommended)
• Connect the
• Tighten the screws of the DVI connector.
• Select SPDIF or Analogue in the Audio menu of the TV. For more information, see the manual of your TV.
3.VGA connection
• Connect an VGA cable (not supplied) to the
VGA IN socket the TV / monitor and the VGA output (12) of the Media Center.Tighten the screws on both connectors.
Note: If your VGA TV / monitor is equipped with a fixed VGA con- nection cable, simply plug this cable into the VGA output (12) of the Media Center and tighten the screws.
4. SCART connection
• | Connect the SCART cable between the SCART input | SCART |
| ||
| of the TV / monitor and the SCART connector (16) of |
|
|
| |
| the Media Center. |
|
Notes:
– Be sure the SCART connector on your TV supports RGB (Red, Green, Blue) for optimum picture quality.
– When using normal PC applications, picture quality may not be optimal.
– Some TVs automatically switch between 4:3 and 16:9 image ratio according to the Wide Screen Signaling information.The Media Center however does not support Wide Screen Signaling (WSS). Please consult the User manual that came with your TV on how to select image ratio manually.
–In case of SCART connection, some small bars might appear on all sides of the screen.This is not a defect
11
