6. SET UP
English
POSITIONING THE PROJECTOR AND SCREEN
Position the projector perpendicular to the screen with all feet flat and level to achieve an optimal image. Move the projector forward or backward if the edges of the image are distorted.
•The projector lens should be centred in the middle of the screen. If the lens centre is not perpendicular to the screen, the image will be distorted, making viewing difficult.
•Position the screen so that it is not in direct sunlight or room light. Light falling directly onto the screen washes out colours, making viewing difficult. Close the curtains and dim the lights when setting up the screen in a sunny or bright room.
•A polarising screen cannot be used with this projector.
•Place the projector at the required distance from the screen according to the desired picture size (see the table below).
•Optional wide and telephoto lenses from Philips are available for specialised application. Please see your local Philips Authorised LCD Projector Dealer for details on the optional lenses.
Standard mode (4:3)
Image size |
| Projection distance |
|
| Distance lens |
| |||||||
(diag.) |
|
| Tele zoom |
|
|
|
| Wide zoom | center to bottom | ||||
|
|
| |||||||||||
|
|
|
|
|
|
|
|
|
|
| of image |
|
|
|
|
|
|
|
|
|
|
|
|
|
|
|
|
mtrs | inch |
| mtrs | inch |
|
|
|
| mtrs | inch | cm | inch | |
1,02 | 40 |
| 1,40 | 55 |
|
|
|
| 1,90 | 75 | 3,10 | 1,22 |
|
1,52 | 60 |
| 2,20 | 87 |
|
|
|
| 2,90 | 114 | 4,60 | 1,81 |
|
1,83 | 72 |
| 2,60 | 102 |
|
|
|
| 3,40 | 134 | 5,50 | 2,17 |
|
2,13 | 84 |
| 3,10 | 122 |
|
|
|
| 4,00 | 157 | 6,40 | 2,52 |
|
2,54 | 100 |
| 3,70 | 146 |
|
|
|
| 4,90 | 193 | 7,60 | 2,99 |
|
3,81 | 150 |
| 5,60 | 220 |
|
|
|
| 7,20 | 283 | 11,40 | 4,49 |
|
5,08 | 200 |
| 7,40 | 291 |
|
|
|
| 9,80 | 386 | 15,20 | 5,98 |
|
7,62 | 300 |
| 11,00 | 433 |
|
|
|
| 14,30 | 563 | 22,90 | 9,02 |
|
|
|
|
|
|
|
|
|
|
|
|
|
| |
Wide mode (16:9) |
|
|
|
|
|
|
|
|
|
|
| ||
|
|
|
|
|
|
|
|
| |||||
Image size |
| Projection distance |
|
| Distance lens | ||||||||
(diag.) |
|
| Tele zoom |
|
| Wide zoom | center to bottom | ||||||
|
|
| |||||||||||
|
|
|
|
|
|
|
|
|
|
| of image |
|
|
|
|
|
|
|
|
|
|
|
|
|
| ||
mtrs | inch |
| mtrs | inch |
|
| mtrs | inch | cm | inch | |||
1,02 | 40 |
| 1,50 | 59 |
|
|
|
| 2,00 | 79 |
| ||
1,52 | 60 |
| 2,40 | 94 |
|
|
|
| 3,10 | 122 |
| ||
1,83 | 72 |
| 2,80 | 110 |
|
|
|
| 3,70 | 146 |
| ||
2,13 | 84 |
| 3,30 | 130 |
|
|
|
| 4,30 | 169 |
| ||
2,34 | 92 |
| 3,70 | 146 |
|
|
|
| 4,80 | 189 |
| ||
2,54 | 100 |
| 4,00 | 157 |
|
|
|
| 5,20 | 205 |
| ||
2,69 | 106 |
| 4,30 | 169 |
|
|
|
| 5,60 | 220 |
| ||
3,38 | 133 |
| 5,40 | 213 |
|
|
|
| 7,00 | 276 |
| ||
3,81 | 150 |
| 6,10 | 240 |
|
|
|
| 7,90 | 311 |
| ||
5,08 | 200 |
| 8,10 | 319 |
|
|
|
| 10,50 | 413 |
| ||
7,62 | 300 |
| 12,0 | 472 |
|
|
|
| 15,60 | 614 |
| ||
Notes:
–Tolerances ± 3% in above mentioned values.
–Values with a minus
MAINS SUPPLY
1.Insert the mains lead into the projectors Power socket and connect it to the wall socket.
Note:
The Power indicator lights up red, the projector is now in the Power/Standby mode.
2.Remove the lens cap.
3.Press Power On.
•The power indicator lights up green and the flashing green Lamp indicator shows that the lamp is warming up. Wait until the indicator stops flashing before operating the projector. The image shown is the Philips
•If the power is turned off and then immediately turned on again, it may take a short while before the lamp turns on.
•After the projector is unpacked and turned on for the first time, a slight odour may be emitted from the exhaust vent. This odour will soon disappear with use.
When the power is on, the Lamp indicator lights indicating the status of the lamp.
Green: lamp is ready.
Flashing green: warming up.
Red: change the lamp.
4.To switch off the mains supply completely, pull the mains plug out of the wall socket.
Note:
Before disconnecting the mains lead, make sure that the cooling fan has stopped (about 2 minutes after the projector has been switched off).
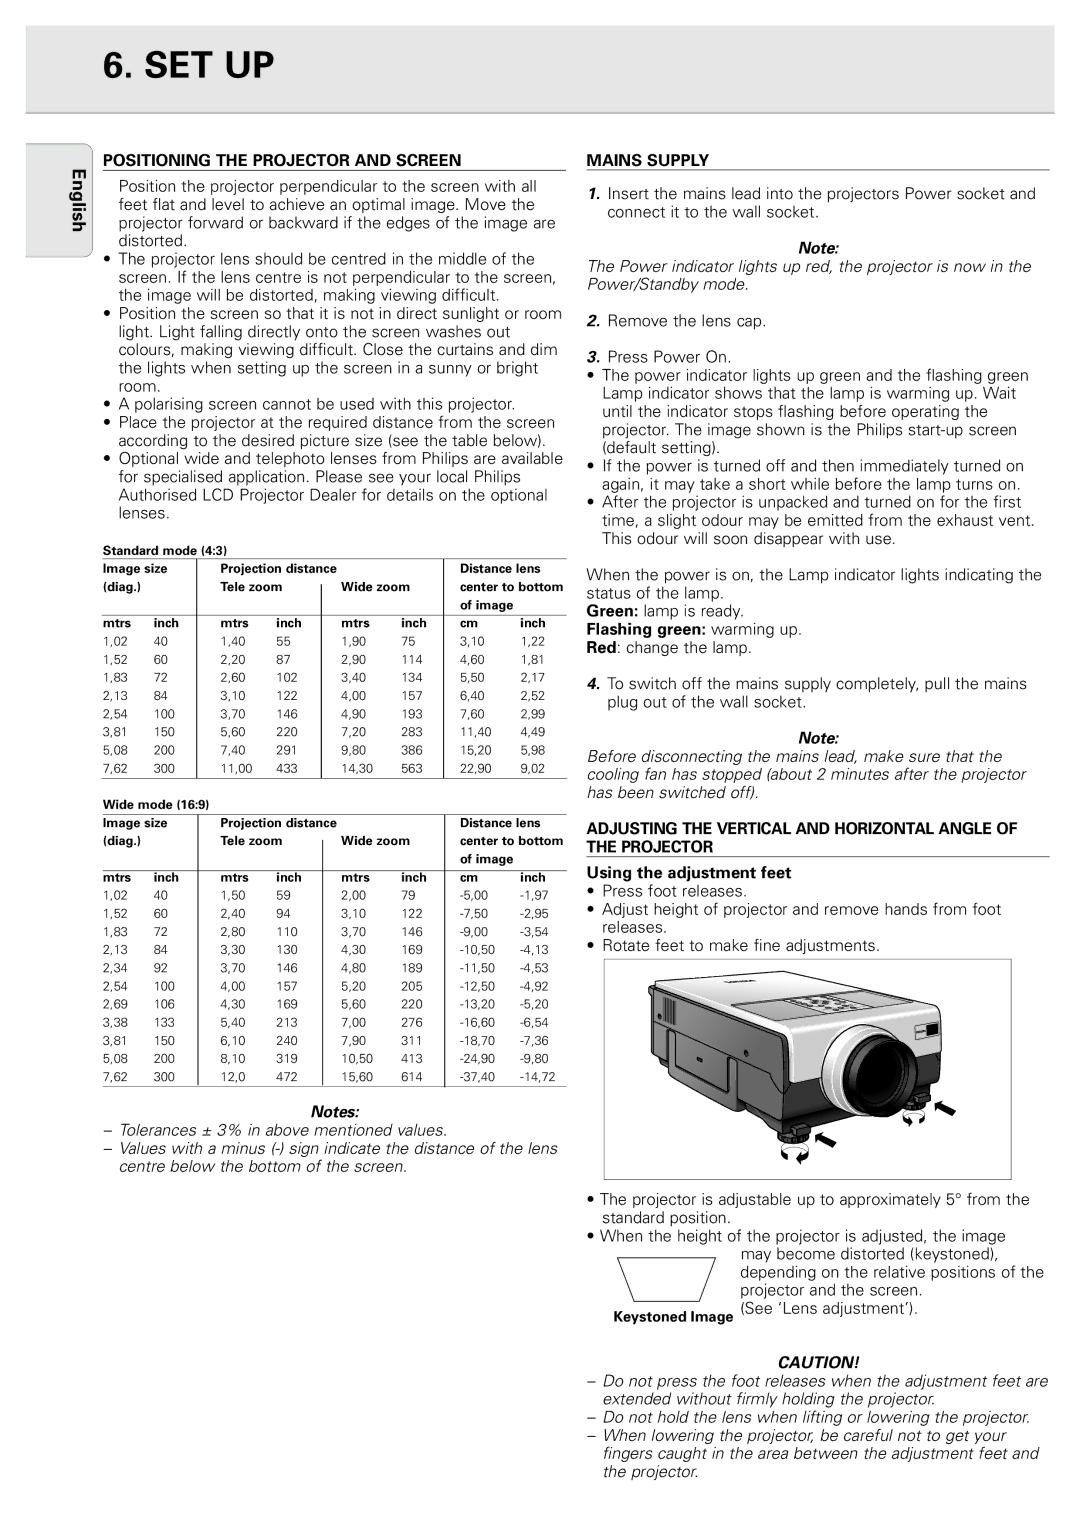
ADJUSTING THE VERTICAL AND HORIZONTAL ANGLE OF THE PROJECTOR
Using the adjustment feet
•Press foot releases.
•Adjust height of projector and remove hands from foot releases.
•Rotate feet to make fine adjustments.
)
•The projector is adjustable up to approximately 5° from the standard position.
•When the height of the projector is adjusted, the image may become distorted (keystoned), depending on the relative positions of the projector and the screen.
(See ‘Lens adjustment’).
CAUTION!
–Do not press the foot releases when the adjustment feet are extended without firmly holding the projector.
–Do not hold the lens when lifting or lowering the projector.
–When lowering the projector, be careful not to get your fingers caught in the area between the adjustment feet and the projector.